Windows Server 2016 TP4 was released few weeks back. Lots of new stuff is coming in the upcoming Windows Server 2016, including Hyper-V. In one of my previous posts we have showed the installation of installation of Windows Server 2016 and activation of Hyper-V role by using VMware Workstation. We were actually testing the hot-add/remove RAM for hyper-v VMs, which worked as expected. In that setup we had setup a New VM through VMware Workstation where we just checked the box to activate Intel VT-x. No editing of VMX files or other tweeks were necessary. Today we'll do a deployment of Windows Server 2016 Hyper-V on VMware ESXi. We will than install a Hype-V role on this Windows 2016 VM and then we'll create and run a VM inside. We will see that to achieve this only small tweek is necessary and no need to edit VMX configuration files or install full vCenter server including vSphere we client.
Note that this is a lab setup and we're doing this for testing purposes. We'll be using the latest ESXi Built – VMware-VMvisor-Installer-6.0.0.update01-3029758.x86_64.iso – You can download a trial of vSphere or the free VMware hypervisor from VMware site here. Note that you don't need to install the whole vSphere suite (including vCenter) in order to test this.
Windows Server 2016 Hyper-V on VMware – The setup
Download the Windows Server 2016 TP4 > upload it to the datastore that is seen from the host where you'll be testing.
Create a new VM with Virtual Machine version 11
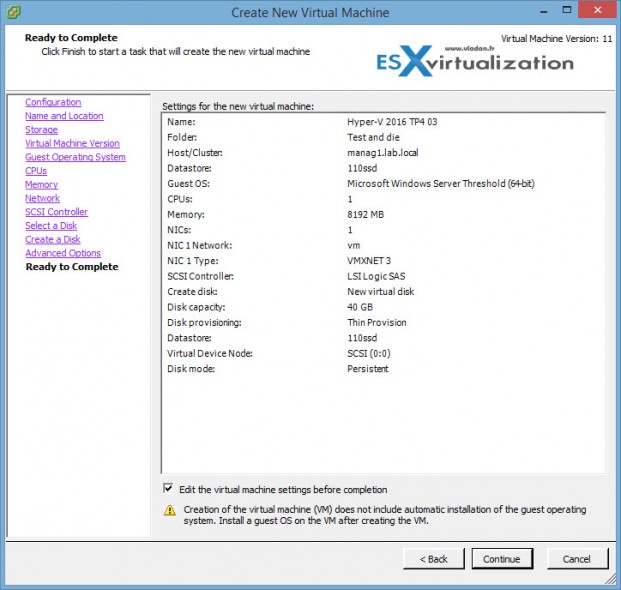
Choose Microsoft Windows Server 2016 (threshold) by selecting the operating system of the VM. This is important and it defines the content of the VMX file.
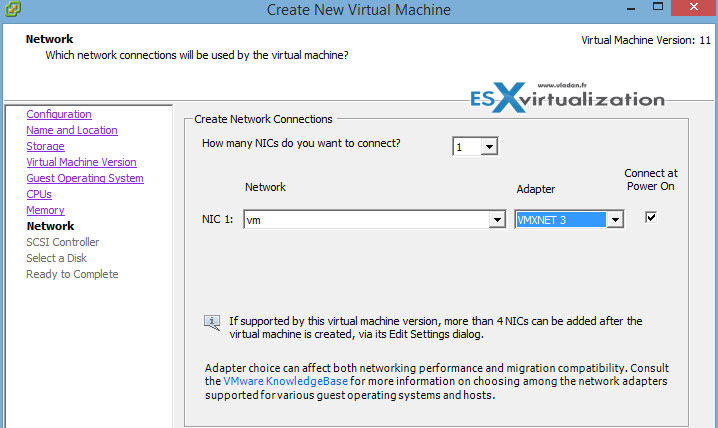
The next step choose NIC. VMXNET3 as adapter is fine and should have best performance. From the drop-down pick your network.
Use the defaults for the next steps:
- LSI logic SAS as a disk controller
- Create new virtual disk
- Size 40 Gb (or higher if you like) > Thin provision > Store with the virtual machine
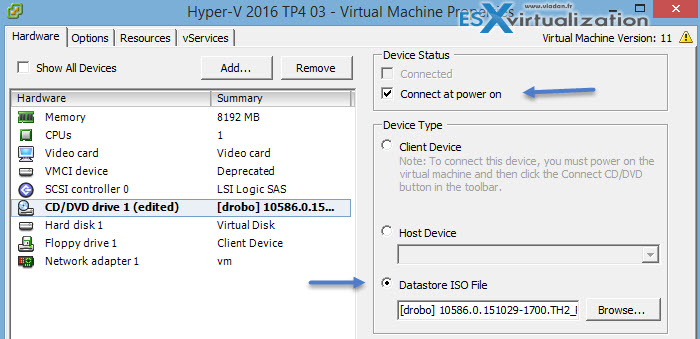
In the next step just we'll attach an ISO to boot from. Browse for the ISO of Windows Server 2016 on the datastore to which you have uploaded the ISO in the very first step of the guide.
Then you can start the VM and do a normal (with GUI) install… The Desktop Experience option, as on the screenshot below.
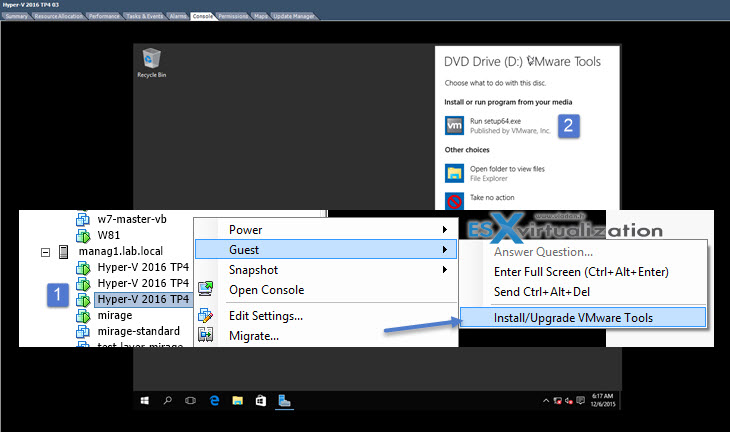
After finished the install and after the first login as an administrator, install VMware Tools in that VM…. Nothing new here so far…
Shut down the VM (you're prompted for reboot I know….)
Now, you can have two options:
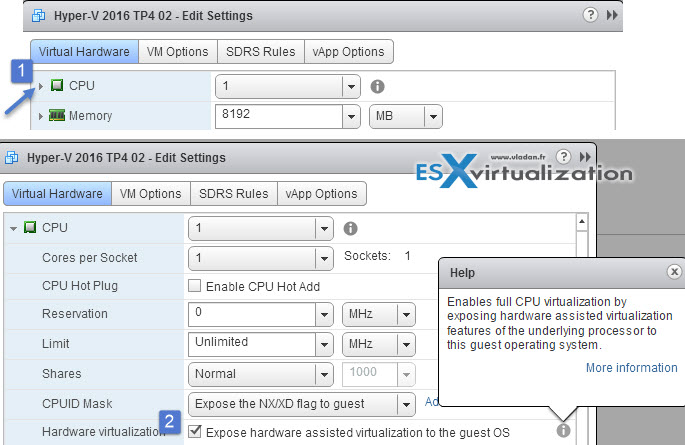
Option 1: You have vCenter and vSphere Web client use this to edit the VMs config Right click the Hyper-V 2016 TP4 VM > Edit Settings > CPU > Check the box Expose hardware assisted virtualization to the guest OS.
Option 2: You don't have vCenter and only using C# client. In this case we must do something different.
What If I don't have vCenter and vSphere Web Client?
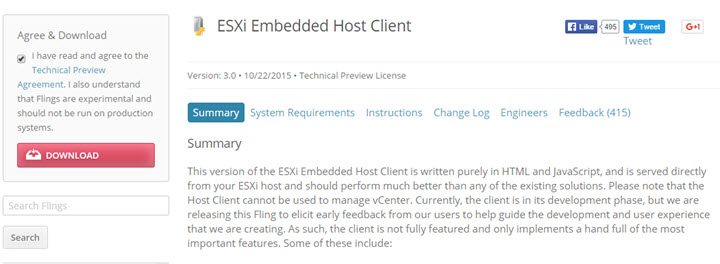
If you don't have vSphere web client which is part of vCenter server components you can try the new ESXi host client! It's very very easy to setup and I'll show you this in few steps. The host client is very cool (currently in preview) and it allows us to modify an advanced CPU settings which are not visible through the vSphere C# client (the legacy one). It shall replace the vSphere C# (legacy client) in the future release of ESXi.
First – download the vib package from VMware labs here and put your host in maintenance mode (you'll need to stop the running VMs, if any).
Second – upload the package to a datastore visible from ESXi host. Use datastore browser for that.
Third – fire up an SSH session (Putty) and enter the single command:
esxcli software vib install -v /vmfs/volumes/<the_name_of_your_datastore>/esxui-signed.vib
so in my case the datastore's name is drobo
esxcli software vib install -v /vmfs/volumes/drobo/esxui-signed.vib
Done!
Now you can connect to your host via ip adress or dns name, and edit the advanced CPU configuration there…
https://ip_of_esxi/ui
in our case
https://10.10.5.9/ui/
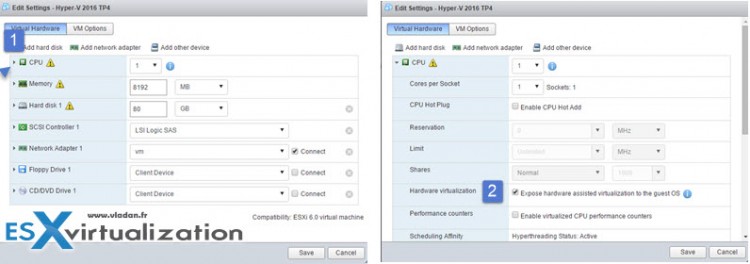
And after the login we have access to our VMs running on the host and their config… Click the Virtual Machines section > select and click on the Hyper-V 2016 VM > Edit Settings.
Then Expand the CPU section by clicking the small black triangle and check the Expose hardware assisted virtualization to the guest OS
As you can see, both web clients can do that. Additionally there is a third way by editing the VMX file.
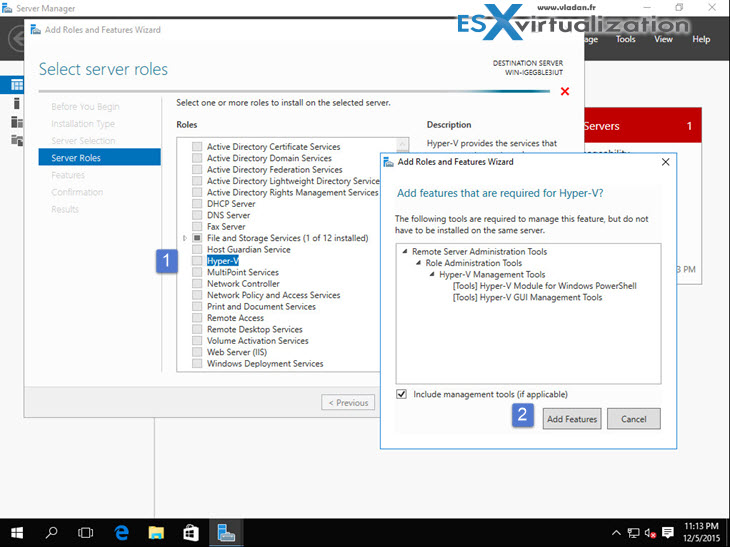
So we have our VM ready so we can go forward, start the VM and add a Hyper-V role via Windows Server 2016 server manager. You do that via the menu Manage > Add Roles and Features …
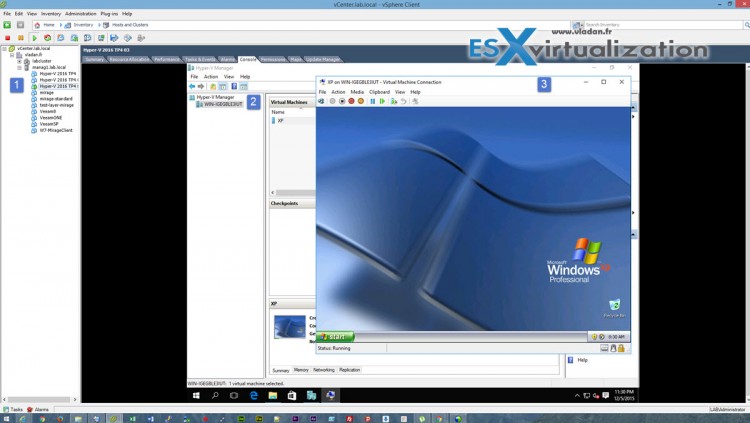
So at the end we have our Windows Server 2016 TP4 running (1), and inside the VM we have hyper-v manager console (2) and there we have an XP VM running on the nested Hyper-V….-:)
As you can see, not much problems, but we still had to activate the advanced CPU config which is accessible through web client. In case you're using VMware Workstation this config is accessible through the VMware Workstation menu as I detailed in my previous post about testing Hot-Add/remove RAM in the VM.
Physical Box (running desktop OS …. Windows 8.1) > VMware Workstation VM running Server 2016 TP4 (named “2016TP4MAIN” ) with Intel VT-x activated
Wrap-up
Nested virtualization at VMware is very convenient as it's possible to run multiple nested hypervisors in a lab environment. Microsoft also recently announced nested virtualization for upcoming Windows Server 2016. It's not supported for production environments but for labs and learning purposes it's just ideal. With the SSDs prices dropping down fast it's very convenient for people learning towards VMware or Microsoft certification exams to build a homelab running either ESXi or VMware Workstation on the top of existing Windows or Linux system.





I did test it double-nesting
Host esxi 6.0 > Windows 2016 TP4 (hyper-v) > Windows 2016 Tp4 (hyper-v) > Windows 10 VM
This way you can fully test containers and hyper-v containers on homelab.
To enable hyper-v inside hyper-v you need to run the Microsoft powershell modules to allow nested hyper-v
Performance numbers:
Windows 2016 TP4 hyper-v 100%
Windows 2016 TP4 hyper-v (2) 73%
Windows 10 (3) 55%
So compared to your first VM you loose 45% speed. Which was pretty impressive on a fast system you can really use this setup.
Hi Rene,
Great. Thanks for sharing this.
Nested Hyper v 2016 on esx 6 does not work if processor is AMD. Any thoughts?
No, as I only run Intel in the lab. Perhaps some of our readers?
Agreed, I have a dual Opteron 4334 whitebox for ESXi 6.0 and while I can run a Hyper-V host as a VM, I cannot start any of the VM’s, it tells me the hypervisor is not running. Since these CPU’s are >2012 they should have AMD RVI feature (for SLAT) but it appears that maybe VMware does not support this properly, I have not been able to start any VMs
Microsoft only supports intel CPU’s for Hyper-V nesting.
I have wmware esxi 5.5 to which I add a with Windows Server 2016 Datacenter. I manage to add the Hyper V role but when I create a new wm inside Hyper v I am not able to start it. I receive the message that the hypervisor isn’t running.
Any suggestions on how to trouble shoot?
I get the same, anyone have any ideas?
Also receiving the same error
Did you ever manage to get the VM started?
I get the same message, despite systeminfo showing all required things present for Hyper-V.