In the first part we introduced VMware vSphere Host profiles and created a host profile from a reference host, then we added a new port group and applied the change to running host. We could see the change populate – live. That's powerful, but we need more. Don't forget that our final objective is to have an AutoDeploy feature working with all the bells and whistles. And to prepare to pass a VCAP exam!
We have already used Imagebuilder to create a personalized image and exported it as a depot and as an ISO file. We did Install and configure the AutoDeploy elements and configured DHCP options. We have also passed some PowerCLI commands to create AutoDeploy rules.
Today we'll look at our host profiles more closer.
For our lab example where we'll need to apply the host profile once the host boots up, we will setup a reference host and then Create profile from the host > apply the profile at the cluster level. So any new host I'll deploy will automatically be able to join the cluster without the admin's intervention.
For this to happens we need to implement several autodeploy rules. You can read about the steps in the post called VMware vSphere AutoDeploy – Run some PowerCLI and you're the Boss.
But before we'll start check out the shortcut. I never really noticed that, did you?

Well, this was just a side note. Let's move on now with our host profiles. As I mentioned, host profiles can be applied at the host level or at the cluster level.
First what's done is the host config. Once the host configured as needed, than we can create host profile from that host. I give the profile name vesxi5-01. You can create a profile from host in two ways:
- Right click host > Host Profile > Create Profile from host
- Click Home > Host Profiles > Create Profile

The rest of the process you could already follow in the first post. But I'd like to focus more on what's around host profiles. A solid DNS, DHCP infrastructure.
A DNS forward and Reverse
Do I need to specify that? It's really necessary to create host records (both – forward and reverse). Once done, clear cache and restart the DNS service.
DHCP Reservation for our Auto-deployed host.
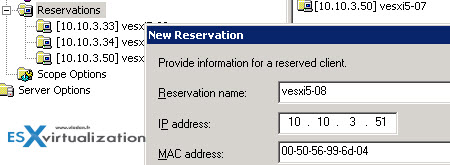
We need also to configure reservation for our host. It's done at the scope level, where you just need to create a reservation, based on MAC address. (note the dashes in the MAC address field).

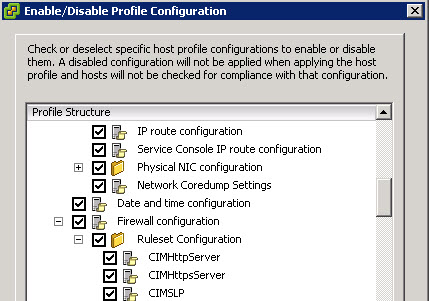
Disable/Enable configuration within a profile
This option allows us to disable certain parts of the host profile. It might be useful if the host has a specific hardware that other hosts does not. For example local SAS drives within the ESXi server can be detected as remote storage devices This might be a problem for the compliance checking. You can uncheck any sub tree to disable just part of the sub-profile.

To talk about the bits and pieces. In my lab, after everything in place, the hosts boots up fairly quickly, adds itself to the cluster by using the rules we created in our PowerCLI lesson (there are 3 rules) and goes live.
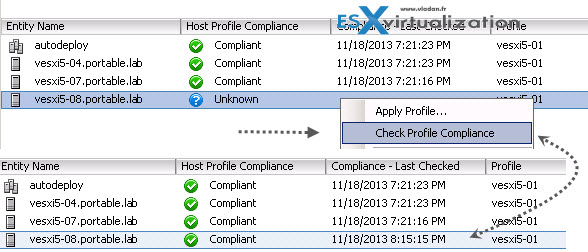
The compliance checker shows first that the state is unknown. It's because the profile compliance default interval is once a day only. If you leave like this, the scheduled task will check the compliance for you. But you can of course manually check if the host is compliant or no. So at the end, the compliance check should looks like this….

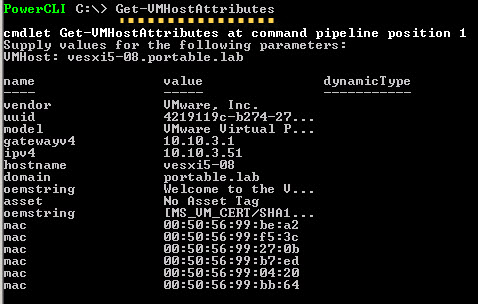
The most difficult part if I can say, is the autodeploy rules and their activation. I've used IP based Pattern, but you can also use to check the vendor (HP, IBM, Dell…) with the Get-VMHostAttributes cmdlets. In my case the vESXi is of course build by VMware... -:)

So that's about it. I hope that you liked the little serie. Here are all parts (so far…):
- VCAP Diary – VMware vSphere ESXi Image Builder
- VMware vSphere AutoDeploy – Run some PowerCLI and you're the Boss
- VMware vSphere AutoDeploy – Install and configure
- VCAP Diary – VMware vSphere Host Profiles
- VMware vSphere Host Profiles – options and troubleshooting (this post)
- How to create custom ESXi 5.x Firewall rule and why you need to

so great post
please post more about VCOPS