Last week we have done a little lab test where we have tested the new vCenter Server 6.5 (for VCSA only) called vCenter HA. If you don't know anything about how it works or what it can do I invite you to check our detailed article on that here – VMware vSphere 6.5 – Native vCenter High Availability (VCSA 6.5 only). Today we'll outline the advanced configuration so the title of today's post is VMware VCSA 6.5 Active-Passive Setup – Advanced Configuration.
In the first article, we have used the “Simple” wizard option to setup our Active-passive configuration. The simple config fits most scenarios, however sometimes you have VCSA 6.5 which is on a separate vCenter in a different SSO domain, then this is the case for the advanced configuration has to be used.
Again, the embedded PSC and external PSC deployments are supported scenario. We could see that with few clicks we could create a vCenter HA configuration and then the system automatically created the Passive node and the Witness node. At the end, we would see all 3 nodes up and running (Main Active VCSA 6.5, Passive VCSA 6.5 and Witness), so it was a truly 3-nodes cluster environment assuring vCenter server uptime. The goal is, during the wizard to place the nodes on different datastores and on different hosts while still maintain the HA network.
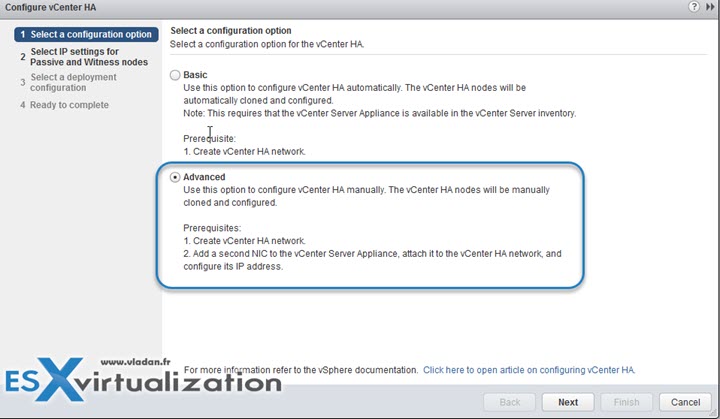
The Advanced option needs more manual steps, but at final, you might be able to adjust things that you would not be able to if you would have gone through the “Simple” config (example set a different SSO domain). The manual steps needs:
- Add manually a second vNIC to our main VCSA 6.5 – (the same as in “Simple” config)
- We need also to add an HA network – (the same as in “Simple” config)
- Clone Active Node manually, to have a Passive Node (and also assign an IP information through the OS customization wizard… yes, it takes longer)
- Clone Active Node manually, to have a Witness Node (and also assign an IP information through the OS customization wizard… yes, more and more manual steps )
- Create affinity and anti-affinity rules so DRS won't place all 3 nodes on the same host.
We'll do some of it, perhaps not all. But you get the point. More flexibility, but more manual steps!
VMware VCSA 6.5 Active-Passive Setup Advanced Configuration – The steps:
Step 0: Create a vSphere HA network. (This step is necessary for Simple or Advanced configuration). Depending if you're using vDS or not. In this example, I'm showing the workflow for standard vswitch.
Open vSphere web client and Select host > Configure > Networking > Virtual switches.
Here is the workflow which is the same as within the “simple” option …
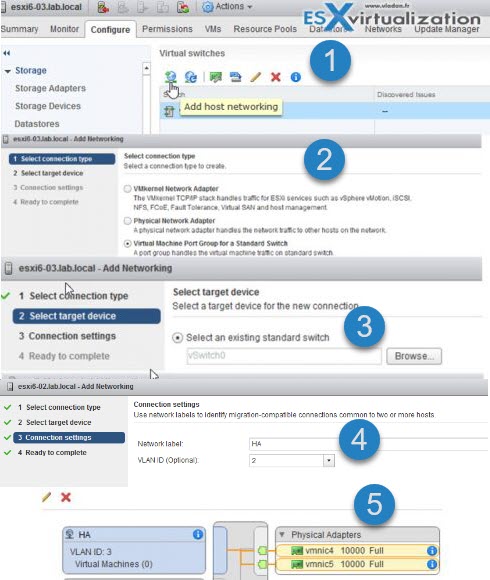
If you're on Standard switches, you'll have to do that for all the hosts in the management cluster or the cluster where you want to place the 3 vCenter nodes, so they can communicate on that network.
Step 1: Add new vNIC to the first VCSA 6.5 appliance VM.
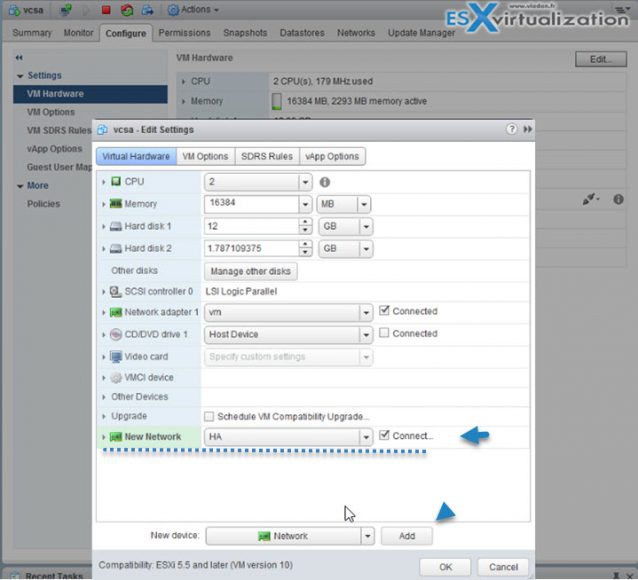
When you run the assistant right now you may have a message saying that the “vCenter HA cluster network interface (NIC1) on the guest OS id down. Make sure the cluster network interface is up.
![]()
well, in this case, you have two options where the fastest one is to open SSH session (via Putty) and after login type:
shell
and then
ifconfig eth1 up
Then if you check via the PSC appliance management UI, you should see that both network adapters are up.
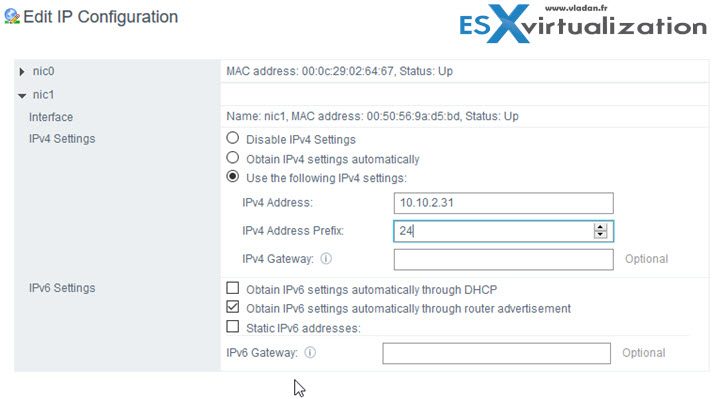
You can also directly go to the PSC appliance and configure the second NIC. When validating, the NIC will come up automatically…. Don't put a gateway on this second NIC. VCSA does not support 2 gateways…
You can uncheck the IPv6 checkbox if you don't use IPv6.
So the end result will look like this. Both NICs are up and configured with static IP settings.

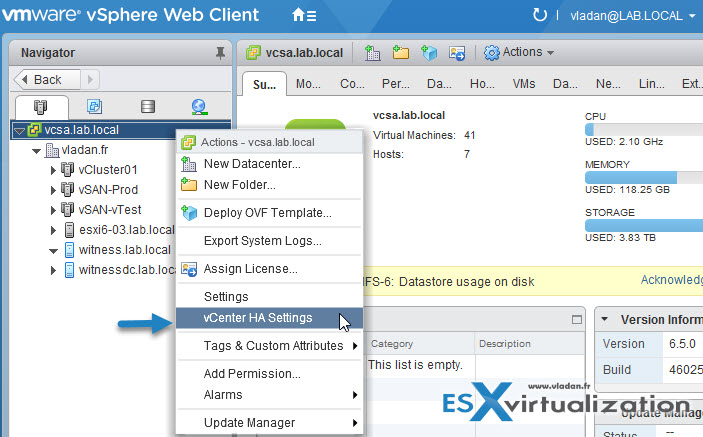
Step 2: Start the main assistant which will configure the vCenter HA. After you log in to the vSphere Web client, select the vCenter Server > do a right click > vCenter HA settings
on the next screen, choose the Advanced option.
then enter the IP information concerning the Passive node and a Witness node.
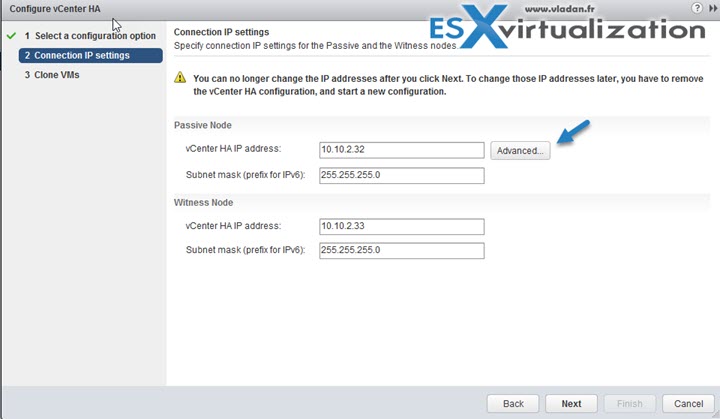
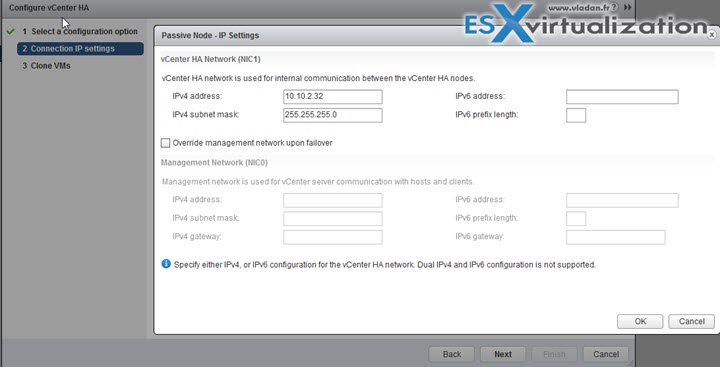
The advanced section allows you to specify advanced override options for the management NIC (NIC0).
The system “watches” what you're entering and trying to correct the errors. Here is an example if you forgot to add a second NIC…. the system detects it.

Step 3: You'll need manually clone the VM, otherwise, the assistant won't let you continue. So you'll have to open another browser window just for the cloning operation and:
- Put a name
- Select Compute
- Select Storage
- Select clone options
Etc, etc…
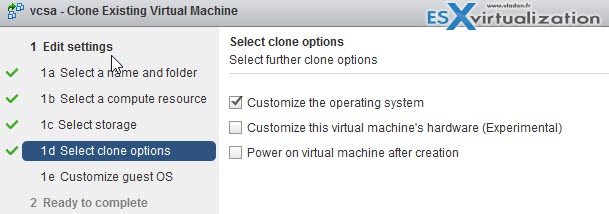
Basically, you have to prepare a customized template which will be used during the clone operation
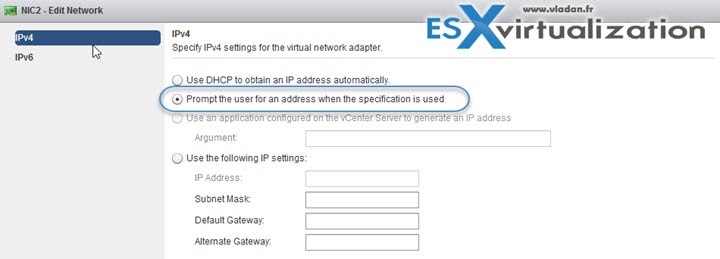
and then when during the cloning, you'll have the wizard like this…

then the recap screen….

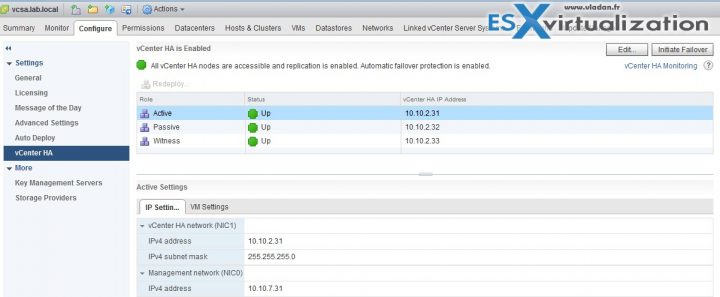
Then rinse and repeat for the Witness. Also needed are the affinity and anti-affinity rules. I assume that you know your way. And at the end, you should end up again with the screen like this one, where you'll have one appliance with the Active role, one with Passive role and one with Witness role.
The same as with Simple config, at this screen you can manually initiate failover with the Initiate Failover button.
You'll have the option to initiate failover where the Passive node gets promoted as Active.
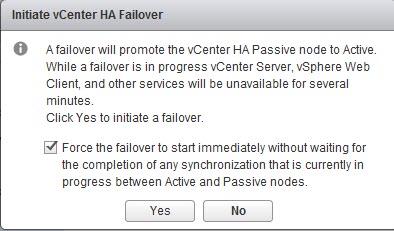
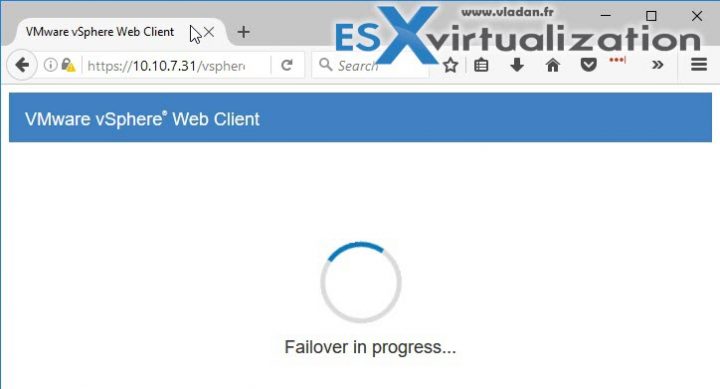
However, you'll have to wait about 5 min before the web client become available as during the failover all the services has to be started on the passive node….
Click the vCenter HA monitoring link and you are able to find additional information about the sync process. (if any).
And that's all folks.
It is certainly a good and simple DR scenario which protects VCSA 6.5. If you're losing a connectivity to an underlying storage, the passive node takes over (if it's on another storage). It is a shame that all this consumes quite a lot of RAM, actually, it more than doubles the RAM requirement for both Active-passive configurations. In the lab, one VCSA takes 16Gb of RAM so all 3 appliances (with the Witness only taking about 1Gb of RAM) requires more than 33 Gb of RAM.
You can check all posts about vSphere 6.5 on our vSphere 6.5 dedicated WordPress page.
Other vSphere 6.5 posts:
ESXi:
- ESXi Commands List – networking commands [Part 2] – useful to check BEFORE upgrade of ESXi !!! (HCL, Drivers, Firmware…)
- How to Upgrade ESXi 6.0 to 6.5 via CLI [On Line]
- How to Upgrade ESXi 6.0 to 6.5 via ISO
- How to upgrade ESXi 6.0 to ESXi 6.5 via Offline Bundle
- How to upgrade an ESXi 6.0 to ESXi 6.5 via VMware Update Manager
- How to create a USB media with ESXi 6.5 Installation
vCenter Server:
- How to deploy VMware VCSA 6.5 (VMware vCenter Server Appliance)
- How to Migrate Windows based vCenter Server 6.0 to vCenter 6.5 (“In-Place”)
- How to Migrate Windows Based vCenter to VCSA 6.5 [Lab] – Windows to Linux
- VMware VCSA 6.5 Backup and Restore How-To
- VMware VCSA 6.5 Active-Passive Setup With Simple Configuration – [LAB]
- VMware VCSA 6.5 Active-Passive Setup With Advanced Configuration – [This Post]
Stay tuned through RSS, and social media channels (Twitter, FB, YouTube)



Great… article….
Do we need 3 hosts to maintain vcenter HA..?
Technically not, but then you lose some of the benefits such as host failure protection.
Tried the advanced model, created vCSA instance, cloned it for the peer and witness instances. Make sure the vCenter HA network was setup and enabled on all 3 instances for HA cluster. But when I attempt to click next on Advanced step I get the following error message:
“The vCenter Server Appliance is not prepared for vCenter HA advanced configuration with already deployed Passive and Witness nodes. Satisfy the prerequisites in KB 00000 (e.g. run ‘prepare-vcha’) to continue.
By the way… there is no KB 00000 that I can find, great that VMware ships GA product that has bad reference links?
When I run prepare-vcha on the original vCSA instance, I get configuration all is ok.
# /usr/sbin/prepare-vhca SelfIP PeerIP WitIP where I have provided the correct IPs for the HA network. Log states…. *** SUCCESS: Vcha presetup ***
Any help on this?
Known issue – Resolved in the below
vSphere 6.5 P1
vSphere 6.5 U1PS
vSphere 6.5 U1
Hello,
Nice article.
I tried to have it working but each time that I press the Finish button I receive a message “A general system error occurred: Failed to ssh connect peer node 192.168.129.102” (passive node).
When I try it manually from the VC active shell, it works.
Any idea?
Yes, it seems that you have not enabled SSH on that node.
how many licenses will be required for VCSA 6.5 with High availability? Active/Passive/Witness?
This is nothing to do with licensing. It is a built-in function of VMware vCSA. It is not tightened to Standard, enterprise or datacenter licensing. Even the lowest cost – Essentials will be just fine.
Thanks for your comment.
Cheers.
Vladan
I have somehow related problem. My VCSA is dual homed – external interface communicates with Internet to download patches/updates and internal interface is used to communicate with hosts.
I’ve added second interface after installation was over and adding/communicating with ESxi hosts are not a problem. However, after several hours of trying I can’t manage to change the IP address for the Update Manager. I Update manager to use internal interface’s IP address for host communication but no matter what I tried – it only shows the external interface’s IP address or FQDN.
Any solution?
Thanks
Very good article.
What is the necessary bandwidth for a vcenter witness located in a remote site?
Thanks in advance.
Diego Bejar
As said on Michael’s blog, VMware talks rather about latency, not bandwidth.
Do I need to mention same vCenter management IP on the passive node while cloning or another IP needs to be assigned on same management VLAN apart from HA IP.