This is a second part of VMware Mirage setup in my lab. I'm testing (and documenting) the solution for my own needs, and because I'm quite hooked by the possibility to have a DR solution which enables to recover the whole settings done on desktop computer, with files etc, in case the computer crashes or gets stolen.
Also the migration possibilities from Windows XP to Windows 7 looks interesting. That's what I'll try to explore with my lab setup as well. In the first part of the series, we did setup a Mirage Management server in a VM which runs Windows 2008 R2 server OS. This OS is a requirement for the current release of VMware Mirage. In my case I'm testing the version 3.6 release, I'm having a demo version which entitles me with 5 free licenses, which will be expiring the 31st of December 2013.
I have installed the Mirage Management Server > Mirage Management Console > Mirage Server components on that 2008 R2 VM. 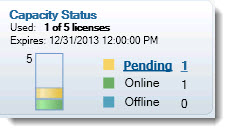 I'm not sure about the licensing, I just found out that I'm not able to do all operations which are possible with the full product. The physical devices part isn't available – I can't protect physical desktops/laptops with the demo license.
Info: VMware Mirage is available for purchase at VMware.
The Vanova company was acquired by VMware not so long time ago….so I would not be surprised that the solution will rapidly evolve and gets integrated with products like VMware View and (or) Horizon. Oh, when talking horizon, you might want to look of test of the Horizon solution that I've done in my lab.
I will prepare two desktop VMs – one VM will run Windows XP as an OS, and the other one will run Windows 7. Both VMs will get installed the Mirage Client. The Windows XP VM will gets installed with Office 2003 while the Windows 7 will gets installed with Office 2010.
We now take a Win XP VM and we'll use the MirageClient.x86.msi file for the installation. If you're using x64 desktop, just take the MirageClient.x64.msi file bundled with all the other installation files. Please note that the client has to be installed with DotNET 3.5 before.
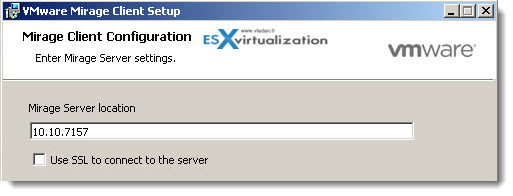
During the installation of the client, you're asked about the IP address of the Mirage server. Optionally you can also use SSL. When done, you can come back to the management console, where we'll continue to “play” further with the solution.
Now, let's go back to our console, which enables us to do the next steps. The first thing to do is to configure our console, since at the first start up the console is empty. So just right click and put “localhost” in the form fields. (in case you have installed the MMC console on the same VM, like I did).
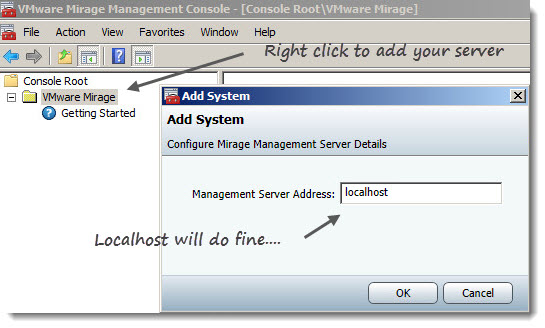
This will add the local server to the console and all the options of the server will appear. Please note that the minimum screen resolution is: 1280 x 1024
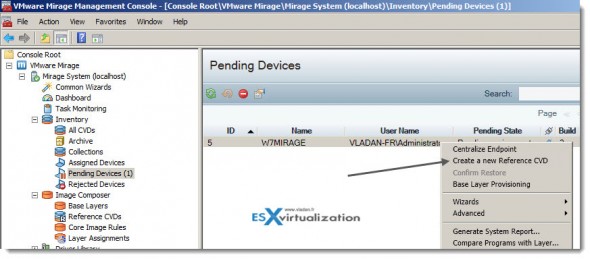
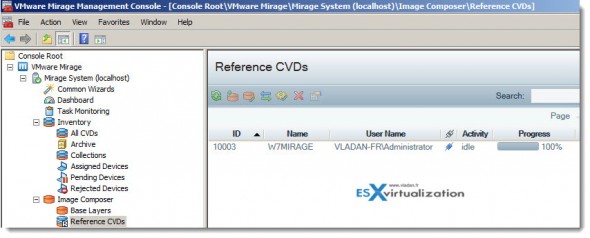
This will bring up the console, where in the part where you can see the “Pending Devices” you should see the client VM. In my case I found there the Windows 7 VM. By clicking the Create a new Reference CVD you'll start up an assistant which will guide you through the process. The VM will get activated and assigned to the new reference CVD by using the default DVD policy.
You have the option to leave the choice of the storage volume on manual or on automatic.
Now the Win 7 VM should start sending the data back to the datacenter, to the Mirage server VM.
For The Windows XP VM I took the option “Centralize Endpoint” (while int he same section – “Pending devices”).
You have also the possibility to add additional storage volumes, by going to the System Configuration > Volumes > Add Volume.
In the same section, you can also see the Branch Reflector, that I talked about in the first part. The branch reflector can be used to centralize the traffic from the clients located at the remote office, rather than each of the individual clients connecting over the WAN directly to the datacenter. This can save an additional bandwidth.
Branch Reflector – maintains a dedicated cache which holds Base Layer, Driver library and USMT file downloads from the server, from which distribution of these files to Client End Points can be optimized.
Just one note here concerning the Branch reflectors. You have to open firewall port 8001 in order for this feature to work.
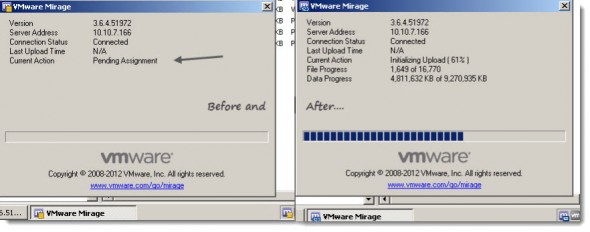
You see the process of uploading the data from the XP client machine….. You can click to enlarge.
The VMware Mirage 3.6 User Guide is a good read, where you'll get all the necessary informations on good deployment. The User guide PDF is included in the download bundle.
So at this stage, I'm here as you can see on the image below. I'm waiting for the upload to finish, and then I'll be able to continue.
Info: VMware Mirage is available for purchase at VMware.
In the third part we will see how to upgrade an XP VM by using VMware Mirage. I'll prepare the XP VM with some software and will try to migrate it to Windows 7, to see what's kept (settings, documents, etc…).
VMware Mirage – The series:
Part 1: VMware Mirage Installation – the lab setup
Part 2: (This post ) – VMware Mirage Setup – MMC and Client Setup
Part 3: VMware Mirage – Migrating XP to Windows 7

Thanks for sharing the knowledge.
However the main part which I felt it was missing is Driver Library for a VM.
We are trying to explore the Mirage tool for Windows migration.
We are using Vmware Workstation, and built a Windows XP machine on it, this Windows XP machine was migrated using Mirage 5.
We proceeded without any driver library and after migration, Windows 7 is up and running with missing network driver.
Please let us know what drivers needs to be loaded into Driver library to proceed with Windows XP migration to Win7 over a VMware VM.
Regards
Santosh K K
IMHO I don’t think that the Workstation VMs are supported as a part of XP > 7 migrations. Shall you probbably try with a physical endpoint which you would migrated to W7? If not check with VMware support.