There is many ways to install ESXi hypervisor. Homelab enthusiasts runs ESXi from USB stick most of the time. Why you might ask? There are several reasons for that. One of them is because it saves one SATA port (in case your motherboard is limited). Another reason is that you can actually go “disk-less” and have only shared storage attached via iSCSI and no other hard drives in your system (lowers the electricity bill). And if you're in doubt, you can attach shared storage even if you're using the ESXi Free version. In this post that I call fancy VMware ESXi 6 Installation Guide I'll talk about different ways of installing ESXi, because I received few questions about that.
If you're planning to run VMware ESXi 6 in production you should start at VMware HCL page to find a compatible hardware first. I already showed in the past on how to search for compatible hardware system through VMware HCL here.
Different ways of installing and booting VMware ESXi :
 Installation to the USB stick which will be then used by the server to boot from
- Installation to the local SATA/SAS or FC drives which can be configured on RAID1 for redundancy
- Installation to SD Flash card
- Boot from LUN via hardware iSCSI card, FC, or FCoE (Fiber channel over Ethernet)
- Going stateless with Auto-Deploy
VMware ESXi 6 Installation Guide
Use USB flash as a boot device – The installation process will partition the USB stick this manner….

You can either burn the ISO to a CD and then use it to install the ESXi where during the installation process you select the USB stick as a destination. Or you can use VMware Workstation to create a new VM > point to the ESXi iso as a source and mount the USB stick so the VM can use it as a destination.
The screenshot from VMware Workstation…
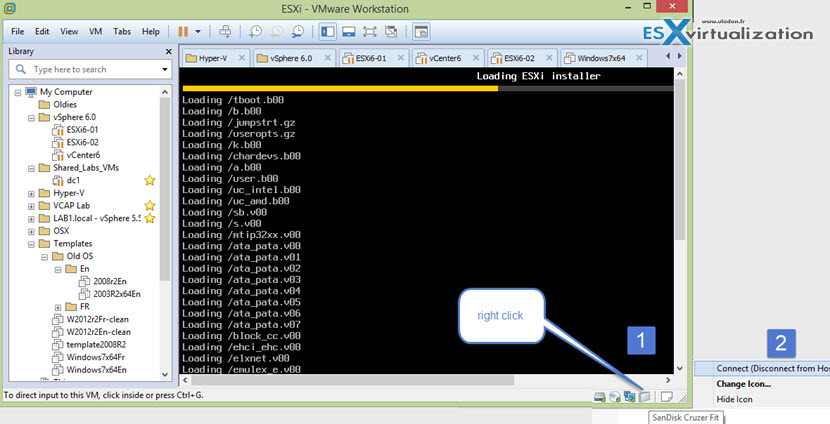
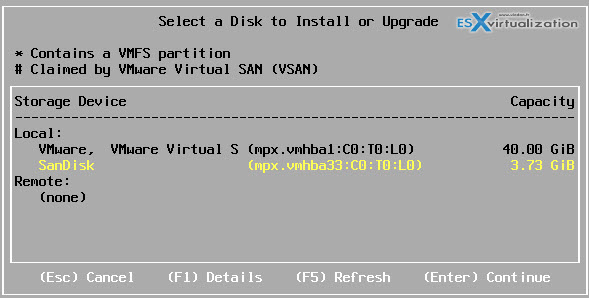
You'll see screen like this. Note that SanDisk USB as an option…
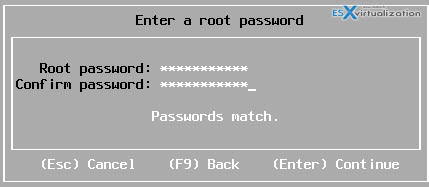
Before the installer starts it asks you to setup the keyboard and root password. This is quite important as the default language is English, but then not everyone uses English keyboard, right? So choosing your language during those steps avoids some headaches when you seek for this or that particular key you have used in your password … -:)
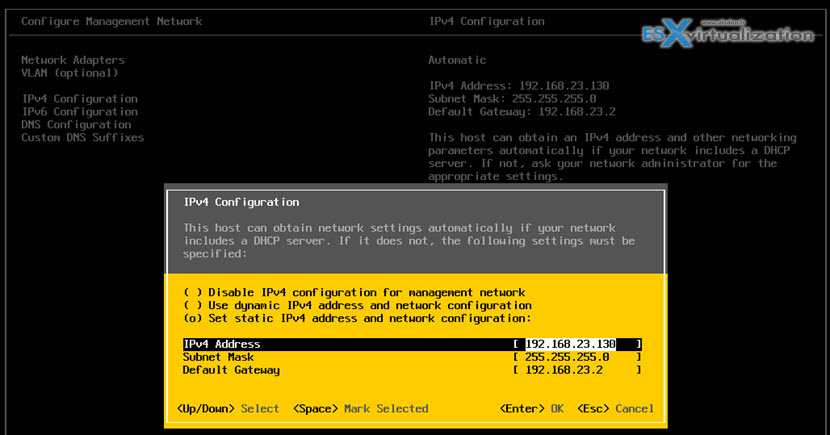
Once installation finishes, just disconnect the USB thumb from within Workstation and plug it in your server. You'll need to configure the BIOS to boot from that deviceYou'll do some quick network configuration. Those configuration steps are very easy to do as you're basically guided when you first open the DCUI (direct console user interface). You'll need to hit F2 key in order to access the DCUI.
The first boot allows you to set IP address and other network settings like netmask, DNS, hostname…. Again. Very easy so guys who knows your way just skip the rest as this post …
Once you got that done, it's very easy to install vSphere client (C++ client or some call the client “fat client”). It's so far most popular. A way more popular than the Web based vSphere client because of the speed. But VMware has done some significant enhancements in the vSphere 6.0 release – Login 13 times faster, Right click menu now 4 times faster or Most tasks end to end are 50% faster.
So this speed difference between those two versions of vSphere client will be no longer obvious. You are also limited with the vSphere (fat) client in the virtual hardware (vmx) for your VMs where you can create for example VM with hardware version 11, but this VM won't have all functionalities of this hardware version as the Fat client is limited and the features are not surfacing through.
The Windows based vSphere client is accessible on the vCenter server installation media or as a download when you first connect via web browser to your ESXi host.
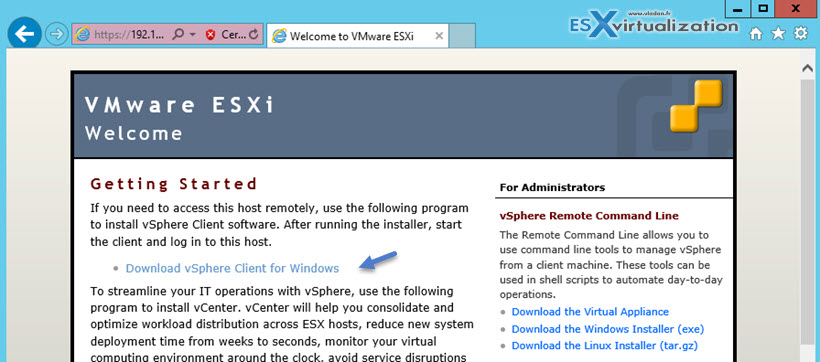
This concludes this simple VMware ESXi 6 Installation Guide.
You can also check this video where I'm demonstrating the installation of ESXi (as a VM in VMware Workstation):
Check out my vSphere 6.0 page with latest guides, videos, tutorials. VMware has put a lot of efforts to this version 6.0 release (not GA yet) to make things simple. If you're planning more than one ESXi host for your local business, or you're learning VMware technology you should check this article where I'm detailing the steps of installing vCenter Server which manages several ESXi hosts in a cluster.

SanDisk Cruzer Fit the best mini flash drive for esxi
Hi,
I followed the article and installed ESXi 6.0 on the USB drive. After the installation I disconnected the iso file on the Workstation VM and tried booting the Workstation VM from the ESXi USB but it does not.
I checked the BIOS settings but the workstation VM (with no hdd and no cd rom) will not boot from usb drive. USB drives shows connected to the VM in workstation.
Any suggestion
This guide is intended for users willing to boot a real server of USB stick. Not for users willing to install ESXi inside VMware Workstation and test nested ESXi. So once you remove the USB stick from your Workstation PC you should plug it to your server and configure the boot sequence.
In case you just want to test ESXi 6.0 as nested, you should follow this video: https://www.youtube.com/watch?v=qEpI4vqKkes
Hi
I would like to know can it be possible to have a boot menu on the usb stick as well ? Like to had a boot choice with a 10 second delay between esxi and another system.
Instead to go each time to bios to set boot disk, save change, reboot…
Thanks
This guide is to boot off the USB stick from a real system (not in Workstation which is used only for the installation purposes). So the BIOS change in the real system is done only once.
As concerning the multiboot on USB stick… I don’t think that ESXi can coexist with other system…
If you install ESXi on several USB drives using Workstation or Player, all of them will have the same MAC address. I usually change it during the customization step:
esxcfg-vmknic -d “Management Network” ; esxcfg-vmknic -a -i DHCP “Management Network”
Nice… Thanks for the comment!
Vladan
Thanks very much for the post. Is really possible Install into the local SATA disk ? I have 1TB sata disk II.
Tks again.
As long as ESXi detects the disk when booting on the ISO – Yes! So depending on your hardware, your SATA controller, but usually the local disks are recognized.
Hi Vladan,
Have you come across the issue where after installation on the USB drive it but after installation it doesn’t recognize the USB drive and boots up only to find that the it’s a non system disk, “No bootable device”.
I believe I have previously fixed it, when using ESXi5 but now am running into this issue for a fresh ESXi6 installation.
Thus I was wondering if you might be able to shed some light on what I might be doing wrong?
Thank you.
Good article and ways on setting up ESXi hosts.
Along with all the ways of installing ESXi we also install using HP iLO or Dell’s DRAC services since we are IT services providers and have access to client networks remotely. We download the ISO’s on shares or nas devices on clients network and mount it directly on the iLO or DRAC services. Using those tools helped us a lot on managing clients on timely manners for installing and upgrading hosts.
Thanks for the Infortmation
Hi,
please do we need the usb in a specific format or not? It is not finding if even when I connect it to the virtual machine
Any USB should go. Avoid a “low cost” usbs which won’t last… 2 Gigs in size, preferably 4G.
Actually I have a 32G SanDisk but it does not seem to work as even when I connect it to the virtual machine it does not show in the list of the disks found. I gave up trying..:)
Thanks
Very Helpful
Hi Vladan,
I have problem when install ESXi 6 on VMWare Workstation as below, could you please help me to fix it.
Problem said: This virtual machine is configured for 64-bit guest operating systems. However, 64-bit operation is not possible.
Thanks
It sounds like your physical CPU doesn’t support VT-x. If so, you won’t be able to run 64-bit guests. Follow the link in the message for more information on hardware and firmware requirements for 64-bit guests.
This error message is because one of the following reasons.
– VT is not enabled in BIOS
– CPU is not capable of VT
Also, if you do have McAfee Deep Defender installed. After uninstalling McAfee DD you will able to create 64 bit virtual machines.
Hi Vladan,
i have question wonder if you could help. i am getting following error while installing ESXi 6.0
from USB
“AP1 is incompatible with BSP; can not start while installing ESXi 6.0 …..
.
.
No place on disk to dump data
No file configured to dump data”
I have new 2TB HDD. Any idea what could be the reason.
Thanks
H
Is there a chance to get a step by step instruction setting up ESXi 6.0 on a synology NAS (DS916+ 8MB) ? That would be very helpful for me. I am a beginner in virtualization.
Thanks
Guido
Depends how do you want to “hook” the Synology. If you’re trying to hook it via NAS then, it should not be a problem. iSCSI, you might want to look at my (older) post for setting up iSCSI and VMware ESXi here – http://www.vladan.fr/how-to-configure-freenas-8-for-iscsi-and-connect-to-esxi/
I know it is for FreeNAS, but the steps are similar.