Today's objective will dive into Thinapps. VCP6-DTM Objective 2.5 – Create ThinApp applications and a ThinApp repository. ThinApp has been historically one of the software pieces present in Horizon View as it allows the software distribution across your domain architecture with central management through View admin console.
ThinApp creates virtualized applications. In Horizon implementation, these virtual packages reside on a ThinApp repository in a network share. As an administrator, you can copy a full ThinApp package from the repository to the virtual desktop. You can also place a shortcut on the virtual desktop that points to the ThinApp package on the repository.
Applications on remote desktops can be natively installed applications, ThinApp virtual applications, or shortcuts to ThinApp virtual applications. You copy a ThinApp virtual application to a remote desktop or add a shortcut that points to the virtual application on the ThinApp repository.
ThinApp applications have their ability to execute itself in a sandbox so the dependency on the underlying OS is inexistent and the app can be streamed across the LAN too. However with AppVolumes the trend is going forward allowing faster deployment of hundreds of applications at the same time with very little administrative effort. But the exam has this objective in it so we'll go through today.
VMware Knowledge:
- Create VMware ThinApp applications
- Create file shares
- Assign permissions to the file shares
- Verify MSI streaming settings in the package.ini files
- Determine necessary VMware ThinApp package components to put on the share
- Assign VMware ThinApp applications to pools
VMware Study Tools (PDF):
- Horizon View Installation Guide
- Horizon View Administration Guide
- VMware ThinApp User’s Guide
- VMware ThinApp Reference Architecture Guide
- Horizon View Administrator
Create VMware ThinApp applications
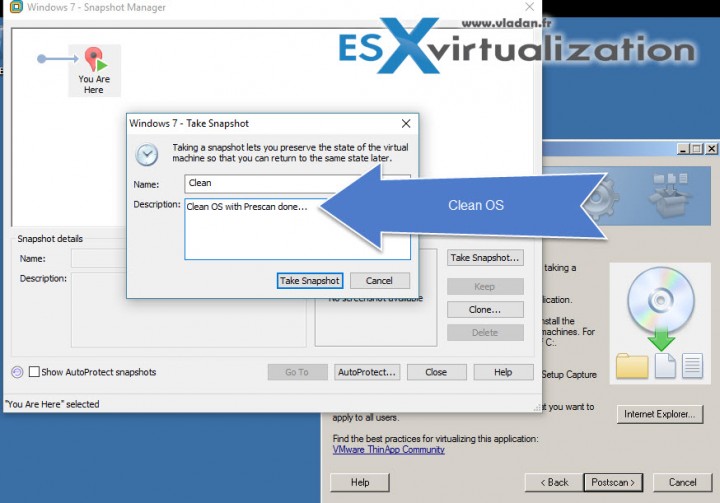
To create a ThinApp application you'll need the ThinApp packager (present in the download bundle) and also VMware Workstation, which will allow you quickly work and prepare ThinApp packages and at the same time by using snapshots to go back to the “clean” state of the OS which is used to prepare Thinapps.
Thinapp workflow:
Prescan > Install app > Postscan > Extraction of the difference = Thinapp package.
ThinApp Virtualization Packager installs on a clean workstation system (in a VM) and first thing you must do is to do a prescan.
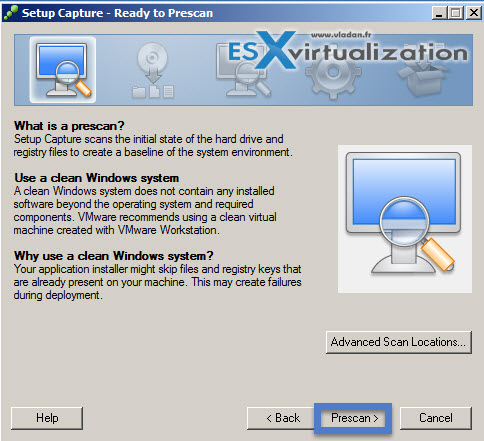
Once done, create a snapshot….. Like this you'll have a system which is clean and which is ready to monitor the application that you want to package.
Now you can install an application (and check that it works) > do a post-scan ….
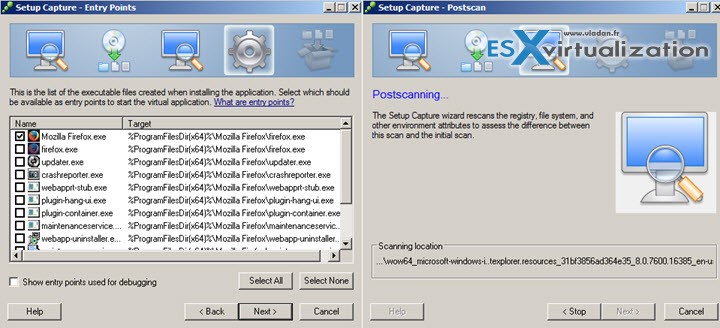
Then click Next to have a screen where you can define authorization to run the package…
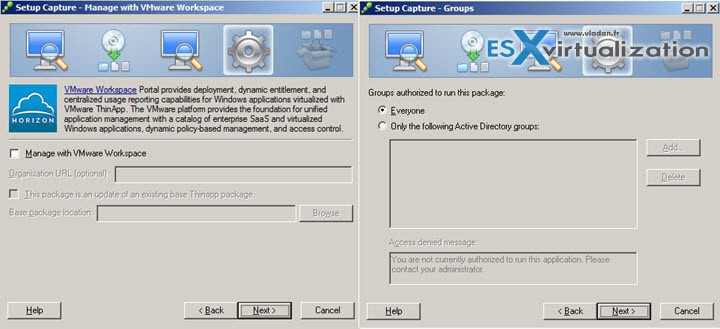
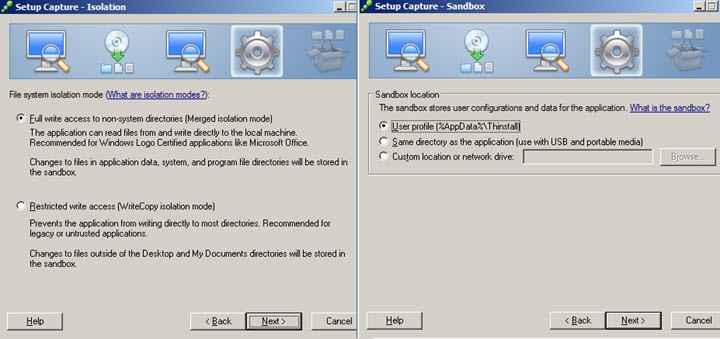
then chose whether you grant the full write access to non-system directories. In this case, the application can read and write to the local VM's filesystem.
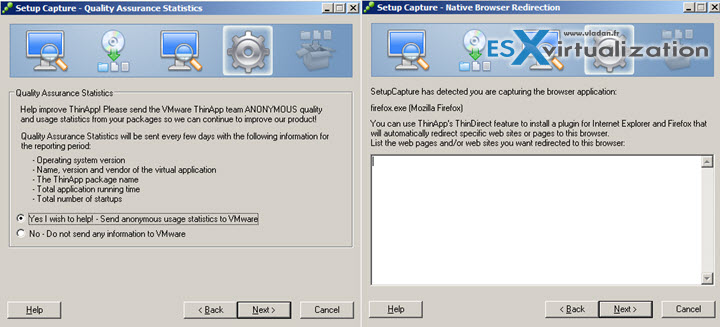
then you can setup ThinDirect by entering which websites to capture and redirect to the browser. Thinapp packager detected that you're creating virtualization package for a web browser…
and here simply put a meaningful name and chose whether to use separate .DAT file for thinapps and if you at the same time want to generate MSI package or not. (simple checkbox).
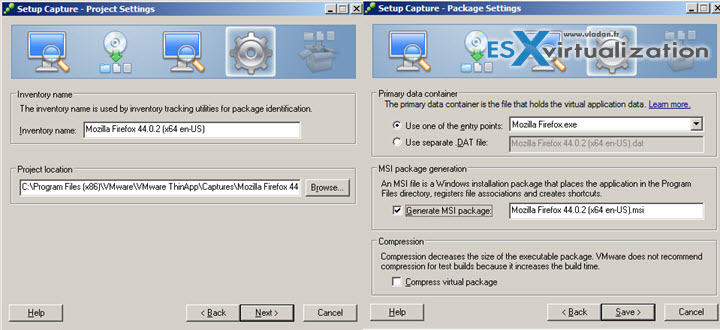
to finish with …
You can only prepare the project without actually build the project.
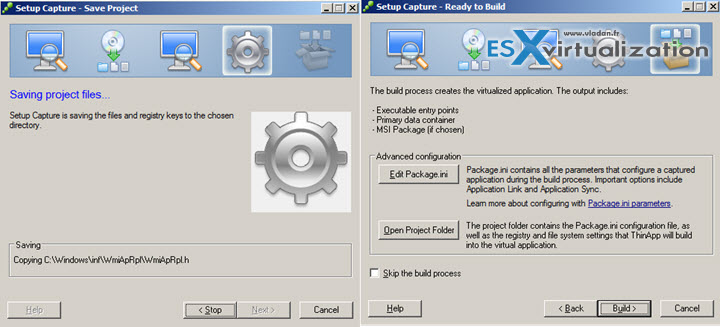
Create file shares
You must store the MSI packages on a Windows network share that resides in an Active Directory domain that is accessible to your View Connection Server host and remote desktops. The file server must support authentication and file permissions that are based on computer accounts.
To run streamed ThinApp applications on remote desktops, users must have access to the network share that hosts the MSI packages.
Assign permissions to the file shares
- NTFS permission of the network share that hosts the ThinApp packages to Read & Execute for users.
Verify MSI streaming settings in the package.ini files
VMware Horizon View administration p.157
If you plan to stream the application to remote desktops, set the MSIStreaming property to 1 in the package.ini file.
MSIStreaming=1
There is a special paper called VMware Thinapp Streaming Execution Mode.
Determine necessary VMware ThinApp package components to put on the share
- Thinapp Executables
- .DAT file generated when virtualizing an Application.
Better to do a separate .DAT file as the thinapps will launch faster. Another reason is that Windows systems has limits when it comes to size of Executables. When an ‘.EXE’ is over it’s file size limitation for the specified OS, thing can (and will) goes wrong….
Assign VMware ThinApp applications to pools
Before assigning Thinapps to pool, you must make sure that:
- You have placed Thinapp (including the .DAT file) to network share accessible to View connection server and destkop pools
- You have granted necessary NTFS permissions to the users on that share (ReadExecute)
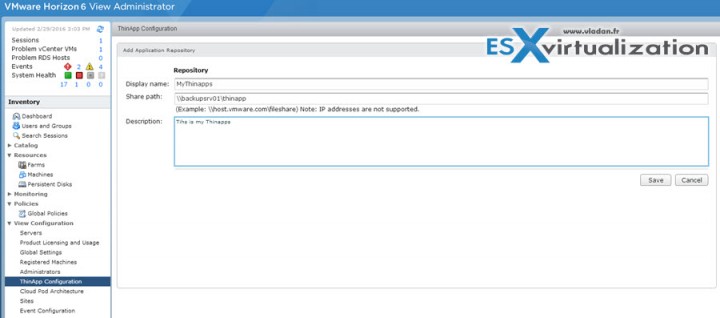
To Add Thinapp application to the pools go to View Admin > View Configuration > Thinapp Configuration > Add Repository
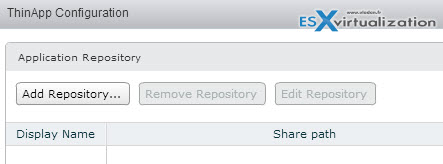
There you'll Add ThinApp repository. Enter some meaningful name, share path and Description. Click Save button..
Put your ThinApp packages to the network share…

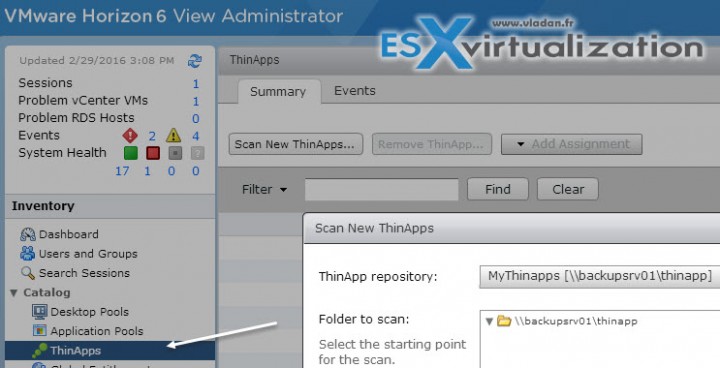
Then go to Catalog > Thinapps > Scan New Thinapps
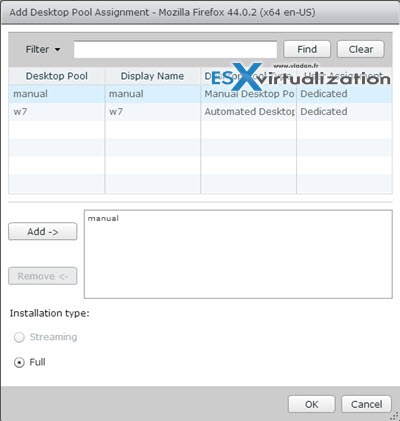
And the final step is to assign the ThinApp application to the pool…
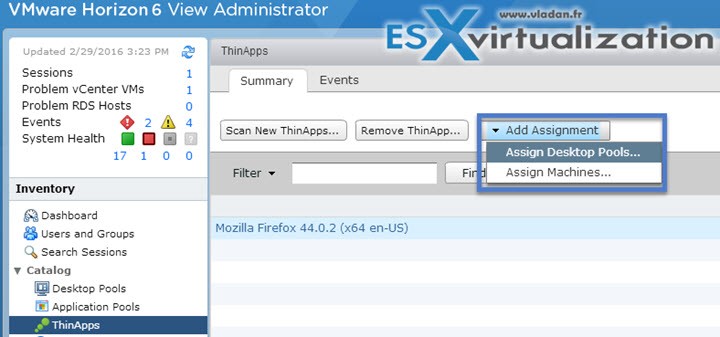
Then chose the pool and also the installation type..
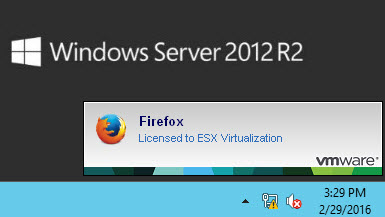
Then when you log on the desktop you'll find Firefox icon on the desktop and when launched you'll see the usual ThinApp Windows like this…
Wrap-Up:
We have done another chapter towards the VMware VCP6-DTM (Desktop and mobility) certification exam. You can follow the progress on our VCP6-DTM Study Page where all the Objectives shall be covered (sooner or later).
If you're studying towards traditional VCP6-DCV (Datacenter virtualization) you'll be certainly interested by our VCP6-DCV Study Page.

