Unitrends has a new FREE product allowing you to backup/recover VMs running under VMware or Hyper-V environments. The free version has no limits in functions, only in capacity so you're able to use this product over an unlimited time period with full functionality.
The only limits on your backups is the amount of protected data. Unitrends Free can handle up to 1Tb of backups (500Gb + 500 Gb when creating a forum account at Unitrends) and allows you to have as many copies consuming as much storage on the target repository side of things as you like.
Unitrends has done quite a good with the speed of the UI of their backup appliance. I was reviewing the v8 of their backup product last year. You can check out the full review here – Unitrends (PHD) Virtual Backup v8 product review.
Please note that this review was sponsored by Unitrends.
Several times I have been questioned on which backup products work with the free version of VMware ESXi. You might wonder if that's the case for Unitrends FREE backup? Well in this instance I must disappoint you, but it's with the same song you have heard before! It's because VMware locks in the APIs in the free version of ESXi, so it's not possible to do incremental backups. Because of this any backup product which would like to leverage incremental backups/restores needs to at least have vSphere Essentials licensing which can be costly, but shouldn’t be a problem for most production environments.
Now that I have mentioned that let's get back to our test of Unitrends FREE Backup. We'll look first at the installation process and then we'll start to work within the UI, which is a HTML5 based and a very fast user interface!
Installation
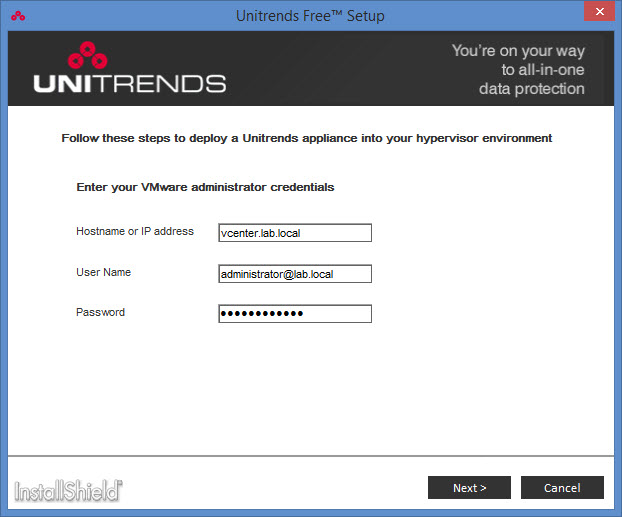
Instead of directly providing the OVF file, Unitrends has chosen to package their product as an EXE which reduces the number of steps needed to deploy and configure the product. The executable has the compressed VMDK encapsulated within and deploys the RedHat based appliance automatically during the installation process. All you need is any Windows based computer or VM from where you'll launch the installer.
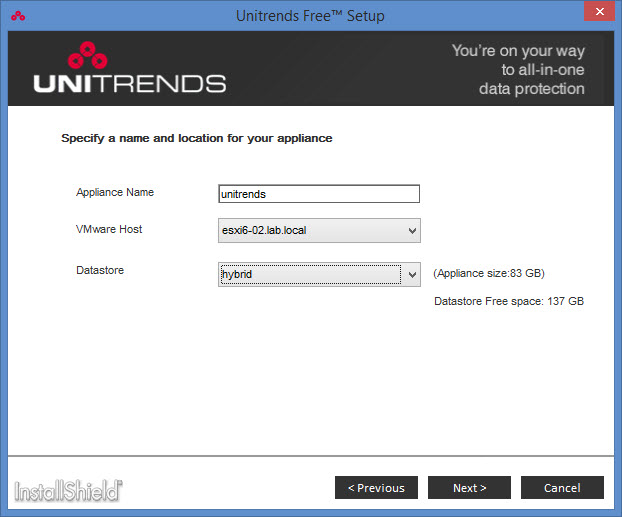
Another screen shows the host name details along with esxi host and datastore details. This information is obviously necessary and differs in most environments.
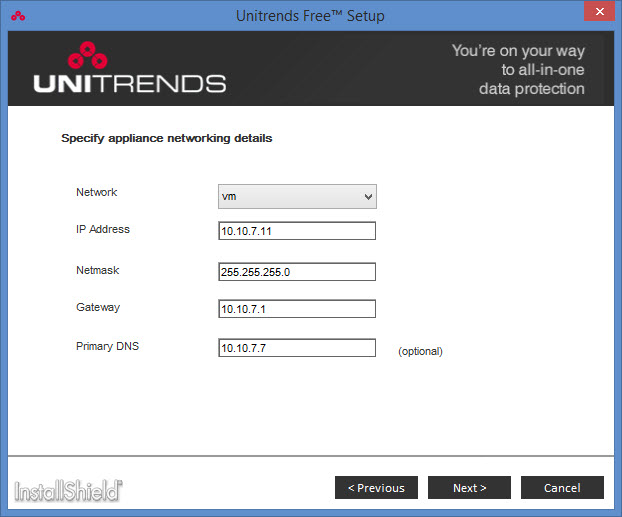
The next screen invites you to enter networking details. Again there is very little to question here. You simply enter the values that match your environment.
Now we are almost done and there is just one more step where you specify how big you want the first data disk for your appliance. This disk will serve as the actual storage for your backups.
One of the questions you might want to ask is where to actually deploy the backup/recovery product? Shall I deploy it at my main storage system or on secondary storage (if available)?
It's probably good practice to choose storage other than your production storage system in order to align with a DR plan. If your production storage system is experiencing problems you might want to spin up your VMs from your secondary storage system. Directly from within your backup repository…
Anyway. Let's move on. The default disk size for the backup is 128 and that is just fine for my test purposes.
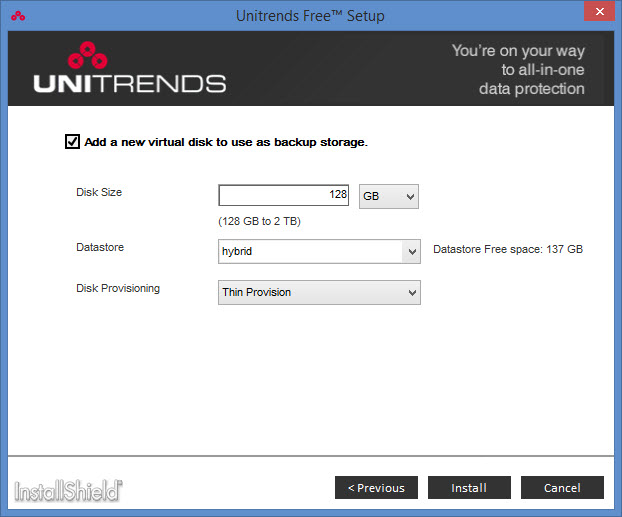
Once you are done with this last screen you can sit back and watch it go!
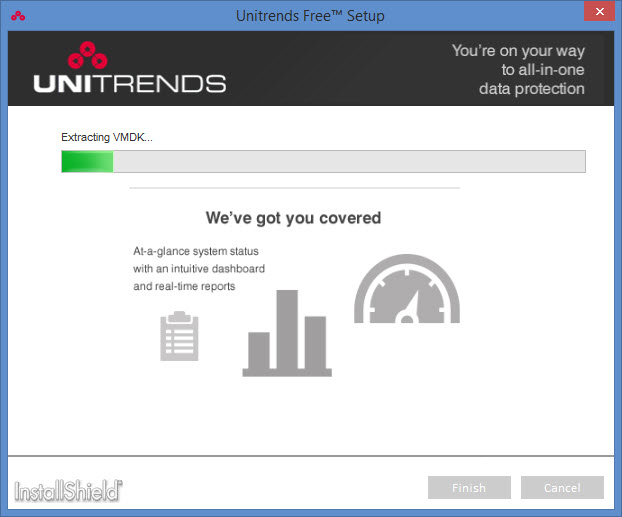
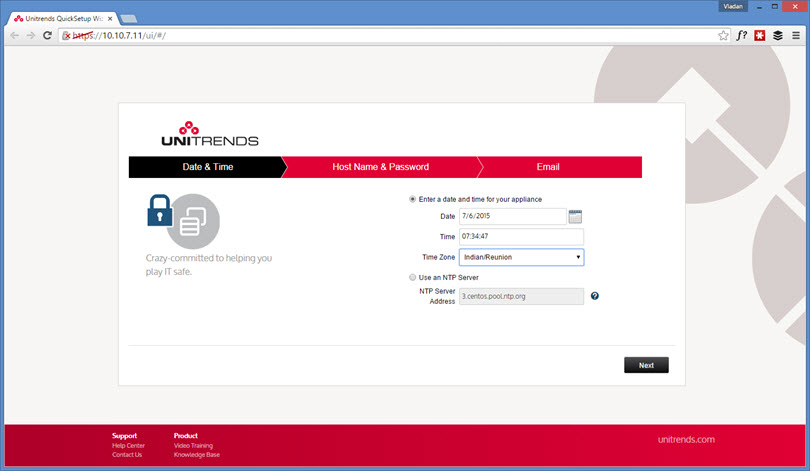
It takes only a few minutes before the “Finish” button becomes active allowing you to click through and finish the deployment. Once you are done the default web browser fires up and invites you to finish the configuration. The time zone of your location will have to be set in order for the backup jobs to start on time.
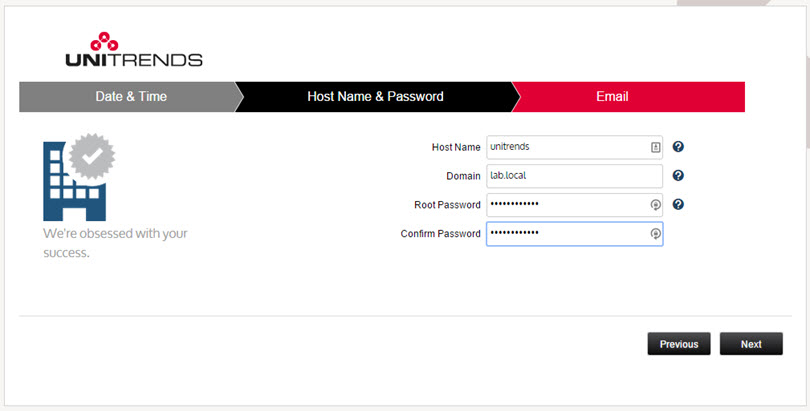
We then have another screen where you enter the hostname, domain and set the root password of the appliance. Note that I previously created DNS records on my DNS server…. Those are the practices I always do before installing any product. The assistant asks you also for your email credentials so you can get the e-mail reports delivered to your mailbox.
You're done. The Unitrends FREE backup appliance has been setup and you're ready (to rock'n roll)…
In my environment which is the latest vSphere 6, I found out that OOB the VMware tools of the appliance needs to be updated. But even if it's Linux appliance and perhaps Windows admins aren't much experienced with Linux, the update of VMware tools of Unitrends Free backup is really easy. All you have to do is to do a right click on the appliance and choose “Install/Upgrade VMware tools”…

The reason why my first backup did threw some errors on me was certainly not having VMware tools up-to-date… -:) VMware recommends always to run the latest version of VMware tools so this step is as important as all the other steps done previously. What I also do is that after everything updated, I do a reboot of the VM. Just to make sure to flush any post install scripts, services etc. It just might be my own paranoia, but my long admin experience proved me right many times in the past!
User Experience, Look and Feel
Now that we have our appliance deployed, configured and running with latest VMware tools, we can start explore the UI and configure some backups. The UI is fast and responsive. When first started, you have the option to take a tour. A virtual assistant shows you every aspect and explains every single window during the tour… If you don't like reading manuals I highly to recommend to taking it!

The tour is pretty good actually. I liked it ant it gives you a quick glance on which windows or which menu etc. you need to look for, where to find it and which options can be tweaked…
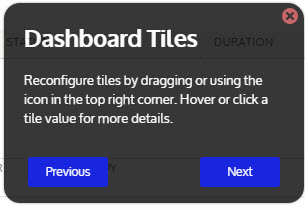
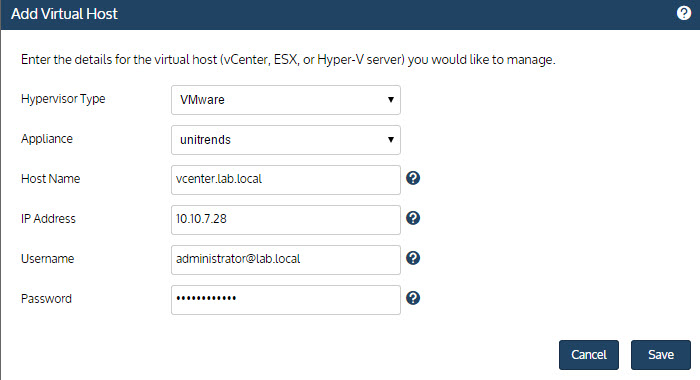
If you decided not to take this tour, just click on the cross to close the overlay window and just go and add your vCenter server to the environment. To add a vCenter server (or an ESXi host ) is a mandatory step. Once done it will display all the VMs that are present in the environment.
Very easy. Hit the Configure TAB > Add > Virtual Host
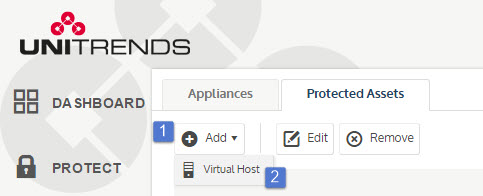
And from the drop-down list choose VMware or Hyper-V (depends on what's your environment looks like). Hyper-V is becoming more and more popular, but VMware is still much more present than Microsoft.
Creating Backup Job
Now, let's create the first backup job. Again very easy to do. You're able to create backup job with a schedule (by default) or just backup up a VM without a schedule.
Click the Protect TAB > Backup
An assistant window will start where you just follow and choose the options….
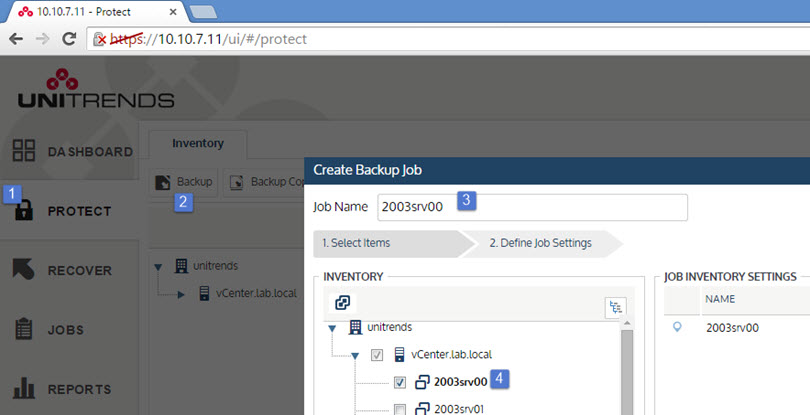
You should give the job a meaningful name. In my case I named the job the same as the VM, but depending of your environment you might want to name the job according different naming scheme. Hit the Save button and you're done. The first VM is protected!
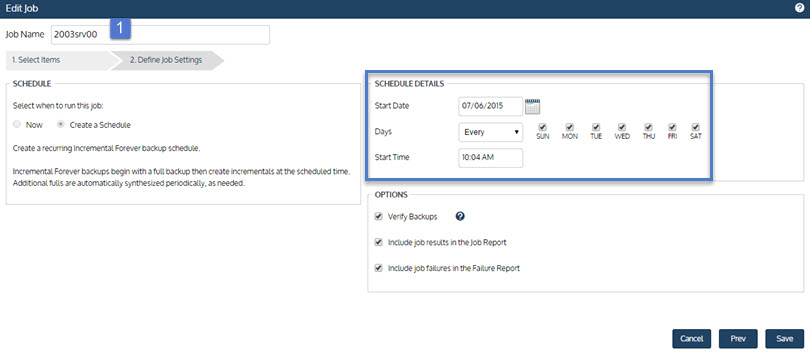
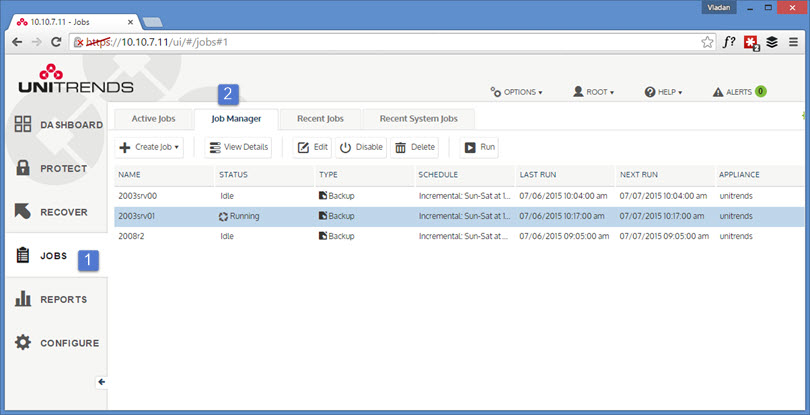
What next? You can setup several jobs for several VMs individually, then check how the jobs are performing through the Jobs TAB on the left hand side (vertical). On the page you'll see horizontal tabs there where the one pre-selected is the Job Manager. There will also be all jobs including the active ones. If you want to check only active jobs, then you might want to click the Active Jobs TAB. There is also Recent Jobs TAB and Recent system Jobs TAB.
Recover, Recover, Recover !!!
Yes, why would one want to do backups? Certainly not just for fun doing backups, right? To get a good night's sleep, feel safe and to be protected of course, and to truly feel protected the recovery of VMs or VMs files needs to be seamless, easy and fast!
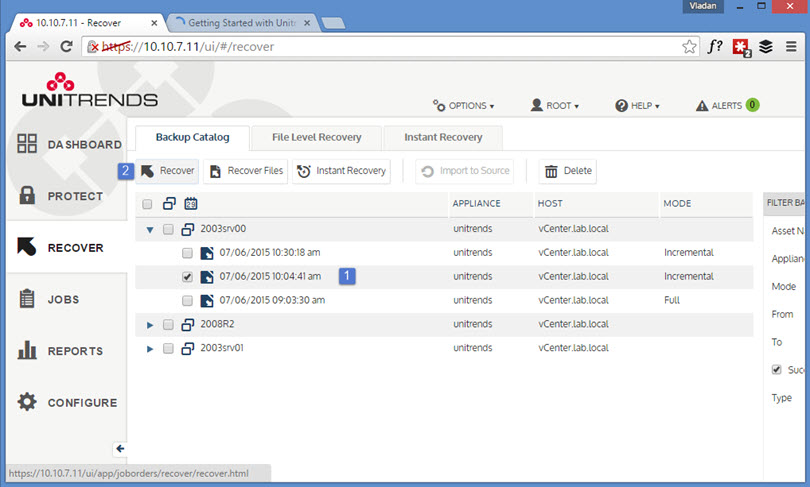
Click the Recover TAB and there you see the main options.
- Backup Catalog – gives you an option to choose a VM backed up previously. It's kind of database of your backups. Choose a VM > choose Restore Point > Recover > done.
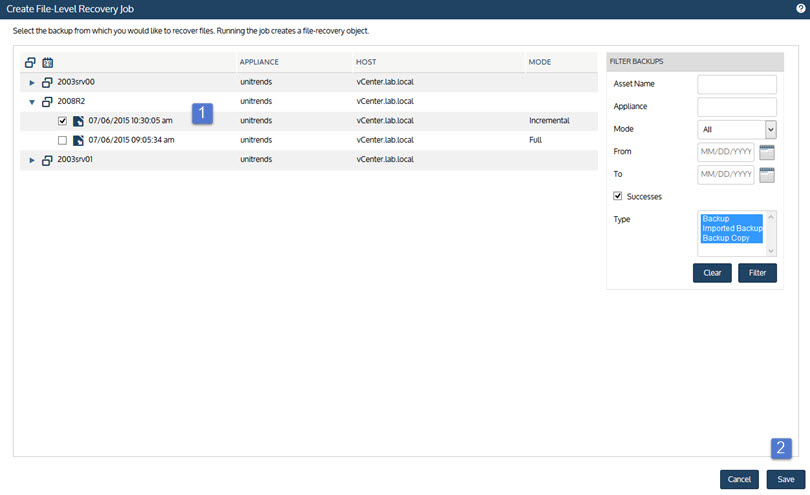
- File Level Recovery – creates FLR job and mounts the VM's filesystem from the backup and presents is as network share. So you'll need few steps to make it works. First Create the FLR job as on the screen below…
Next, go back to the Recover TAB > File level Recovery > Show details
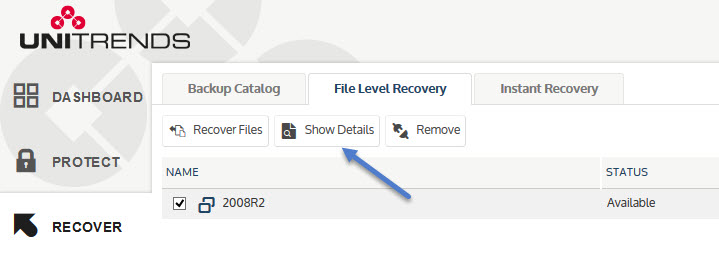
This brings up an overlay windows showing you how to access the files you want to recover… The window looks like this. Note the network path showing up. This is the information needed to recover the individual files from within the backup file (from within the VM)…
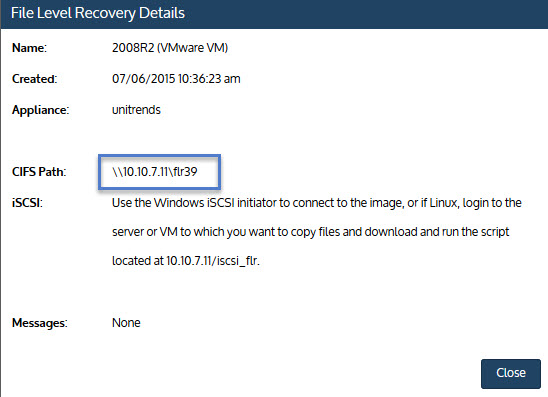
Just open Windows explorer and type this path to connect to the network location… You'll see that your VM's disks and volumes…. So it's very easy to find the file/folder you want to recover….
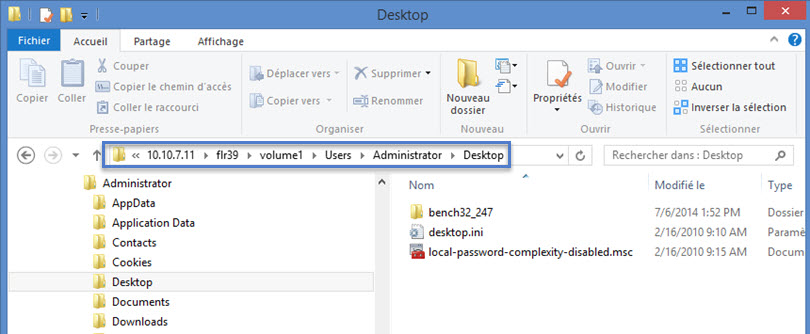
When you finished, click the remove button to stop the network sharing and unmount the VM.
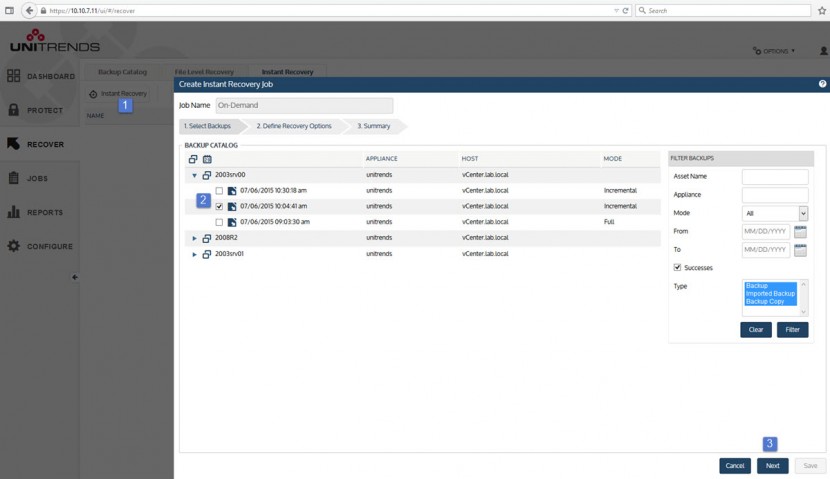
- Instant Recovery – this is important feature which basically allows the VM to be started directly from the backup location and it's fast! The assistant asks for few details before starts the VM from the Unitrens' repository…
First go to the Recover TAB > Instant Recovery > Choose a recovery point > Next
After hitting the Next button you are presented with the screen where you specify other options. The Audit mode option allows to verify that the VM can actually be created from the selected backup.

The VM is recovered from backup and starts in few seconds…. Here is the look at the Unitrends UI and the message saying VM is available for use…. The VM's default name got a suffix _restore in order to differentiate itself from the production VM.
Note the Tear Down button which basically destroys the VM after you have finished your test. This also unmounts the temporary datastore created for this purpose.
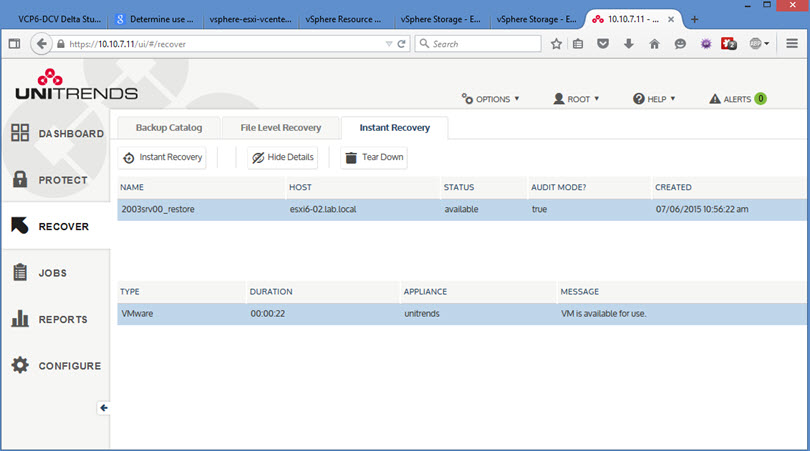
If we look at our vSphere client we can see that the VM has been created and that the VMDK lays inside of the Unitrends Instant recovery datastore that has been created automatically. It's an NFS mount…
And that our VM's virtual disk lays on that datastore….
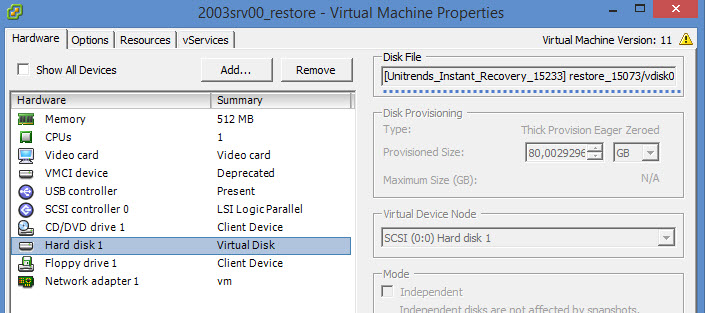
All I can say is that the process works fast. If your production VM is getting corrupted by a spyware, virus or just crashes, you can recover and be up and running within few seconds. It only depends which backup schedule you have chosen so you're able to keep your RPO enough low in order to lose as less data as possible.
In most SMBs environments having few daily backups on most critical VM(s) running business critical custom based application would certainly saved few problems if this kind of features has had been here when virtualization started in the SMB market few years ago…
What else?
We've seen how-to backup, restore, do a FLR restore or how to do an Instant recovery. What else this product can do for us? Another feature (interesting) is to have a backup copy of our backup.
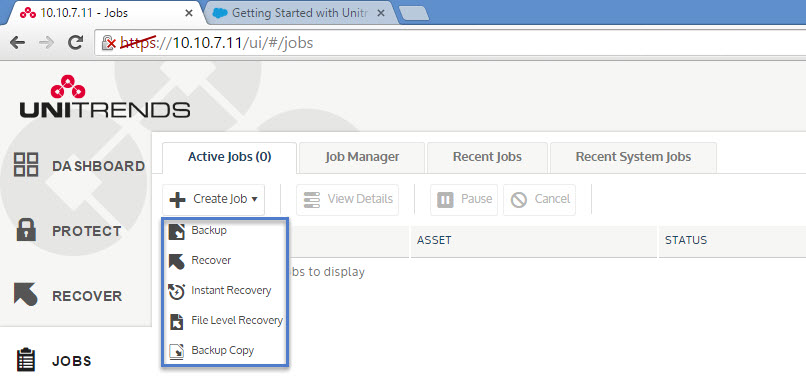
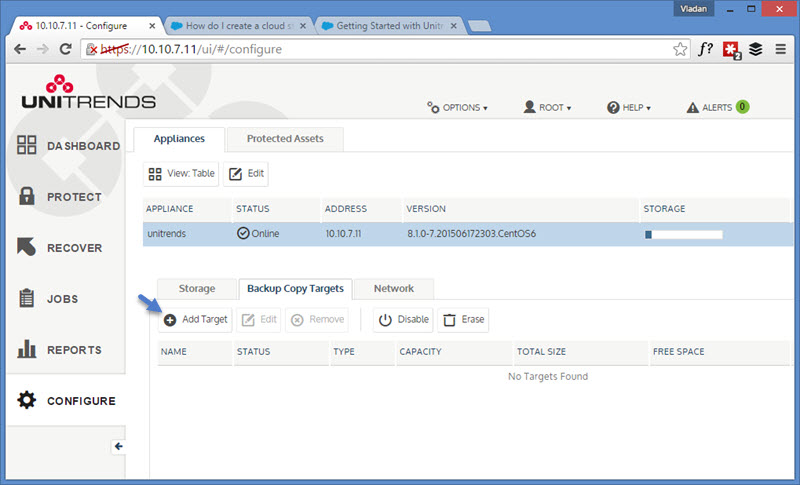
The backup copy job again present you with an assistant allowing you to choose the VM you want you to copy the backup. The backup copy an optionally be encrypted. But in order to use the Backup copy feature it's necessary to configure the backup copy target first. Backup copy target can be:
- Google Cloud Storage Standard
- Google Cloud Storage Nearline
- Amazon S3
Wrap Up:
Unitrends FREE is a fast, nicely built product. For users which do not like virtual appliances or web based interfaces all I can say is – Try it! Very robust product which is fast, intuitive, and does what's needed in today's virtual admin job. Recover Files, VMs and.
This FREE version has many of what's needed. Not all but there has to be be a limit to this free version as the rest of the features are present in Unitrends' other product range.
Features like multiple daily backups or replication (copy backup) to another Unitrends backup appliance, but that's fair game and there must be some incentive left in order to buy the full product!
The free version shall certainly fit for small environments or remote sites, just to start with to stay protected.

Hello Vladan,
Great review, thanks. How would you compare Unitrends free version with Veeam free version ?
thanks again