Connecting to the Desktop by using VMware View Client Software.
The last post of this miniseries will show you the installation of VMware View Client software on my laptop and connection to the first available desktop which we configured in the previous lessons.
I want to say once again, this series of articles is really not a complete how-to guide on VMware View. There are some design trainings from VMware Education or there are also more in-depth VMware View DVD learning course available from TrainSignal. If you want to go further. I'm not covering all the necessary steps and aspects in implementing VMware View.
You can also self-study all the official documentation which can be found through the VMware Website.
The VMware View product can be downloaded as a trial from the VMware Website, or you can buy the View Premier bundle together with the support from this page.
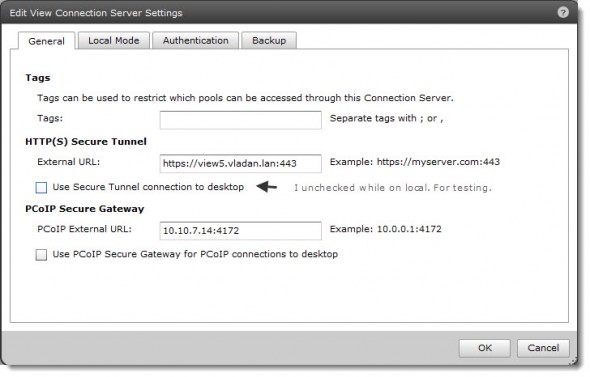
Ok, let's move with the setup. I explained in the previous lesson the setup of our first desktop pool (with 2 desktops…) and now the time is to connect to one of those desktops which are running in our vSphere Desktop infrastructure. First thing I need to do in my lab setup here, is to deactivate the Use secure Tunnel connection to desktop option in order to access my desktop while on my local LAN.
And then, I can proceed with the installation of VMware View Client software on my laptop. My laptop uses x64 bit OS, in my case it's Windows 7 Enterprise version, so I went and installed the appropriate client software for this kind of Operating System.
If you would be using another system (MAC, Linux, iPAD…) you would choose the appropriate client software too. There is nothing fancy with the setup so I'm not showing the different screenshots here.
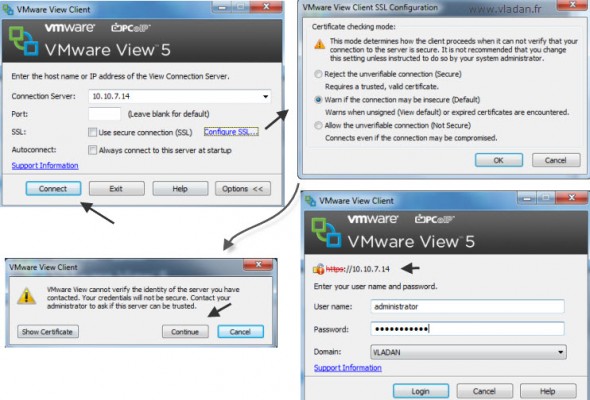
After the installation of the client software, you'll double-click the icon on your desktop and specify the VMware View Connection server's IP address or FQDN name.
There will be a window saying that the self signed certificate isn't good, but we can safely ignore that…
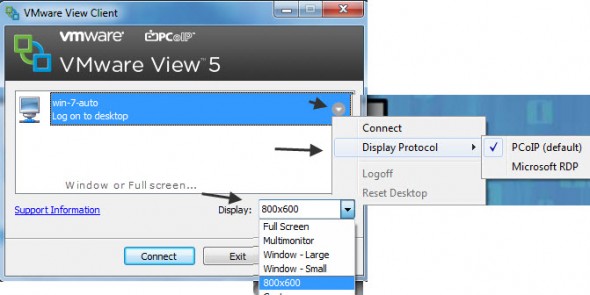
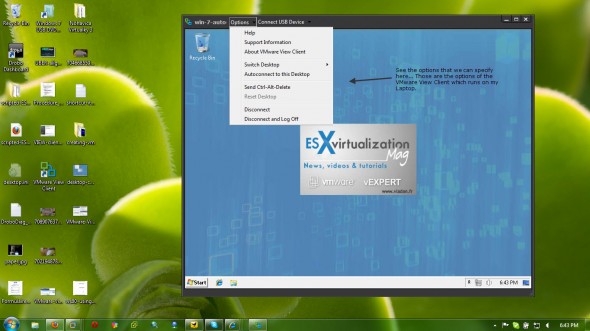
And then we finally got the window where we can configure the different options concerning the protocol used or the size of the Window in case we do not want to execute the client in Full screen mode.
You can configure multi-monitor option there if you're using 2 or more monitors attached.
And as the result we have a nice Windows seven desktop running in a small 800×600 window on my laptop. And you have a possibility to configure auto-connect – in case that the administrator of the desktop pool has made it available for the clients…
We managed to create this mini-serie of articles which are suppose to be an introduction of VMware View for readers which starts with the VDI. Virtual desktop infrastructure has got many advantages over the traditional physical desktops. One of the first advantages is the maintenance and fast provisioning.
If we add the application virtualization, which executes an application without the need of installation in the virtual desktops, the maintenance and updates of those applications is completely independent. We can then update an application without the need of Recompose operations from within the VMware View Administrator and users don't need to be disrupted.
The full serie – VMware View 5 Install, configure – How-to in my lab :
- VMware View 5 Install, configure – How to do a simple lab setup
- How to install Database and ODBC for VMware View
- How-to install VMware View Connection Server
- How-to install VMware View Composer
- How to install VMware View Agent in the Virtual Desktop plus more
- How to create desktop pool in VMware View
- The first connection to a desktop pool – this post
- VMware View – Virtual machine with Input Specification already exists error
- How to Optmize the Master Desktop Image for VMware View
- VMware View Video for SMB
- How-to configure VMware View Persona Management
- How-to remove linked clones reference from composer database video
- VMware Horizon View Connection Server SSL Certificate How-to

