High availability feature tested from Starwind ISCSI SAN Software.
This is a follow up post for setup High Availability feature with Starwindsoftware's ISCSI SAN. In the first part I simply showed what's my lab configuratio will look like and what I will need to test the HA feature.
I basically took 2 VMs running 2003 Server, since I don't have more than One box in my home lab… (again on this later). On both VMs I installed a Starwind node.
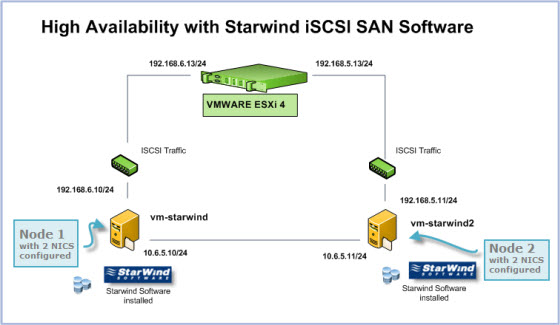
Each VM has two network cards. Easy to do because VMware Workstation permit to configure the VM with more than network card (You can have actually up to 10 NICs in your VM… 😎 ).
VM1 – NIC1: 10.6.5.10/24
VM2 – NIC1: 10.6.5.11/24
VM1 – NIC2: 192.168.5.10/24
VM2 – NIC2: 192.168.5.11/24
NICs 1 are for communication channel between those 2 Starwind Nodes.
NICs 2 are for ISCSI traffic
As many of my reader knows, picture is worth a thousand words…. 😎 Here is my detailed schema for ISCSI traffic and the communication channel required for the setup procedure.
Below you'll find the configuration steps for the part on the Starwind NODES. I suppose that you have already done the installation on both Windows servers.
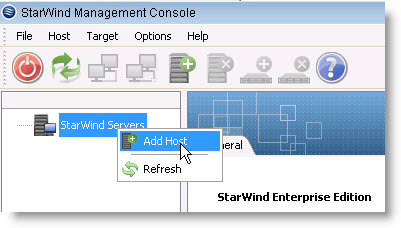
So you can add a new server to the Starwind management console.
Netbios name or IP adress.
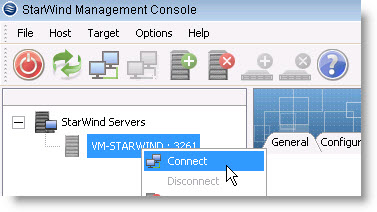
Then, you'll want to connect to the Node…
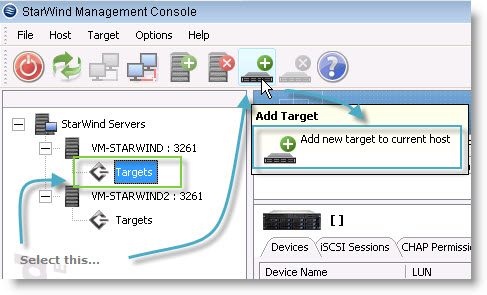
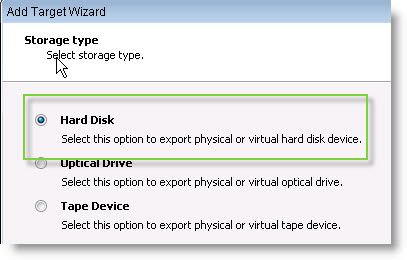
And add a new target.
As you can see you can also use optical drive or tape device…
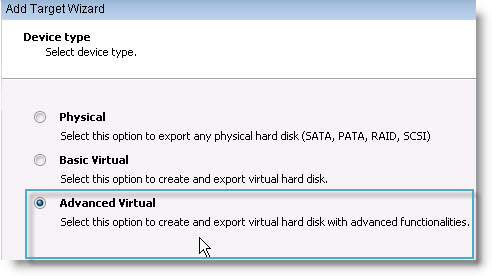
In the next screen you have three options here. If you choose the basic Virtual you can use up to 2 Tb of data in the free version, but only as a single image. Not with the High availability feature. Also with the free version you are limited to a 2 iscsi concurrent connections.
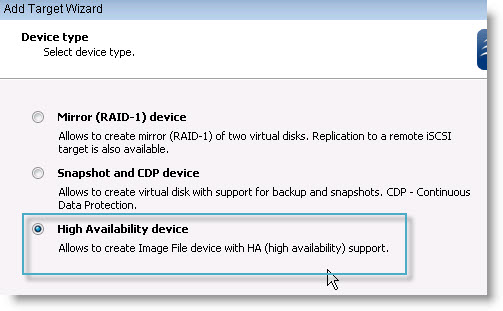
Ok. Let's moove on. On the next screen you have the choice in the advanced Virtual disk, to have Raid-1 Mirror, Snapshot CDP device or High Availability device. I choosed the third one for this excercise.
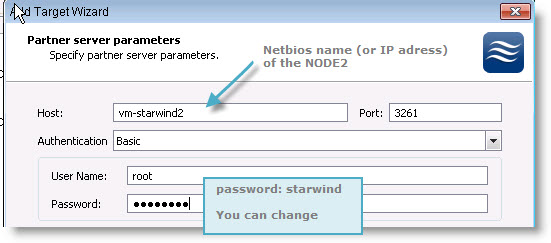
On the next screen you identify the partner server (NODE 2 in my lab, which has the vm-starwind2 as a netbios name).
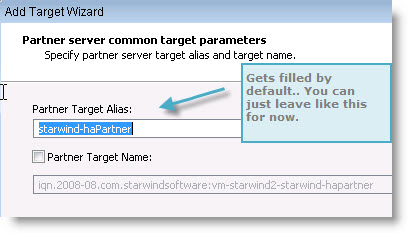
The alias gets filled by the assistant (I suppose to make sure that the name don't gets the same). You can choose different name than the one is pre-filed here…
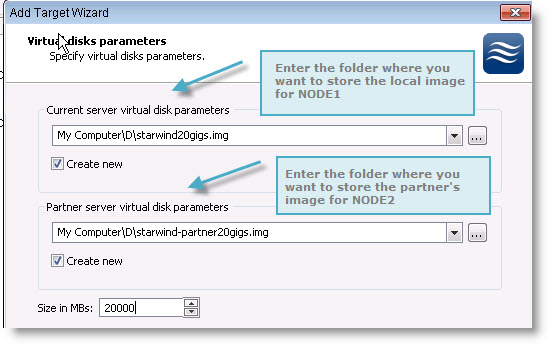
In the next screen you mus configure the virtual disks placement and size. I choosed D drive on my server, and also I checked the Create new checkbox.
Then you choose the interface for the synchronization channel for both servers:
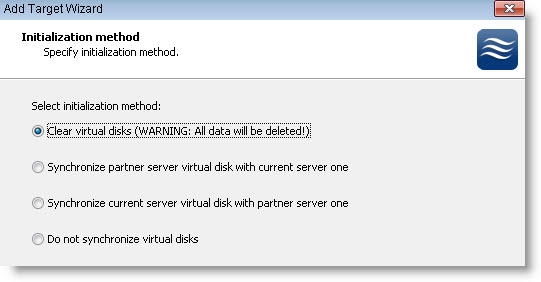
And the method by which the disks will be synchronized. It's for the case that you “loose” one node completely (hard disk crash or so) and you will want to recopy all the data on the new NODE.
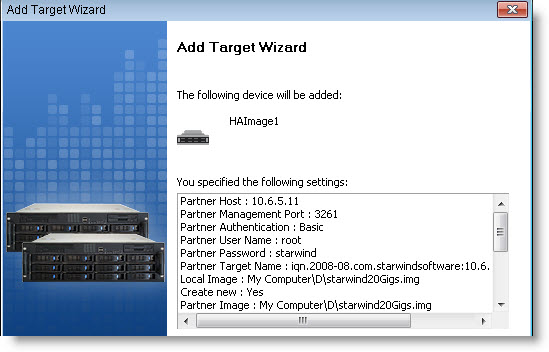
And you are at the end of the assistant where you can see all the configuration steps inside this little window.
At the next screen you should see the initial synchronization between those 2 nodes. You'll have to wait some time because the initial synchronization can take quite time…. I had to wait like 10 minuts for those 2 nodes gets synchronized.
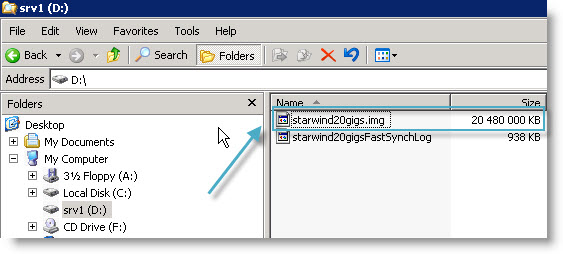
Then you can just check on your NODE1 server the size of the file created. You see that it's a 20 gigs file with an .img as a file extension.
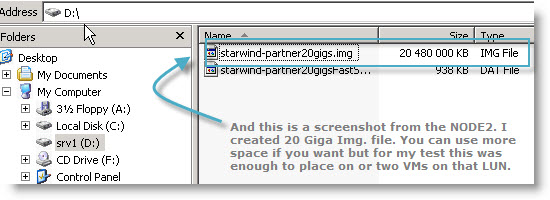
And the screen shot taken from the NODE2:
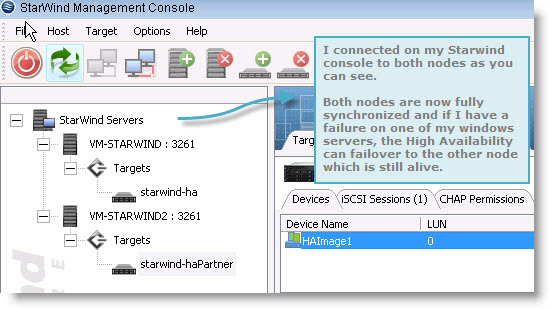
And as you can see on my starwind console I have both servers with the targets synchronized.
Stay tuned for the third part where I'll show you how to configure VMware ESX server to “see” this LUN created by Starwind iSCSi SAN software.
- Starwind active-active HA availability storage
- Starwind with ISCSI SAN Software can do High Availability for you…- this post
- Starwind iSCSI HA Connection to ESX Server
You can subscribe to this website for free by using RSS. If you don't know how to use RSS with your Google account just read my page concerning this. Using RSS saves a great amount of time. You can also subscribe by e-mail and get my daily article deliverd to you by e-mail. The RSS and RSS by e-mail service is provided by Feedburner, which was bought by google (it's been some time now).

