In this post, we'll be testing a setup that eases the job of creating a Veeam Immutable repository on a Ubuntu Linux system. We have already published a post where we went through the manual steps here, so today it should be even easier.
A Veeamhubrepo community script is a GitHub script provided via MIT license by Timothy Devin. It allows you to quickly setup a Veeam Immutable repository via a Python script. The script has several menus that help with the setup.
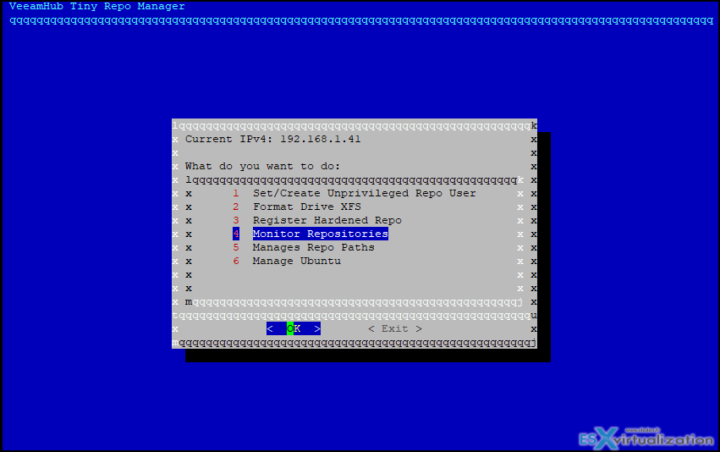
The script can create a dedicated user on the Linux box, format disks/partitions where you would like to store those backups, and also monitor this repository (check disk space, check logs or show Veeam processes).
Veeam Immutable Repository – The steps
Step 0: I assume that you have deployed an Ubuntu server and have a separate disk for the Veeam Backups. If not, go and get Ubuntu distro, then do the install and config.
Step 1: Connect to your Linux server and enter the following command to install:
sudo wget -O ./veeamhubrepo.deb https://github.com/tdewin/veeamhubrepo/releases/download/v0.3.2/veeamhubrepo_noarch.deb
sudo apt-get install ./veeamhubrepo.deb
sudo veeamhubrepo
Step 2: Configuration
Click yes to get started.
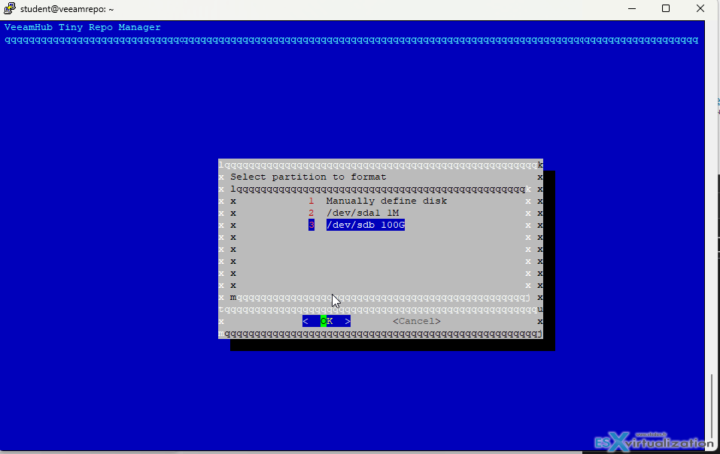
Follow the assistant with adding your disk/volume, formatting, and adding a user. You'll be asked to create a new dedicated user and this user will also be used when you'll connect your Veeam server via Veeam backup console UI. We won't detail all screens here, but here is one of them.
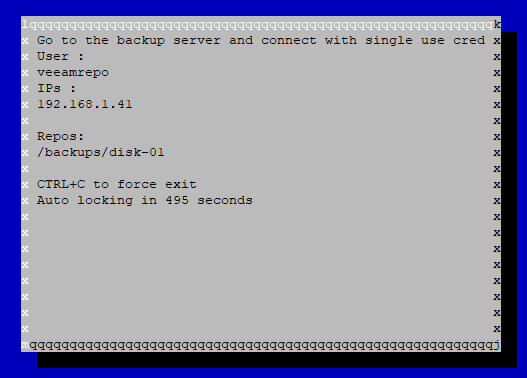
Once you have your user created and the volume is formatted, chose the option 3 – Register Hardened Repo. The system will prompt you for starting SSH access and shows an information screen…
Then go to your Veeam console and add this repo. I'm sure you know how to do that…
Quote from Timothy:
How it works:
- Deploy Ubuntu 20.04 LTS on disk 1 (16GB is more then enough, you only need the base install)
- Add a secondary repository disk/block device
- Deploy Veeamhub Repo
- Launch Veeamhub Repo
- A wizard will start that should detect the second disk/block device via lsblk and ask you to format it (experimental project be careful)
- Additionally it will create a new unpriveleged user, disable SSH, configure the firewall, ..
- Add the end of the wizard it will ask you to enable SSH. Before you start this process, make sure that you are ready to add the repository to a Veeam V11 installation
- Enable SSH, the wizard will show you the configured IP, user, etc. as a reminder. Go to V11 and register the repo with “Single use credentials” and “elevate automatically” checked
- Once you click through, the GUI should detect that the repository is added, auto close SSH and remove sudo power to the veeamrepo user.
Next time you open the VeeamHub repo manager, it will allow you to modify settings, read logs or monitor space usage.
Well, this is about it.
Source:
More posts from ESX Virtualization:
- VMware vCenter Server 7.0 U3e released – another maintenance release fixing vSphere with Tanzu
- VMware vCenter Converter Discontinued – what’s your options?
- How to upgrade VMware VCSA 7 Offline via patch ISO
- vSphere 7.0 U3C Released
- vSphere 7.0 Page[All details about vSphere and related products here]
- VMware vSphere 7.0 Announced – vCenter Server Details
- VMware vSphere 7.0 DRS Improvements – What's New
- How to Patch vCenter Server Appliance (VCSA) – [Guide]
- What is The Difference between VMware vSphere, ESXi and vCenter
- How to Configure VMware High Availability (HA) Cluster
Stay tuned through RSS, and social media channels (Twitter, FB, YouTube)


