PXE Manager Howto: Converting ESX hosts to ESXi
This is a guest post by Andy Grant.
PXE Manager was updated last week offering a new feature: ESX to ESXi conversion. With VMware's push to replace classic ESX with ESXi this feature comes at a good time. Prior to any migration, it is highly recommended to review VMware's ESXi migration guides at the ESXi Info Center.
Migration
Converting an ESX host to ESXi assumes you have successfully setup PXE Manager and loaded ESXi stateful/less images.
With little documentation regarding the feature, I though I would try it out and report on how it works.
ESX hosts are not detected by PXE Manager plugin in the Stateful Hosts tab so you must manually add a host.
After adding the host using the Add Host wizard it will be displayed with a status “Need Conversion to ESXi”
Clicking on the Convert this ESX Server to VMware ESXi Server link opens the Import Legacy ESX Hosts wizard.
Update, June 24 2011: Max Daneri provided input on how to start the wizard without manually adding the host.
- Select a host in Hosts and Clusters then click on the Hosts States Archive tab where you will find the link to open the conversion wizard.
- Select a host in Hosts and Clusters then select Convert legacy ESX Hosts from the Administration menu of the vSphere client.
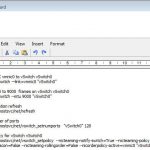
The wizard itself is straightforward, but the real magic happens at the last step where you will find the post configuration script, no host profile required.
Even if you have no intention of using PXE Manager to perform ESX to ESXi migrations, the auto-generated configuration script is worth looking at to add to a kickstart file should you be using another installation method. The script will configure the freshly installed host to match the original.
After running the import wizard you will have a host entry under the stateful hosts tab in the PXE Manager plugin.
Next you must ensure that the host is configured to PXE boot using the first or secondary NIC. If the external network trunking multiple VLANs across the wire be sure to set the “default VLAN” to where the PXE agent resides.
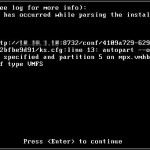
My first attempt to upgrade an ESX 4.1 host to ESXi failed with the following error.
I would consider this fail-safe default to be by design to avoid the accidental erasure of a LUN should the boot drive be identified incorrectly. I had to edit the configuration to overwrite VMFS as well as select local boot disk. After a failed install attempt, the Boot Mode changes to Disable: you must set it to Normal to try again.
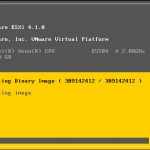
The installation now began successfully.
The original ESX host was removed from vCenter and after the installation completed, I was able to re-add it to the cluster as an ESXi host.
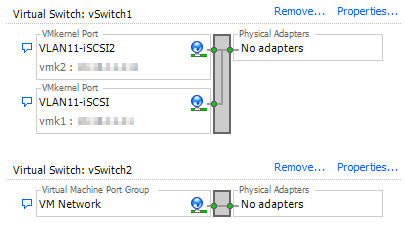
After adding the migrated host to vCenter, additional configuration was required to associate missing vmnics to the appropriate vSwitch as these settings did not migrate.
If your hosts have identical hardware configuration and component layout, you can easily add to the migration script to add the missing adapters. A few other items added include enabling Tech Support Mode and adding the software iSCSI vmkernel adapters to the HBA.
#Add vmnic's
esxcfg-vswitch -L vmnic1 vSwitch0
esxcfg-vswitch -L vmnic2 vSwitch1
#Associate vmknic to software iSCSI adapter
esxcli swiscsi nic add -n vmk1 -d vmhba33
esxcli swiscsi nic add -n vmk2 -d vmhba33
#Finish adding vmnic's
esxcfg-vswitch -L vmnic3 vSwitch1
esxcfg-vswitch -L vmnic4 vSwitch2
esxcfg-vswitch -L vmnic5 vSwitch2
#Set iSCSI failover policy
vim-cmd hostsvc/net/portgroup_set –nicorderpolicy-active=vmnic1 –nicorderpolicy-standby=vmnic3 vSwitch1 VLAN11-iSCSI
vim-cmd hostsvc/net/portgroup_set –nicorderpolicy-active=vmnic2 –nicorderpolicy-standby=vmnic1 vSwitch1 VLAN11-iSCSI2
#Enable TechSupportMode
vim-cmd hostsvc/enable_local_tsm
vim-cmd hostsvc/enable_remote_tsm
vim-cmd hostsvc/start_local_tsm
vim-cmd hostsvc/start_remote_tsm
#Set DEFAULT_AA multipathing
esxcli nmp satp setdefaultpsp –satp VMW_SATP_DEFAULT_AA –psp VMW_PSP_RR
You now have another tool in your toolbox come ESXi migration time.


