While it's fairly simple to take the defaults, for VM hardware components, It's not always the best ones when it comes to performance. In this post, we will explore the different possibilities to give you the opportunity to create performance Optimized VM of Windows Server 2016 On ESXi 6.5 directly from the installation.
We'll use VMware Paravirtual SCSI controller for a boot disk, but as Windows Server 2016 does not have the drivers, we'll need to “give” him this driver before launching the installation process. We'll cover that within our guide.
Let's assume you have vCenter and you can connect via vSphere HTML 5 Web client (still incomplete, but works for basic VM operations and more, except VSAN). Obviously, you can also use the vSphere Web Client (Flash based).
If you're working on standalone ESXi the same steps should work as well, just the connection tool is different.
Performance Optimized VM of Windows Server 2016 On ESXi 6.5 – What You'll need?
- Latest Version of VMware Tools – download here (Current version is 10.1.7)
- Windows Server 2016 ISO Image – download from Microsoft
The Steps (On VMware vSphere HTML 5 Web Client)
There are quite a few guides on how to install Windows Server 2016 VM by modifying the existing virtual hardware after installation. What we do is that we do some steps before the actuall installation and we'll end up with the same result. Let's get started.
- Step 1: Upload the Windows Server 2016 ISO on a datastore visible by your ESXi host – you can do that via datastore browser of your HTML 5 client.
- Step 2: On your Windows Workstation from which you're following these steps, mount the VMware Tools ISO image for Windows. Browse the folders into
- Step 3: Upload a VMware Tools Windows ISO to the same datastore. (you'll find the ISO after extracting the ZIP file, in my case the ZIP file's name is VMware-Tools-10.1.7-core-5541682.zip but, a few months later you'll certainly find another, more recent built.
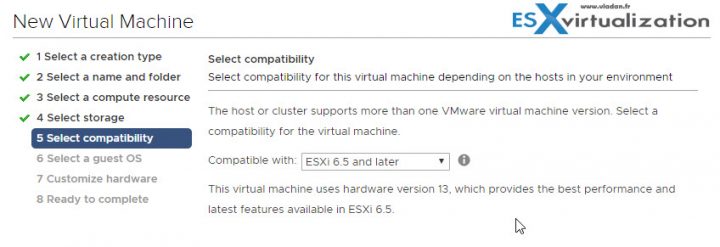
First Create a VM with Windows Server 2016 (x64) as an OS. it's the latest template from the drop-down list.
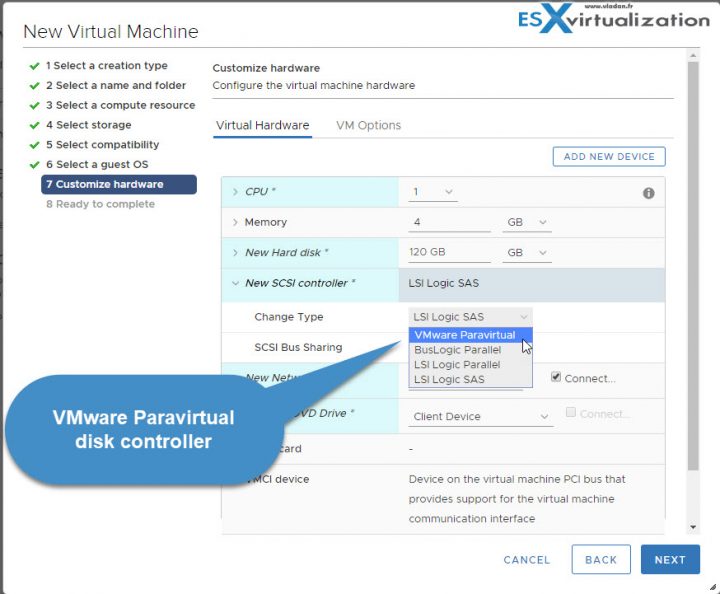
Concerning storage, the wizard automatically picks LSI Logic SAS as new SCSI controller. We will modify this right away and we'll select VMware Paravirtual SCSI disk controller. After, you can adjust a disk size to some reasonable capacity (I picked 120 Gb to be comfortable).
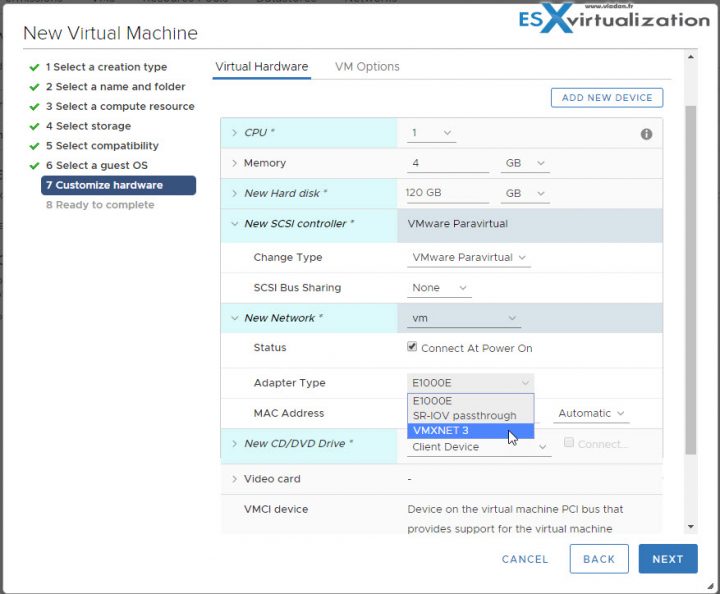
Next step is to change the default Network adapter type which is E1000 by default. We'll pick the VMXNET 3 which is more performant.
TIP: Check our post – VMware Network Adapter Types – to see the differences between many of those VMware NICs.
Simple drop-down selection too.
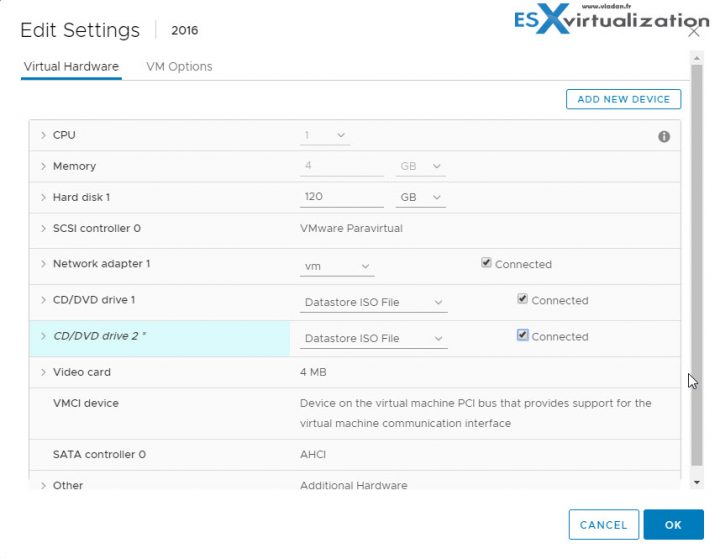
The next step would be to add an additional CD-ROM drive to our VM. Why are we doing this? To make our life easier. As you know the VMware Tools ISO image contains the VMware PVSCSI driver and we'll need this driver for the Windows 2016 Server installation otherwise the installer will not find any disks to install the system on to.
So Let's simply add a second CD-ROM and attach it to the “Windows.iso” (from VMware tools package, uploaded in previous step).
So by now, you should have the First CD-ROM attached to the Windows 2016 ISO and the second CD-ROM Attached to the VMware Tools ISO. Both lying on the same datastore (it could be different datastore as well, but let's make things simple).
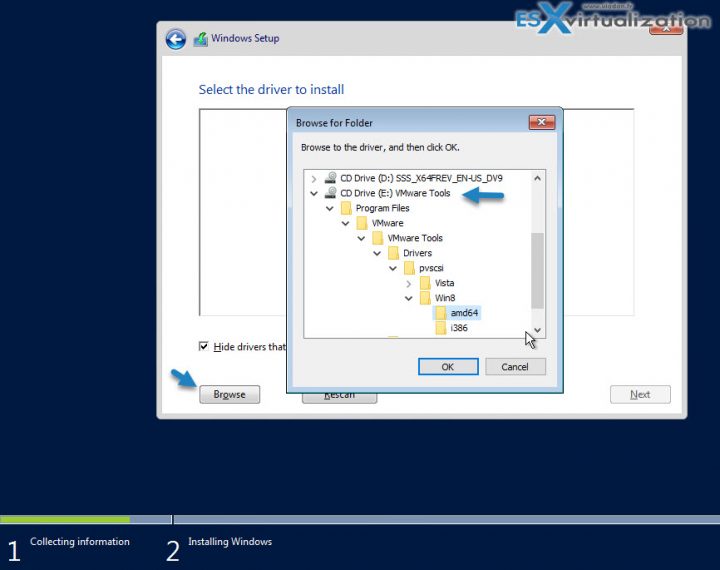
Start the VM and the system will boot the VM into the Installer of Windows Server 2016. Follow the installation screens. When you'll be looking where to install the system (no disk drives will be found), click Browse > Navigate to the “amd65” folder (as on the image below) and provide a PVSCSI driver which is present on the VMware tools ISO.
Figure1: browse for the PVSCSI driver on the ISO (VMware tools) you have mounted as second CD-ROM. There is the “amd64” folder there.
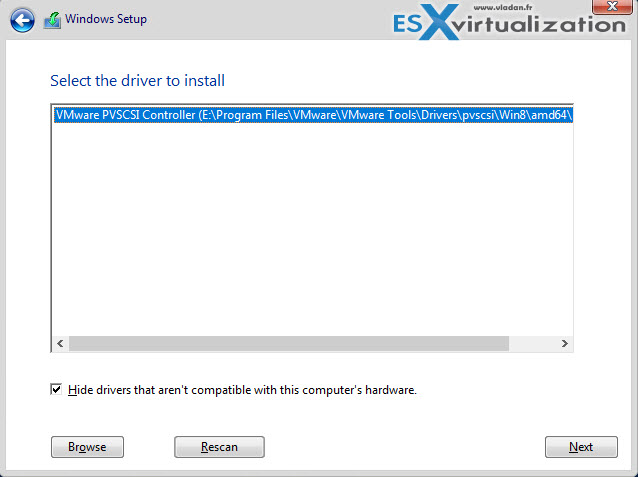
On the next screen, you'll find the VMware PVSCSI controller.
The rest of the Installation remains the same as you probably know. Don't forget to install VMware tools within this VM and then remove the second CD-ROM from the VM hardware.
At final, you'll get a VM with VMware paravirtual storage controller. And VMware says that:
VMware Paravirtual SCSI controllers are high-performance storage controllers that can result in greater throughput and lower CPU use. These controllers are best suited for high-performance storage environments.
How about virtual NVMe Controller?
As you know VMware has introduced Virtual machine hardware 13 which has an NVMe controller. We have reported on it here – What Is VMware Virtual NVMe Device? The main benefit of NVMe interface over SCSI is that it reduces the amount of overhead, and so consumes fewer CPU cycles. Also, there is a reduction of IO latency for your VMs.
You’ll need a virtual machine compatibility is ESXi 6.5 or later. The Add New device wizard when adding a new virtual hardware to a VM which has Virtual Hardware 13 configured (vmx-13).
Each virtual machine supports 4 NVMe controllers and up to 15 devices per controller. With Hardware Version 13, you can use NVMe, SATA, SCSI, and IDE controllers in a virtual machine. The problem is that VMware tools do not have a built-in driver for NVMe. It's up to the Guest OS to provide the driver.
Basically, you can add another virtual disk which will use the virtual NVMe controller.
Wrap Up:
Further optimization of such a VM can be done by deactivating some virtual hardware within the BIOS (Floppy drive, Serial Ports, Parallel ports….) and also removing the virtual hardware which is not used for day to day work (ex. CD-ROM).
Are you doing some specific (supported) optimization to your VMs within your environment? Share you tips within the comments.
More from ESX Virtualization:
- What is Storage Replica? – Windows Server 2016
- VMware vSphere Client Download Page
- What is Veeam Proxy?
- What is VMware CPU Ready?
- VMware Transparent Page Sharing (TPS) Explained
- What is VMware Memory Ballooning?
- How to Clean Previous Windows Installation Files after latest Windows 10 Update
- What is VMware Hot-Add RAM and How to use it?
Stay tuned through RSS, and social media channels (Twitter, FB, YouTube)


You don’t mention the need to use UEFI if you are going to use the NVMe controller for the boot device.
Hi Brad, Absolutely true, but that wasn’t my original intention. To create a VM booting off NVMe. Perhaps another post with a test, clarifying this, would help. Thanks for the idea…
William Lam recently pointed out that UEFI for Windows 10 and 2016 VM’s is a good idea: https://www.virtuallyghetto.com/2017/10/tip-from-engineering-use-uefi-firmware-for-windows-10-server-2016.html
It might be a good idea if you’re looking to use some of the new vSphere 6.5 secure boot. However, I don’t think that it brings any performance increase or improvements.
I have one question.
Has anyone tested performance of virtual NVMe “disk” vs pvSCSI disk backed by ordinary FC SAN storage ?
i.e. If I don’t have actual NVMe backend storage, but only old-school FC SAN based storage (15K SAS). Will virtual NVMe disks perform better I/O wise than virtual pvSCSI disks ?
“amd64” folder instead? 🙂
Today Iam tested two VMs with LSI Logis SAS, PVSCSI, NVME (I have hybrid vSAN). Copy 137GB folder within VM disk. Result – minimum differents. 😐