One of the latest additions in Nakivo Backup and Replication software is Nakivo Self-backup feature. Today, we'll explain how it works, what's the catch up (if there is) and the different possibilities you have when using it.
As you know, Nakivo can install in 4 different ways. To different physical/virtual systems and also on some NAS devices. You can install Nakivo Backup and Replication directly on a Synology NAS or Western Digital NAS and create your own, high-performance VM backup appliance. (Note other NAS systems are added on regular basis too. Check for an update at Nakivo).
Nakivo Self-Backup is basically a feature allowing you to back up a configuration of the software so you can roll back in case you have issues.
It is not only the connection to vCenter servers, Hyper-V servers, your Amazon AWS config. But also all your different repositories and also all transporters which you have configured within your environment.
If your environment has several remote sites (remote offices), you'll those configuration backed up too. And who says the remote site, says Transporter, as it's the Transporter appliance who assures network acceleration, AES 256 encryption. So you need to have at least two Transporters within such an environment.
Let's have a look at Nakivo Self Backup
- Inventory (including all VMware/Hyper-V/AWS virtual environments, all your managed credentials, network mappings, and Re-IP rules).
- Backup repositories.
- Created Backup, Backup Copy, and Replication jobs (including data on past jobs run as well as future scheduled jobs).
- Information about Transporters.
By default, the Self-backup feature saves backups to the first five repositories available.
How to Configure Nakivo Self-Backup – The Steps
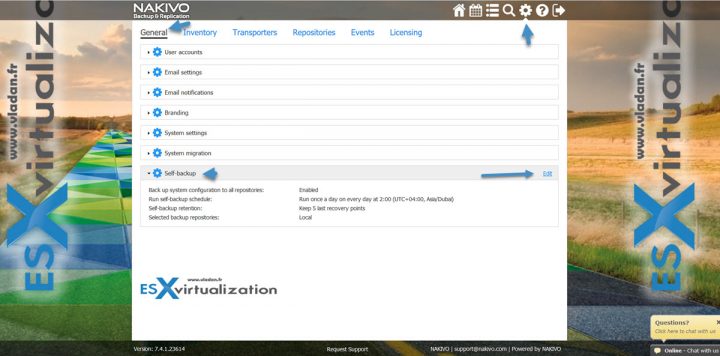
To access to the option simply log in to your admin user interface > Go To Configuration > General > Self-backup
Click the Edit Link.
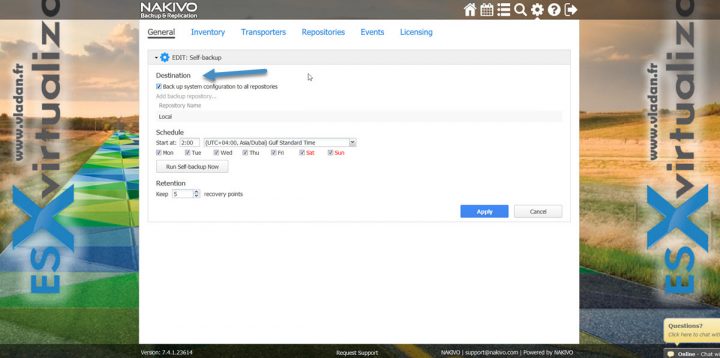
On the page which opens, click the checkbox “Backup system configuration to all repositories”. This will make sure that the config is spread out through all your repositories so you don' have to worry about and look for the backup later on. The backup will be sent to all repositories. Everywhere.
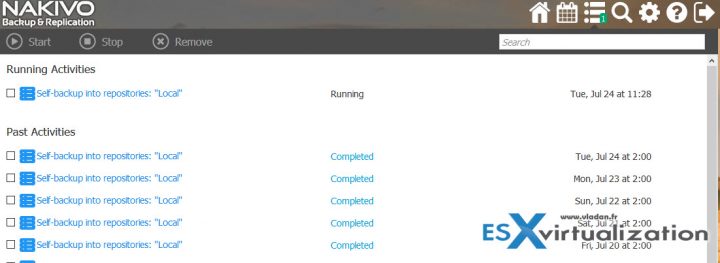
You can click the “Run Self Backup Now” button to backup immediately the config. If not, it will execute itself as per the schedule you can configure there. Note also the possibility to keep the recovery points.
As you can see on the image above, I'm just backing up to my local repository. This isn't right. If my server dies (flooding, fire, etc…) the backup config dies with the repository where it's located. So If I would be in production (not my test-scratch lab) I'd add several repositories on several remote sites and then be safer.
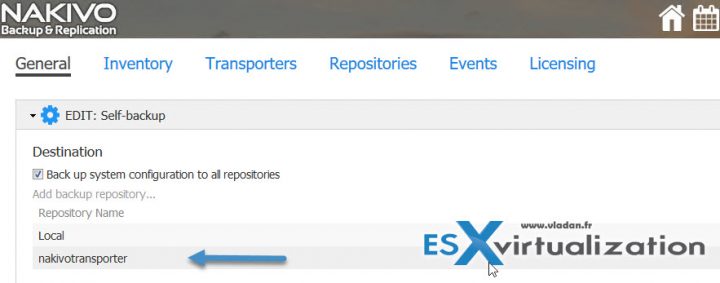
Update: I actually added my Transporter as a destination of the backup config.
So I have now two destinations for my backup config. “Local” and “nakivotransporter”. Just to demo.
How do I restore?
If you need to restore, to revert-back if something went wrong with your backup server, you can do so by going to Configuration secton.
Restore Self-Backup
Once you have a clean copy and configure at least one vCenter or Hyper-V connection and attach the repository which contains the backup.
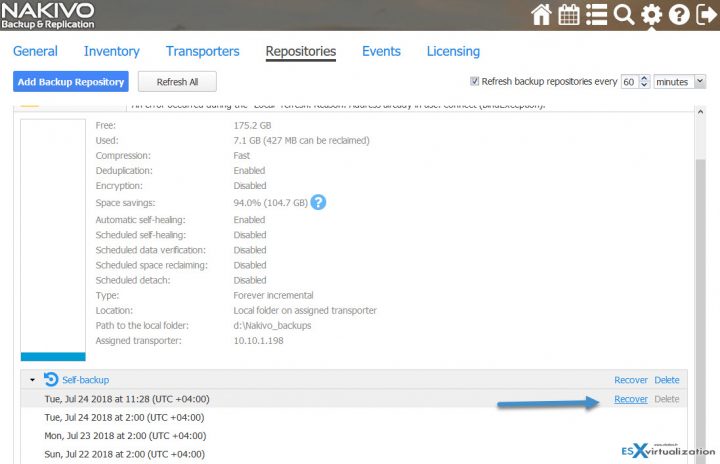
Then you simply go to Configuration > Repositories, select one of the repositories that contain a Self-Backup > click Self-backup, and then click Recover > Done.
If you're planning to Migrate, proceed like this:
- Export System Configuration to File – via Configuration > General > System Migration > Export System Configuration
- Install Clean Nakivo server
- Restore System Configuration – via Configuration > General > System Migration > Export System Configuration
Note:
System configuration export and import is designed for migration purposes only and was not designed to serve as a system configuration backup. After you have exported system configuration from an old instance of the product, do not run jobs in that old instance. Doing so results in failed jobs in the new instance after migration, all jobs will have to be recreated, and full initial job run will be required.
NAKIVO Backup & Replication provides the ability to migrate all your settings (including inventory, jobs, credentials, transporter settings, and so on) to a new instance (copy) of the product via System Backup Export.
Wrap Up: Nakivo put in place powerful tools which allow even larger organizations to be safe and comfortable with the product. Having a possibility to self-backup and (or) export system configuration is certainly a good practice for DR or migrations.
You can either have a possibility to Self-backup feature to quickly roll-back your system config in case something goes wrong or use system config export when moving your Nakivo backup server installation to another location. You should not use system config export AND continue to run backups on your old system, because once you restore your config, the new jobs would trigger Full backups.
Check Nakivo website for further details.
More about Nakivo on ESX Virtualization:
- Nakivo Backup and Replication 7.4 Released
- Nakivo Backup and Replication FREE Edition
- Nakivo Backup and Replication 7.3 With Hardware Deduplication Support
- Nakivo Backup and Replication available for QNAP NAS
- How to Setup an AD Integration with Nakivo Backup and Replication 7
- Replication of VMs to Remote Site via Seeding Option
- Nakivo Backup and Replication 7.1 protects Hyper-V Clusters
More from ESX Virtualization
- VMware Desktop Watermark Free Utility is Similar to BgInfo
- Time Configuration For vSAN Witness – [Lab]
- Top 3 VM Replication Software for VMware vSphere Environments
- Configuring IP Pools – What are vSphere IP pools for?
Stay tuned through RSS, and social media channels (Twitter, FB, YouTube)

