The vSphere 6.0 web client allows easier possibility. Through a GUI if you have vCenter installed.
So How to Mark local disk as SSD disk ?
Connect to your vCenter > Go to Hosts and clusters > Select a Host > Manage > Storage > Select disk which you want to tag as SSD. You can click to enlarge.
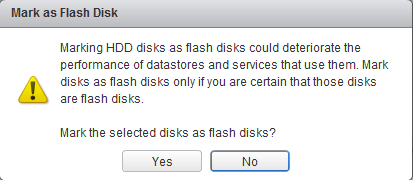
This brings a small warning window saying that you might deteriorate the performance of datastores and services that use them, but if you're sure on what you're doing, then go ahead and validate on Yes button.
As a result, after few seconds (without even refreshing the client's page) the disk turns into a SSD disk… It's magic, no?
It works also the other way around!
When you need to tag a disk recognized as SSD disk back to HDD, you can. The icon is not the same… check this out.
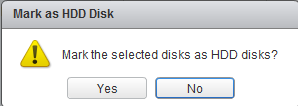
So when selecting the SSD disk and clicking the HDD button, you'll get another warning window telling you this
And again, you'll wait few seconds and the disk became a “normal” HDD… very convenient when creating a lab environment. But I'm pretty sure that the VMware folks did not enable this feature to play with it in the lab but to save precious time during deployments!
One of VCAP topics which lays on the blueprint and which is also necessary if your SSD you just bought for your brand new whitebox lab is not recognized as SSD but as Non-SSD. It can happen for locally attached SSD or also for LUNs accessed via iSCSI. The only remediation is to tag that disk/lun as SSD via the CLI and that's why this post.
You'll need a local SSD in place in case you want to test VMware VSAN. It's probably not in everyone's reach to get 3 ESXi hosts to play with, so there is a possibility to play with nested ESXi hosts and enable the SSD for nested hypervizors. The step by step config for VSAN in nested environment can be found here.
How to tag disk as SSD VMware esxi 5.x – the steps:
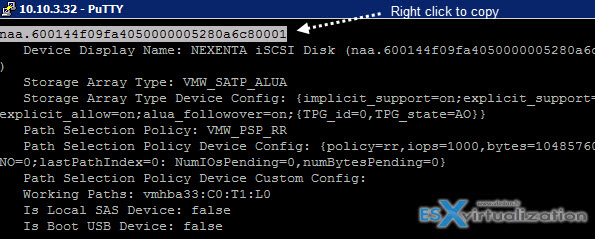
1. Connect via Putty to your ESXi host and run this command in order to identify the hardware id of the drive and note also the SATP (storage araty type plugin), the VMW_SATP_ALUA cause you'll need it.
esxcli storage nmp device list
2. Then run this command to enable the SSD:
esxcli storage nmp satp rule add -s SATP_TYPE -d naa.ID -o enable_ssd
so in our case…
esxcli storage nmp satp rule add -s VMW_SATP_ALUA -d naa.600144f09fa4050000005280a6c80001 -o enable_ssd
3. Then one more command and you're done. For our case the command looks like this:
esxcli storage core claiming reclaim -d naa.600144f09fa4050000005280a6c80001
And magically the drive changes from Non-SSD to SSD…
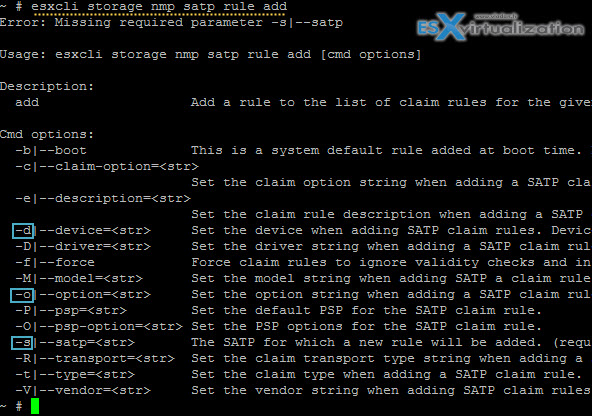
The different options (-s -d -o) can be found if you run just the command without the switches:
esxcli storage nmp satp rule add
As being said, the process tags the local (or remote LUN) as SSD, but it's also possible to do the other way around, as in the future the SSDs will replace the spinning disks anyway, or you are so rich that for your home lab you run only SSDs and VSAN requirement needs to have magnetic (spinning) disks present inside of the disk group. So you will have to basically tag the SSD to became MD for the ESXi hypevisor. But we might see it in one of our future posts.
Source: vSphere Online Documentation


Thanks for this post Vladan! I used a different way that I found on the web to tag my SSD-backed iSCSI LUNs during ESXi kickstart, which issued an unclaim – load – run sequence. That basically worked, but caused an error in the unclaim step, so it always appeared to me that this was not the right way to do this. Reclaiming makes much more sense. 🙂
Cheers,
Martin
Entering maintance mode and rebooting resolved the unclaim issues on my ESXi
Thank you for the post, very useful.
Thank you very much!!! I love getting it right the first time and you helped me do exactly that!
Thanks for the post, saved me a few hours… Just had to reboot the server after the last step to make it work 😉
-Ken
Seems like using the GUI you have to set the SSD on every single hosts. It’s not like you are doing it once and you are done. Also I had to delete and recreate my lun in order to switch to flash otherwise it wasn’t working with some data on it. Am I doing something wrong?
The article went out when VSAN 6.0 was released. Things have changed for VSAN 6.2 with the new assistant allowing to group per model (or capacity)when creating VSAN cluster http://www.vladan.fr/vmware-vsan-6-2-new-assistant-check/
I am assuming by what I heard that main use is for ESXi to use HDD datastore as SSD cache.
However is there anyway to add this disk to a VM and have it be recognized as an SSD by lets say ubuntu16?
HI,
I am using esxi 6 and i have followed above steps noe my disk is showing as unknown disk
[root@d25:/dev/disks] esxcli storage core claiming reclaim -d naa.600605b006e90e901f6f14c11d63ecf2
Unknown Device name naa.600605b006e90e901f6f14c11d63ecf2
hello,, i have tried your tips.
but, now my device is gone, i cannot find my naa. address..
any advice ?
Same thing has happened to be. I tried this procedure and the device now appears to be gone, even after reboot.
Yep, this fucked my datastore.
Guess I’ll take this dudes advice with a grain of salt.
It’s an old post bro…