Playing with the lab sometimes break things. If you break an ordinary VM, it does not really matter. But what if the VM is a vCenter VM? Recently that has happened to my vCenter Server Appliance (VCSA) 6.5. Impossible to connect and dig into the services, to start them up. No VMware snapshot either. But I had a Nakivo backup, as, during that time, my vCenter server VM was backed up by Nakivo. (Note if you're IT pro, you can ask for NFR VMware backup: Free NAKIVO NFR).
But how to do, if you actually rely on vCenter to give you the inventory of your infrastructure? You can't possibly restore vCenter to itself. Can you? Well, you can, as there is a workaround, which I'll walk you through so today's post is called How To Recover a vCenter VM if vCenter Is Down – With Nakivo.
What do we need to get started?
- You'll need to have Nakivo Backup and replication up and running.
- You'll need at least one backup of your vCenter server (so you can restore).
- You'll also need to deploy an additional temporary copy of Nakivo.
How To Recover a vCenter VM if vCenter Is Down – With Nakivo. The steps
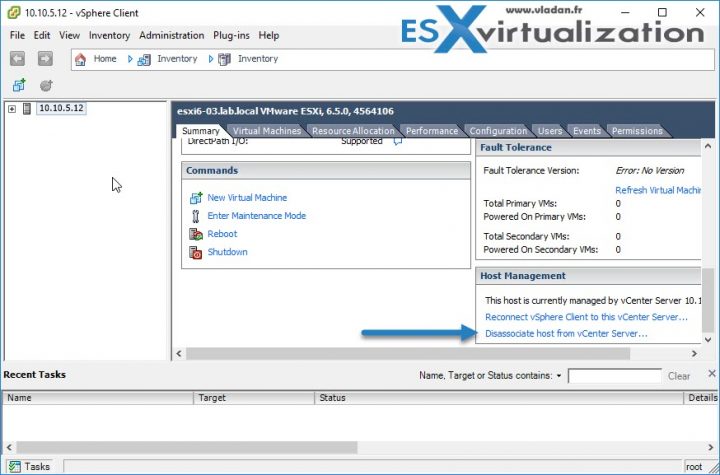
Step 1 – I assume that your vCenter is definitely lost, you don't want to bother a rebuilt one and do a lot of manual tasks to have it back online. So, connect directly to the host where you want to restore the vCenter VM. You can do that via the old C# Windows client. Select the host > Dissociate from vCenter server.
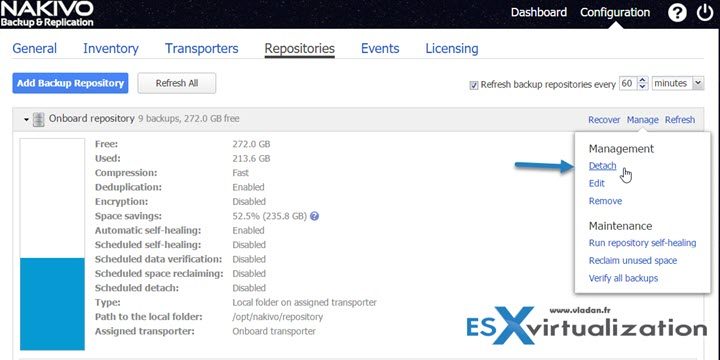
Step 2: Detach the backup repository (Onboard or remote) from your main Nakivo Backup program.
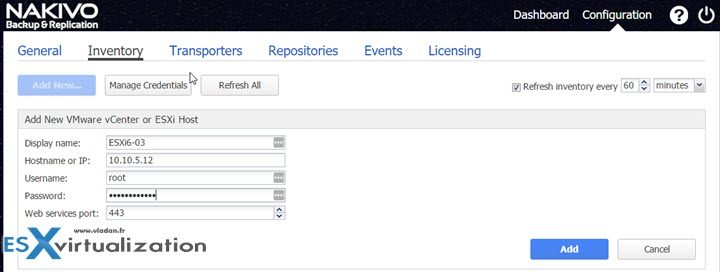
Step 4: Then go to the temporary copy of Nakivo that you just installed and configured.
Add the ESXi host which was running your broken vCenter VM (in my case it's ESXi-03.) and where you want to restore.
Step 5: Now here you can have 2 use cases depending on the repo type:
- Nakivo Local Repository – Import the remote repo from your main Nakivo installation
- Nakivo Remote Repository – Import from the remote repository.
Screenshot showing the importing the local repo of the Main Nakivo installation.
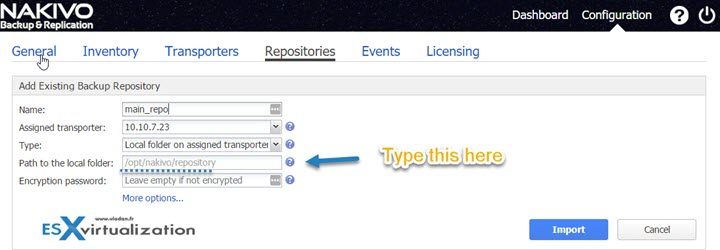
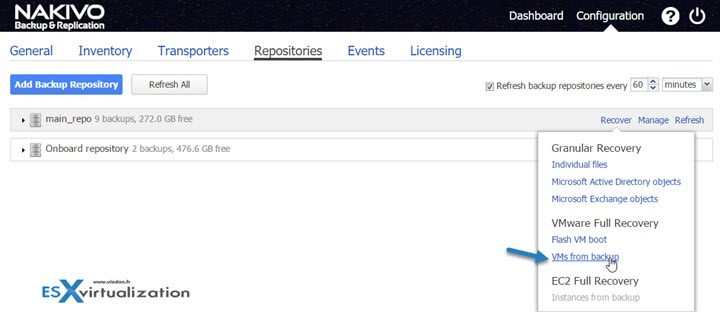
Step 6: Start the assistant to recover the vCenter VM via Configuration > Repositories > Choose the imported repository (in my case I named it “main_repo”).
What an unusual way to start recovery of VMs right? Yes, true, but it's because there is no backup job at the moment and if there are no backup jobs, you don't have a possibility to create recovery jobs. Logical.
Then specify the location (host, datastore, network…)

And then the job options…. Make sure to click the Advanced option where you can
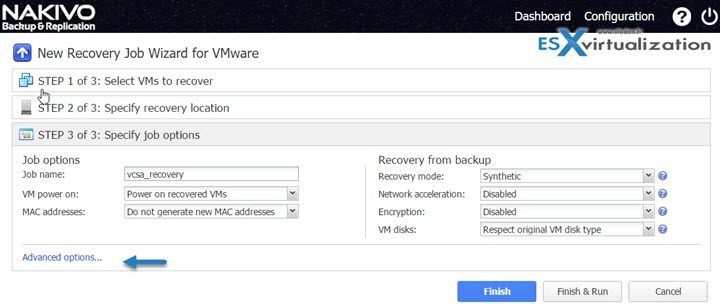
specify an option to keep the original name

Click Finish & Run to start the recovery.
Currently, Nakivo could backup and restore my VCSA 6.5 VM. During the time of writing, I have no certitude that Nakivo officially certified their solution for vSphere 6.5 or if any patches are necessary.
If you're using their product in production, please check with them concerning the compatibility with the latest version of VMware vSphere.
Hope you liked my little post and it helped you to recover your vCenter VM!
More posts covering Nakivo Backup and Replication:
- Nakivo Distributed Deployment – How it works?
- Nakivo Backup and Replication v6 Released
- Nakivo Backup and Replication 6.0 Look and Feel
- Nakivo Flash VM Boot and how to configure and use
- How To Recover a vCenter VM if vCenter Is Down – With Nakivo [This Post]
Stay tuned through RSS, and social media channels (Twitter, FB, YouTube)
Source: Nakivo Help Center

Hi Vladan
First of all, your blog is great!
Recently I came across the same problem, a faulty VCSA and tried to restore it from a recent backup.
After some digging on Nakivo forum I found the steps that you are mentioning on this post.
But after reading the article, for me it didn’t make sense that I had to install a temp copy of Nakivo to restore a vCenter VM. So I started testing a theory I had.
This is what I’ve done:
1 – Disassociate one of your hosts from vCenter server.
2 – Remove backup job, retaining the backups.
3 – Remove vCenter from Nakivo Inventory.
4 – Add you host to Nakivo
5 – Go to Repository and select the VM you want to restore and select the host as target.
6 – After the restore is complete and vCenter is up and running, remove Host from Nakivo.
7 – Add Host to vCenter.
8 – Add vCenter to Nakivo and recreate job. It should recognize you’re previous backups.
Presto! Worked like a charm for me! 🙂
Keep up the good work and you’re great posts!
It looks like you just discovered another workaround -:). Thanks for sharing.