today we'll go and see the steps which need to be done in order to migrate file shares from our old server to a new one. This post will teach you How To Migrate Shares and Files with ease by using Microsoft Storage Migration Service.
This is part 2. Please read the Introduction post – How To Migrate Shares and Files with ease by using Microsoft Storage Migration Service – where we talk about the system requirements, firewall requirements and overall architecture.
The fact that you're able to transfer shares, files, including permissions and attributes, then cut-off without interruption, is very convenient. During the cut-off phase, a final copy will be executed and Rename the source machine will be done. Also, a change of the IP of the source machine, rename the destination device with the name of the source device and set the IP address of the destination device with the information of the source device.
When you first connect to the Storage Migration service, you'll see a small informative window showing the workflow. So there is a 3 part work to do. First, job creation, then data transfer, and then a cut over to the new servers.
You can close that window.
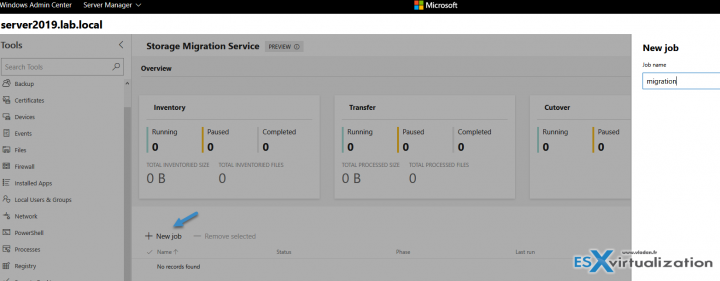
Click the New Job button to create a new migration job. As you can see, you can have several migrations running at once, or one after another, and follow all that through the dashboard.
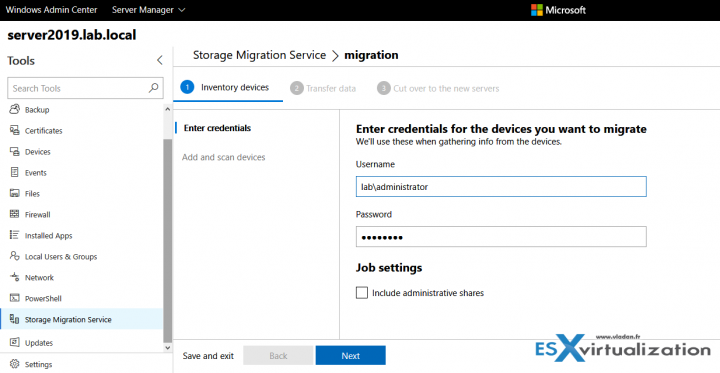
Then you'll need to enter the credentials for the source. Those credentials will be used when gathering info from the devices. You also have an option to include administrative shares. In our test we don't include administrative shares.
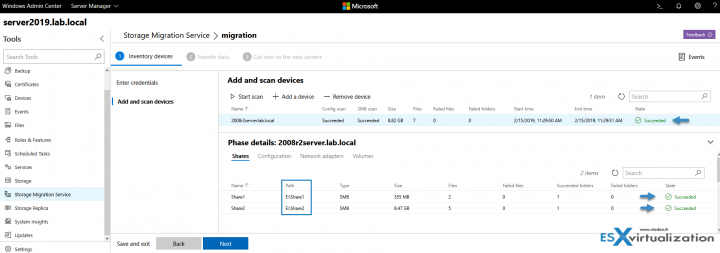
Next step is to add a device. Enter the source server, the source device in FQDN format and click the OK button.
The source server is discovered and after clicking the Start Scan button, the shares, and all details will be discovered.
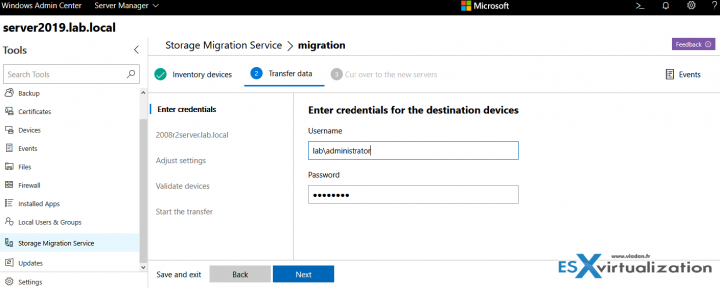
Let's follow the workflow and Click the next button to enter credentials for the destination devices.
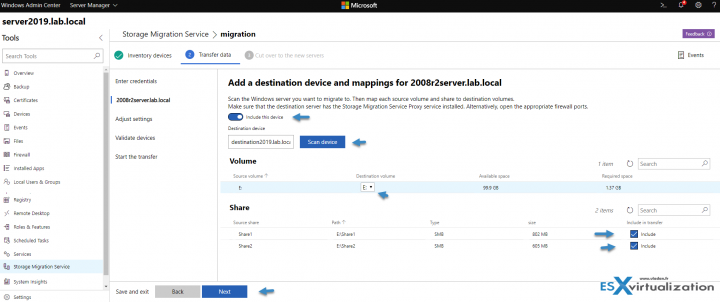
Then add a destination device and mappings. Click the Scan device button to launch the discovery. Chose the volume where you're willing to copy the shares.
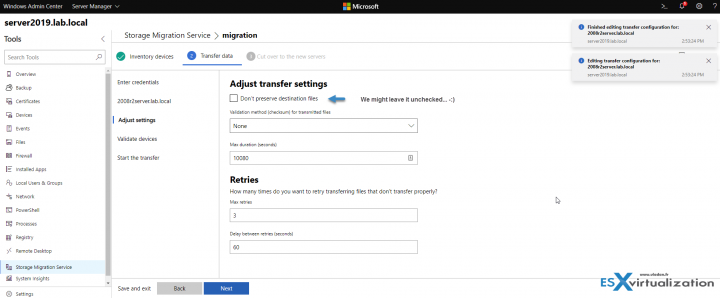
You have the option to “Don't preserve destination files” but we might leave it as if for now as we don't want that the system deletes the files right after the end of the copy.
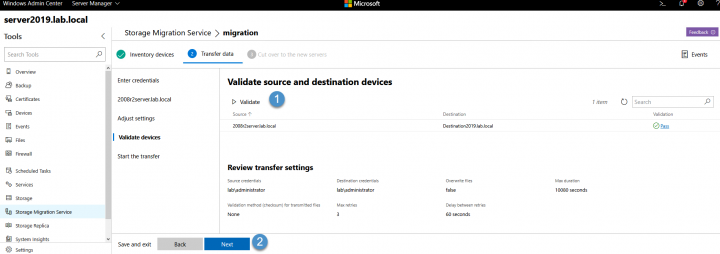
Then we have a validation source and destination window where we review the transfer settings, the source, the destination…
And on the next screen, we can finally launch the transfer.
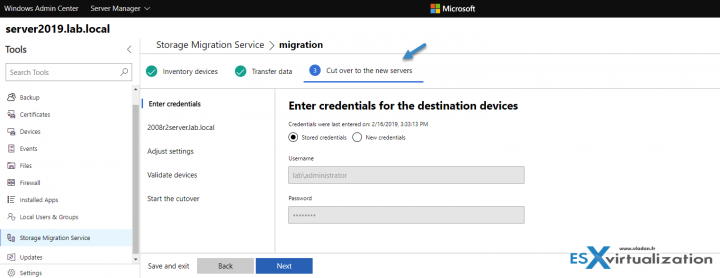
The Cut Off process
What's happening during this process?
- There is a final copy between source and destination
- Rename the source machine and change the IP address of the source machine
- Rename the destination device with the name of the source device and set the IP address of the destination device with the information of the source device
The Orchestrator truly holds the correct name….
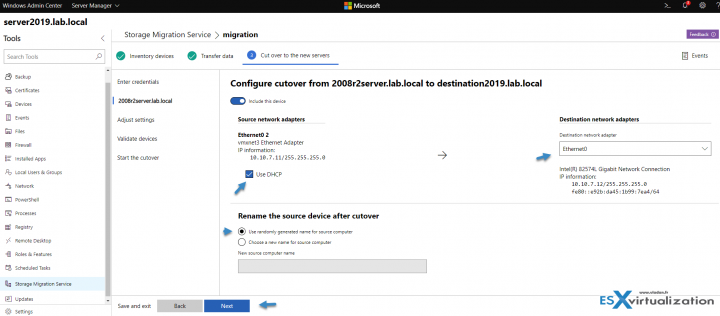
Then I ticked the DHCP check box and picked up the network card at the destination which will inherit the source's IP address.
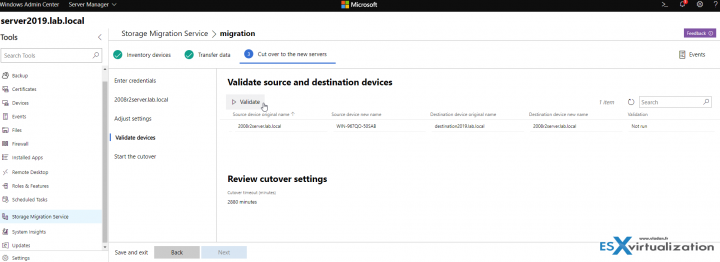
then click next and Validate the cutover. Once validated, the Nexb button will become available…
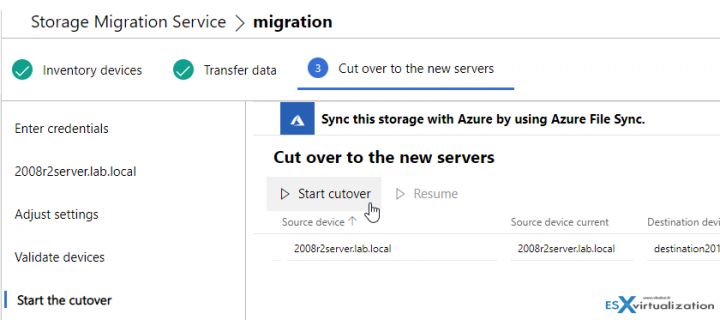
And then start cutover….
We can see that the orchestration started, restarting the source computer is the second phase … (the first was a final copy).
And we can also see the different phases
Now you should review the old server and new servers whether the copy and cut-off went ok. The decommissioning of the old server(s) is finished. You have successfully copied all and fell over to the new server.
Part 1: How To Migrate Shares and Files with ease by using Microsoft Storage Migration Service
Final Words:
Microsoft Storage Migration Services is a really useful feature of Windows Server 2019. Not only it allows you to inventory multiple servers and their data, but also seamlessly migrate to the new server(s), including a cut-off with rename old server where the new server take the old server name. Your end users won't see any change.
You have a single console to manage multiple migrations. While the destination server does not needs to be Windows Server 2019, there is a benefit of faster transfers due the fact that you activate the Storage Migration Service Proxy feature.
Microsoft Storage Migration supports migrating from Windows Server 2003 and later operating systems. It cannot currently migrate from Linux, Samba, NetApp, EMC, or other SAN and NAS storage devices, but I'm sure that it will be added in one of the future releases.
Also, migrating from the NTFS to REFS file systems isn’t supported. However, you can migrate from NTFS to NTFS and ReFS to ReFS.
More from ESX Virtualization
- What is VMware Skyline?
- VMware Transparent Page Sharing (TPS) Explained
- VMware Virtual Hardware Performance Optimization Tips
- What are VMware Learning Credits?
- StarWind Virtual Tape Library (VTL) for Veeam and AWS further details
- What Is Nakivo Transporter?
Stay tuned through RSS, and social media channels (Twitter, FB, YouTube)






Hi everyone and thanks Vladan for the article!
At the scanning phase, the only way I have is to scan the entire source server? Could I scan only a share (something like \\servername.domain\share in the device name)?
Thanks for any help you could provide.
Fabrizio.