Zentyal is a lightweight Remote web based GUI for Ubuntu servers. The company in addition to a paid version with 3 years of suppor, also has a free community version, with limited support only (forums). The release 3.2 is in preparation, will be out in september and focuses on Samba 4.0 integration. The main features in the 3.2 version of Zentyal are GPO support, external AD authentication/SSO, Contacts and Distribution lists support and Multiple OU support via Zentyal UI. A lot of stuff to explore if you're looking to get out of single vendor lock.
Update: Check out Zentyal 4.0 and how to get VMware tools running inside the VM

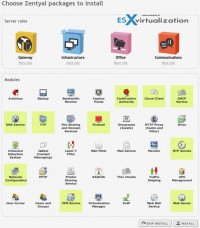
Zentyal Server Features
- Gateway: transparent caching, load balancing, traffic shaping, content filtering…
- UTM: firewall, IDS, VPN management, antispam, antivirus, …
- Infrastructure management: DHCP, DNS, NTP, certificates, …
- Office server: LDAP, PDC, file & printer sharing, backup, groupware, …
- Unified Communications: email, IM, VoIP
- LDAP replication and Windows Active Directory synchronization
If you're a pure Ubuntu Server user, you can install Zentyal as add on package. Ubuntu server otherwise don't come up with GUI – graphical user interface – which would allows some kind of easy remote administration. You can technically install other known GUIs like Kubuntu or Gnome, but those might opens other network ports which you certainly want to avoid in order to stay as secure as possible. Zo using the Web based Zentyal add-on might convince you to try Linux after the abandon of further Webmin development.
It's possible to install Zentyal in two different ways:
By Installing directly by using the Zentyal ISO (download here) – in this case you use pre-packaged Ubuntu distribution with Zentyal baked in.
- By installing Zentyal after setting up your Ubuntu server – It allows more personalization ( but as for now only the 2.3 of Zentyal is supported on Ubuntu 12.04)
The first one is very well documented on the Zentual's website and it's the way to go, as it has also all the dependencies. This easy setup very well documented on https://doc.zentyal.org/en/installation.html.
Installing Zentual from scratch on Ubuntu Server 12.04 VM.
After the creating a new Ubuntu server VM, first thing to do is to install VMware Tools. To do it on Ubuntu Server with only a Command Line Interface might be hard for folks not using Ubuntu Linux on daily basis, so I detailed the steps here:
- Step 0 – be sure to select the right OS when creating your Ubuntu server VM. I assume you know your way through the installation process.
- After Installation finishes, Right click the VM > Install VMware Tools (this mounts the CD)
- Login and run those commands:
sudo mkdir /mnt/cdrom
You'll get prompted for a password, enter your Ubuntu admin user password.
- Run this command
sudo mount /dev/cdrom /mnt/cdrom or sudo mount /dev/sr0 /mnt/cdrom
Depending of the version of VMware tools the numbers can vary, so type that (use TAB key to auto-complete):
ls /mnt/cdrom
tar xzvf /mnt/cdrom/VMwareTools-x.x.x-xxxx.tar.gz -C /tmp/
cd /tmp/vmware-tools-distrib/
sudo ./vmware-install.pl -d
Note: The -d switch accepts the defaults, so you don't get all those prompts for default paths and so on……
- Wait for the installation to finish and tun this command to reboot the virtual machine after the installation completes:
sudo reboot
How to Install Zentyal in Ubuntu Server (12.04)
You need to add the Zentual repositories first and then get those files from the online repositories. There is a single line of code to copy-paste:
sudo apt-get install -y python-software-properties && sudo add-apt-repository ppa:zentyal/3.0 && sudo apt-get update
Then you can install just the core files and the common librairies:
sudo apt-get install zentyal
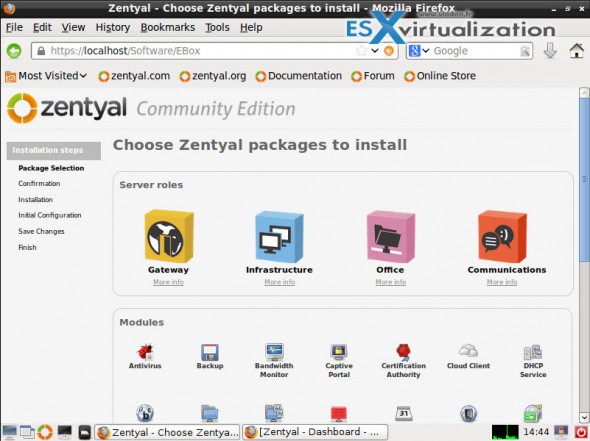
And then continue the setup through the web interface. To access Zentyal web interface, browse into https://localhost/ (or the IP of your remote server). Zentyal creates its own self-signed SSL certificate, you will have to accept a security exception on your browser.
If you want a company support, its possible, since they also provide supported (paid) versions. Zentyal provides 3 years support (security and important bug fixes) for each major stable release. Zentyal Server major stable versions are released every September.
Note that if you want to be running the version 3.0 of Zentyal, you would probably go with the baked in version and installed from the ISO. The setup process is basically the same, but you'll still have to install VMware tools if you're running Zentyal as a VM.
Links:
- Zentyal Roadmap 3.2
- Zentyal 3.0 Details Read Me
- Ubuntu 13.04 remote administration page
Hopefully you discovered powerful tool for remote Ubuntu Linux administration. Stay tuned for more news and articles from ESX Virtualization. Feel free to Subscribe via RSS.


