First, I'd like to talk about PowerShell Core which is a module that can run on different platforms. Yes, It is a cross-platform version of PowerShell that is based on .NET Core, and this is an open source application. (Note that the “traditional”, built-in version of PowerShell is NOT open source and it is based on .NET Framework). But in this post, we'll take a plunge and install VMware Management Framework, which is very popular within VMware admins, and which is called PowerCLI.
The PowerShell Core is freely downloadable from Github and can run different platforms: Windows, Linux, and Mac OS. Microsoft will continue to release bug fixes for PowerShell on Windows but there will be no more new features introduced. In short, PowerShell Core is the future and is embraced by Microsoft.
And for VMware admins like you or me, this allows you to manage VMware vSphere environments from Linux or Mac OS with PowerCLI.
But let's get back to our small tutorial where we want to teach you How To Install VMware PowerCLI via PowerShell.
How To Install VMware PowerCLI via PowerShell
First, check the version of PowerShell you're running. You can be on Windows Server 2012 R2, 2016 or Windows 8, 10…. so checking and installing the latest version of PowerShell BEFORE installing VMware PowerCLI is perhaps the best way of doing it.
Open an Admin command prompt and type:
PowerShell
Then type:
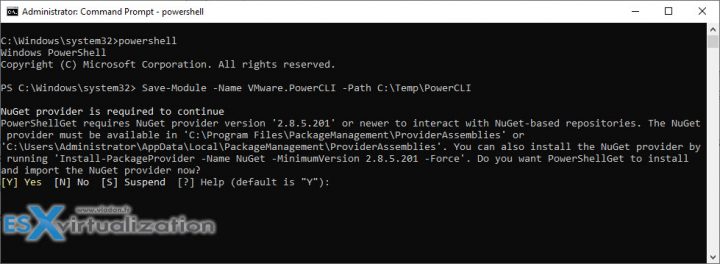
Save-Module -Name VMware.PowerCLI -Path C:\Temp\PowerCLI
A small hint:
Hint: You can copy this directory with all the modules to a USB key and use it for installation onto a system whcih does not have an internet connectivity. Yes for “Offline” systems.
You'll get a prompt to install NuGet-provider. Click Y to do so.

This will install the NuGet-provider which is necessary.
Note: You must first create the c:\Temp\PowerCLI folder
Then repeat the above command once again (simply hit the top arrow on your keyboard and then enter) or re-paste the command in to the PowerShell window once again. VMware PowerCLI modules will start to download, one by one. In total, there is over 500 Mb of files…

Then enter this command:
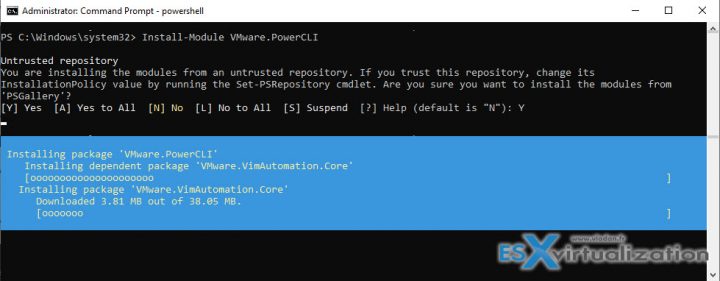
Install-Module -Name VMware.PowerCLI
And click Y to validate

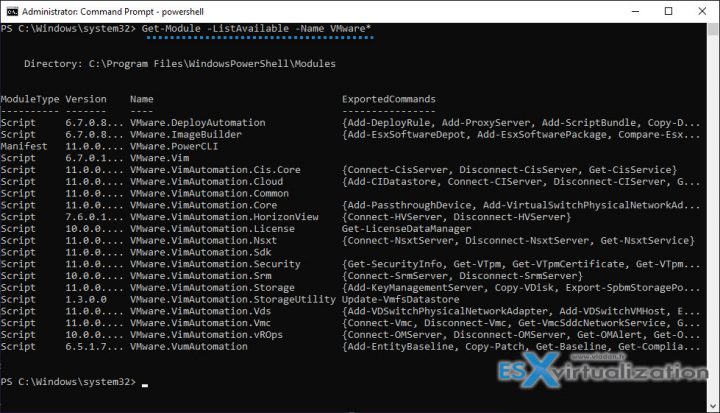
You can also check which modules are installed..
Get-Module -ListAvailable -Name VMware*
And you'll get a list.

One last point:
VMware has increased security with untrusted SSL certificates so in order for you to bypass this thre is one more command to run:
Set-PowerCLIConfiguration -InvalidCertificateAction Ignore
Here is the view.

And only after that you can run the usuall VMware command to connect to your vCenter server:
connect-viserver
and then
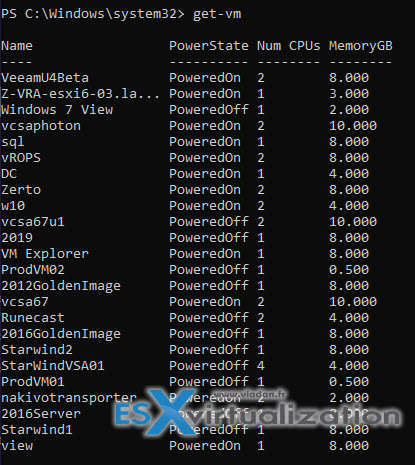
get-vm
to list all your VMs (for example)

Well, this is it. We have installed VMware PowerCLI from within PowerShell.
Note: If you want to install PowerShell Core, you'll need to pull down the installation package from the official Github repository, which you can find here: https://github.com/PowerShell/PowerShell
I'm not a scripting guy. The scripting guys might find it perhaps to easy, but for someone just starting with VMware technology or for someone who isn't scripting guy like me, this tutorial might be handy. At least I hope so….
If you're new to VMware you may want to start with some simple tutorials, right?
- Install and Configure VMware vCSA 6.7
- Top 3 Free Tools To Create ESXi 6.7 Installer USB Flash Drive
- What is The Difference between VMware vSphere, ESXi and vCenter
Where to find the cheapest version of VMware vSphere?
Shop for vSphere licenses at VMware Store:
- vSphere Essentials Term (for time-limited period – 1 year ) | vSphere Essentials (lifetime license)
- vSphere Essentials Plus Term (for time-limited period – 1 year) | vSphere Essentials Plus (lifetime license)
Essentials Plus which has vSphere High Availability, is an obviously better choice. Because, if you have an unplanned hardware failure, vSphere HA can restart automatically those VMs which failed with the host. Those VMs are automatically restarted on other hosts which are part of VMware cluster.
There is small downtime during which the system figures out which host has failed and which are the hosts that are able to start the failed VMs. Once this automatic decision is taken, the VM boots up. The whole process is completely automatic and acts without the admin’s intervention.
Requirements of vSphere HA?
- A shared SAN/NAS storage
- Pingable Gateway
- VMware vCenter Server (part of Essentials and Essentials Plus bundles)
vSphere Tips:
More from ESX Virtualization
- What is VMware vSphere On-Disk Metadata Analyzer – VOMA
- VMware PowerCLI 11 Released – Get Your Copy
- Free Tool – HammerDB Benchmark Tool New Release
- What is VMware vCenter Convergence Tool?
- VMware Desktop Watermark Free Utility is Similar to BgInfo
- What is VMware vSphere On-Disk Metadata Analyzer – VOMA
Stay tuned through RSS, and social media channels (Twitter, FB, YouTube)

in order to uninstall all the modules to perform a clean update, i used this command:
>Get-Module -ListAvailable -Name VMware* | Uninstall-Module
this will fire many dependencies alert… i’ve run it many times until all the modules have been uninstalled and the command suceeded.
After that i tried a fresh install with
>Install-Module -Name VMware.PowerCLI
but it did not suceeded.
It would be nice to have a tutorial for upgrading also 😉