In the previous post, we have successfully Installed Zerto in our VMware vSphere environment. Since we only have a single site we have activated replication to self. Now that all this is nicely up and running, we can start moving forward. Here is coming what's called VPG (Virtual Protection Group). In this post we'll get all details about How-to Create Virtual Protection Group (VPG) In Zerto and start protecting your VMs.
Zerto Virtual Protection Group (VPG) groups your VMs together (or it can contain single VM only) and those VMs gets replicated to another site/another host. Think of it as an envelope which contains your VMs.
Why would you choose to replicate some VMs together you may ask? It's because you certainly need data in sync. Let's say you have a multi-tier application which has web servers, load balancers, backend DBs. Or a couple of domain controllers…. You certainly need to protect them together. By having them in the same VPG it does ensures consistent recovery points (RPOs) across all grouped machines. VPG has to have at least one VM, but you can add more VMs later.
How-to Create Virtual Protection Group (VPG) in Zerto
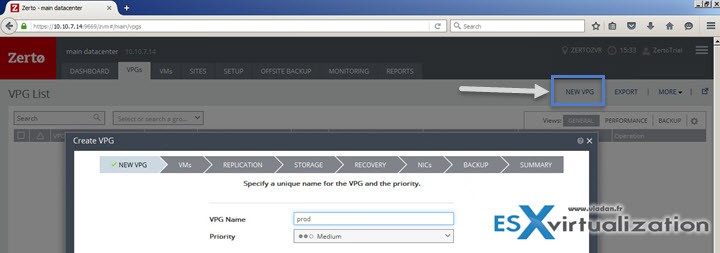
Open Zerto virtual manager and go to the VPGs tab > New VPG
Nice assistant page opens. Note it's layered page (not a pop-up another browser window).
Select priority. The priority is important when you have more than one VPG created. High priority VPG have the most priority concerning bandwidth when there is resource contention. (not enough bandwidth). So High priority VPGs have more bandwidth than Medium. The same between Medium and Low…
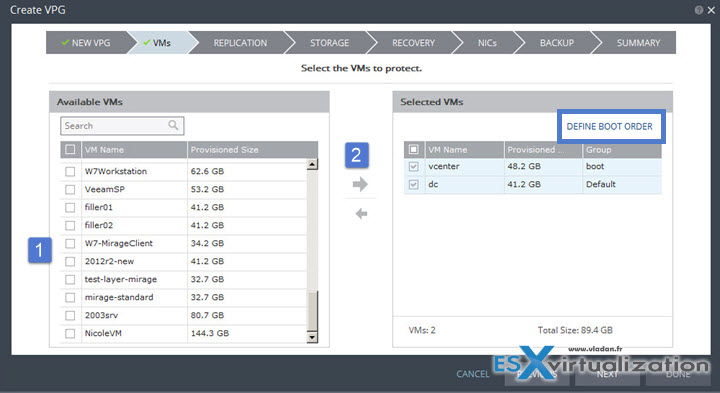
Next step is to put VMs into the VPG. Simply check the box next to the VMs you want to protect > Click the right arrow > done.
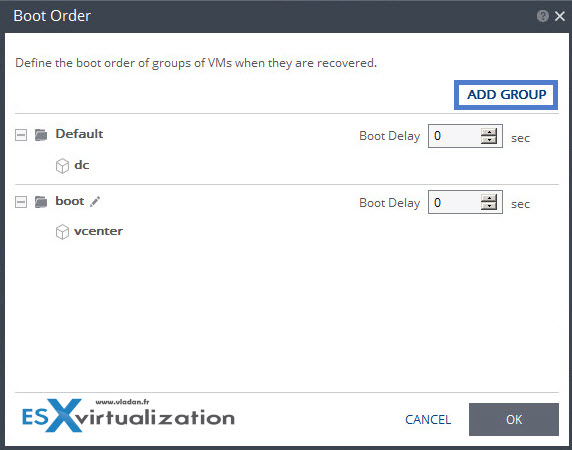
You may define a boot order to have those VMs booting up in the correct order. In order to do this Click the Define Boot Order link > Add Group. Then simply drag-and-drop the VM to the good position….
You have a possibility to setup a boot delay as well….
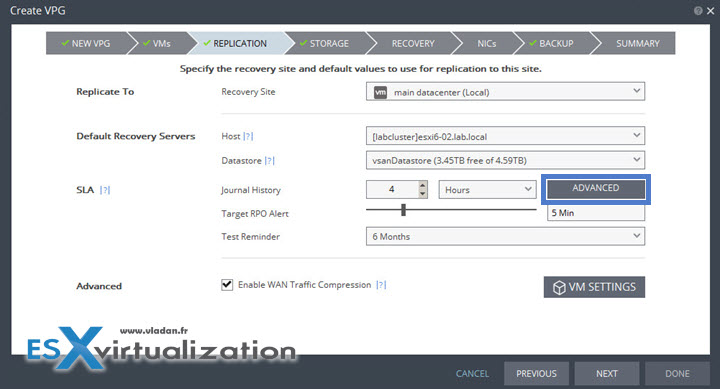
Next step we need to chose where we replicate. In our case we only have single site so its the same (main datacenter).
By clicking the Advanced button next to the SLA, you can define advanced journal preferences:
- Default journal datastore – the datastore used for each VMs journal data
- Journal size hard limit – maximum size of the journal. (this can be unlimited, percentage or size in Gb).
- Journal size warning threshold – this triggers a warning message when reached.
Next step defines storage. Do you want to go thin or thick? Where do you place your swap? Thin is the default…
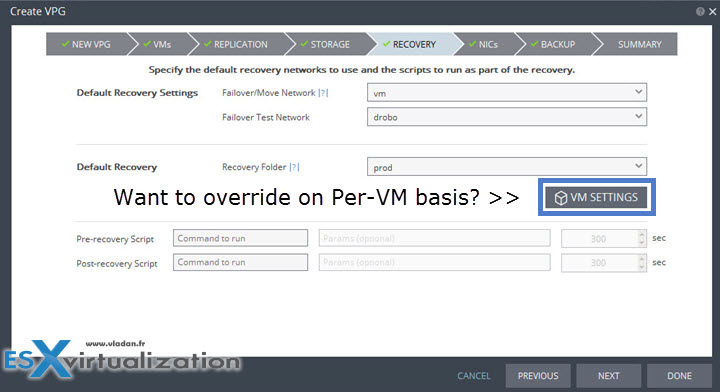
Recovery settings – Failover network (this is the default network used for failover). You can override the VPG settings and define diferent recovery folders on per-VM base by hitting the VM settings button.
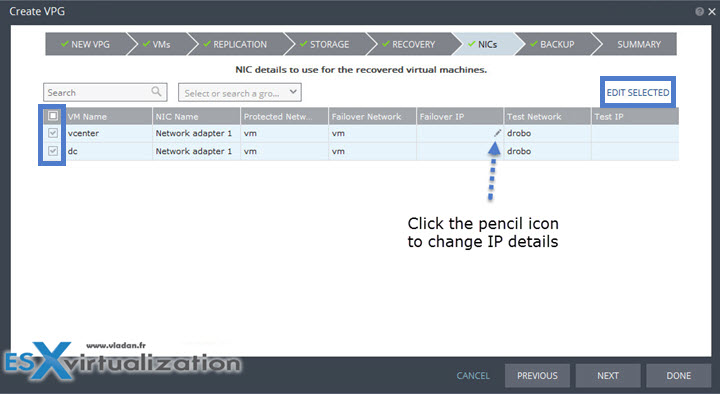
Next – NICs (re-ip is necessary?). This is the place …. You can do it two ways:
- Clicking the pencil icon you modify the Failover IP on per-VM base
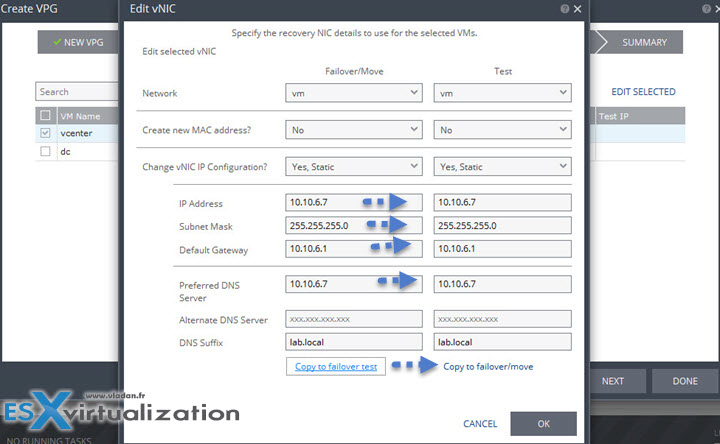
- Checking the boxe next to the VM and then clicking Edit Selected you bring another window (bellow this one) where you can work on those IPs for selected VMs at the same time
so you can change the IPs for failover/move and test. Note that there is a link below which allows copying IP config from one to another … time saver -:).
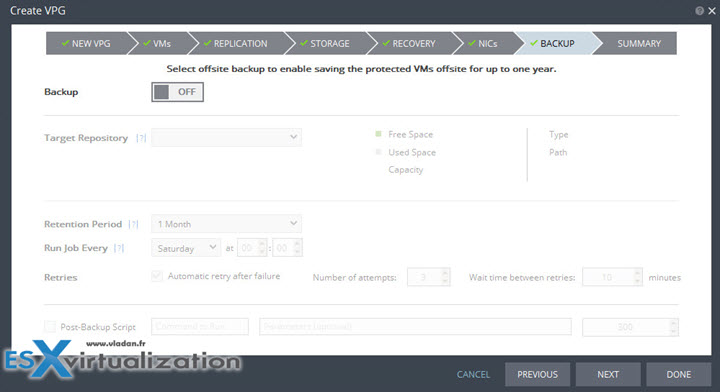
Next page shows Backup. For now let's leave it as OFF. We will get back to this feature in our next post as it's interesting.
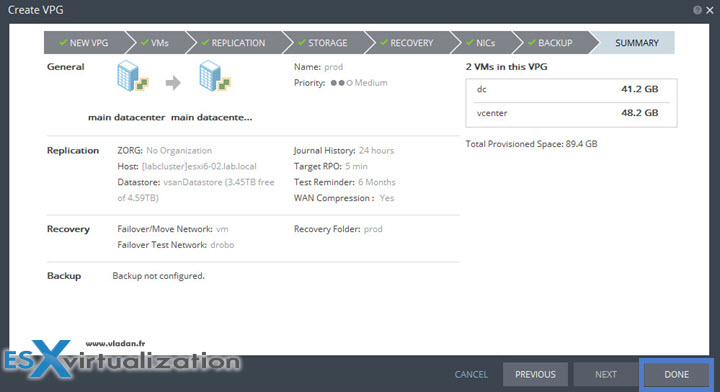
Last Screen – a recapitulation page. You can see all details (with graphics). The VMs on the right, Journal history, target RPO, hosts/datastres ec…. By clicking the Done button you succesfully created your first protection group!
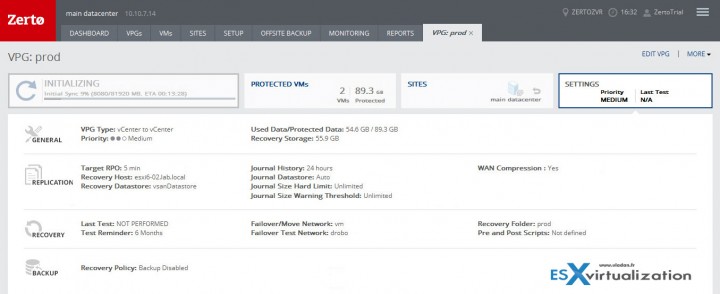
Right after the VPG opens as a new TAB (which is “closeable”)…. The INITIALIZING area is selected by default….
You can select the PROTECTED VMs button… which shows which VMs are being protected
Or the Sites button which shows nice graphical screen
And also the SETTINGS button showing the setting of this VPG…
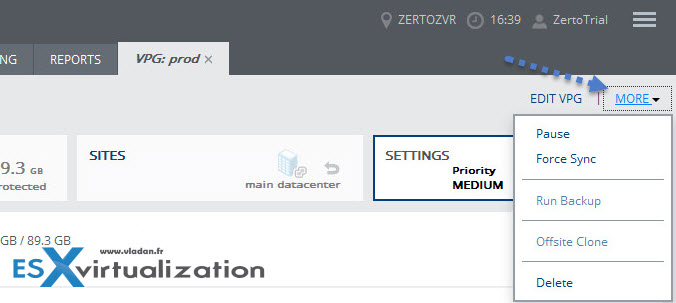
On the right hand side you have a MORE link allowing you to do more actions related to the VPG
- Pause
- Force Sync
- Run Backup
- Offsite Clone
- Delete
Next to the MORE link there is EDIT VPG link which brings the assistant window that we just completed. Done! You're protected replicating from one site to another or from one site to the same site (another host/cluster).
The navigating through the product is a real pleasure. The web UI is fast and responsive. If you don't like vSphere web client you'd love Zerto web UI. One of the next post will talk about backups within Zerto, but we will obviously cover the main part which is failover and failover tests. Stay tuned!
Zerto Serie:
- Zerto Virtual Replication Lab Deployment
- How-to Create Virtual Protection Group (VPG) In Zerto and start protecting your VMs (This post)
- Zerto Virtual Replication 4.5 adds Journal File Level Recovery and More
- How-to Configure Backup in Zerto Virtual Replication
- Zerto Virtual Replication – Stay Protected even if ESXi host is in Maintenance mode
- Zerto Virtual Replication 5.0 – What's New?
Try Zerto Here.

