Connecting to the View Connection server and Creating a desktop pool
The whole series of VMware View will be finished when we're going to create our first desktop pool and connects to a desktop via the VMware View client which you'll install on your laptop for example. So in this “lesson” we'll create our first desktop pool.
What have we done so far. You could follow on VMware View 5 Install, Configure, how-to do a simple lab setup (Intro post), then we did the Database and ODBC Setup for VMware View, which was followed by How to install VMware View Connection Server and How to install VMware View Composer.
So in order to connect to the VMware view administrator console, you must do it via the https of your Web browser. So in my case my View connection server lays on the 10.10.7.14 IP so I'm gonna use the htttps://10.10.7.14/admin as an URL in order to establish the web browser connection to the broker and do the initial configuration through the flesk interface. (If your browser does not have the Flash plug-in installed you'll be prompted to go to Adobe and download/install this plug-in).
Just to let you know, yesterday, Adobe has announced that they're stopping any future development of Flash in browsers, so I guess that VMware will transition in HTML 5 in order to keep nice and animated web-interface for their web portals. The Adobe News can be found here.
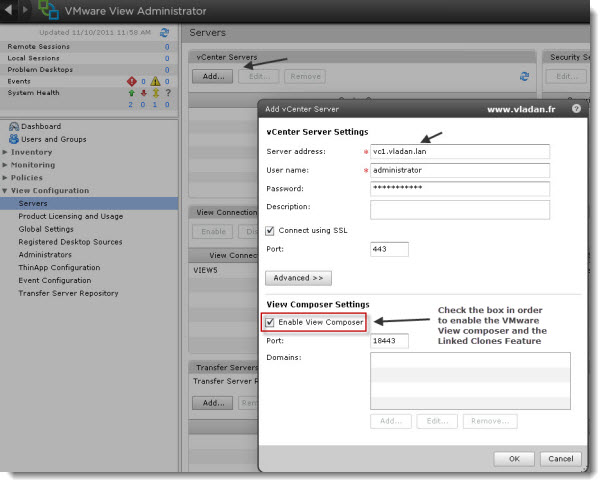
We're using domain admin account to connect to through the web-interface to do the initial configuration of VMware View Administrator. First thing we need to do (after entering the trial Serial number) is to add a vCenter Server there. We'll go to the View Configuration > Servers > Add and add the vCenter server address there followed by the domain admin account.
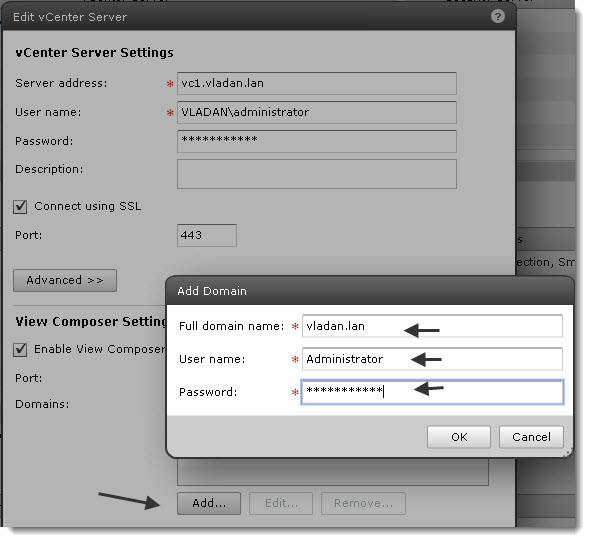
You might noticed the Add button to Add a domain is grayed out. It's because it's a 2 step process. In the first step you'll add a vCenter server. You must come back to it and then you have the possibility there to click on the button and add a windows domain. Those 2 steps are necessary to successfully hook-up to your Microsoft Domain.
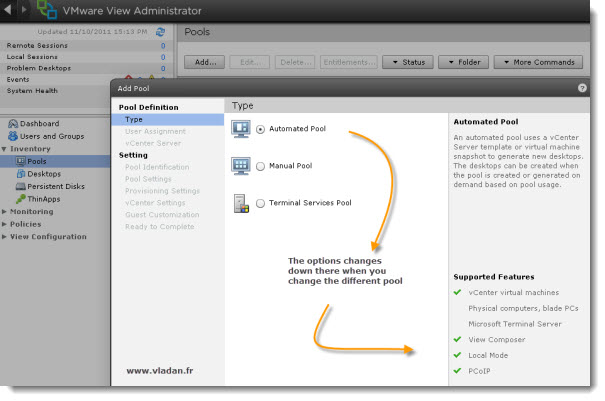
The next step would be to create a desktop pool. To do that we'll go to Pools > Add Pool. Simple.
You'll be presented with an assistant which will guide you through.
The next screen show that I took the first option here which enables the automatic desktop assignment, and each user gets it's own desktop at the first connection via the VMware View client.
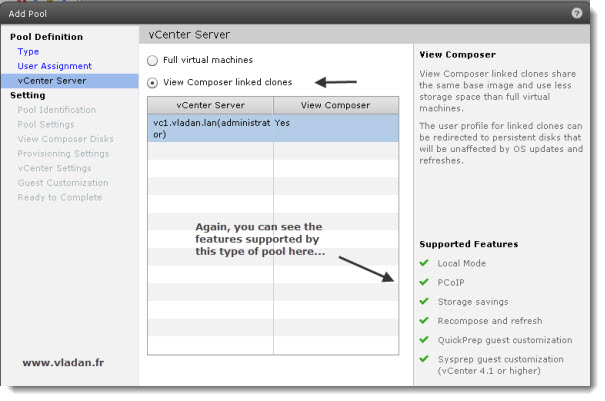
The next screen shows the selection of View Composer linked clones feature. The “holy grail” of VMware View. It saves time and space on your SAN storage. This is the feature present in the “Premier” option licensing. The Professional version lucks this and does not provide you with the VMware Composer, so you're only able to do Full Clones…. -:(.
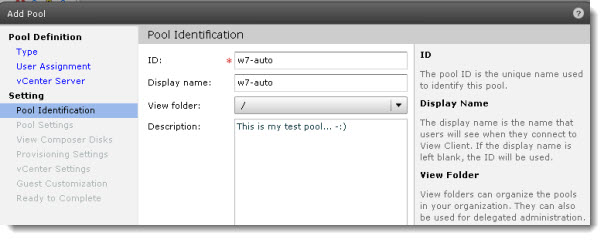
The next screen shows the naming of the desktop pool. Fairly simple…
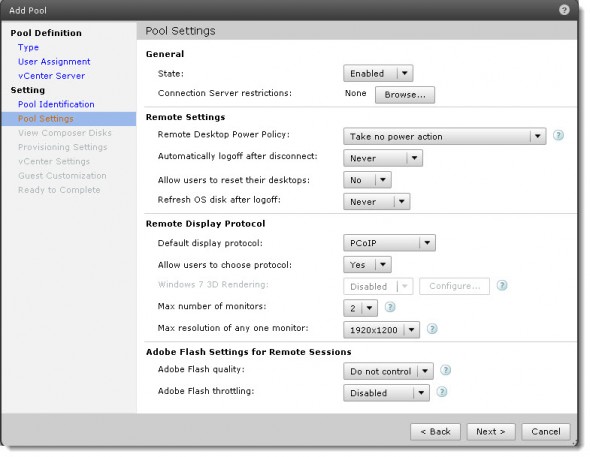
And next screen we can see the different settings for the Desktops. Some of them might be useful when implemented in production. I leave all options as a default for now….
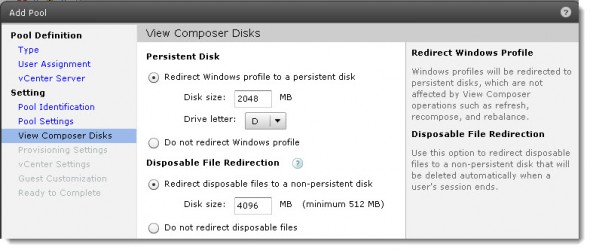
Next screen will permit you to Redirect the Windows profile and disposable files (pagefile.sys etc…..). So this options permits some base configuration.
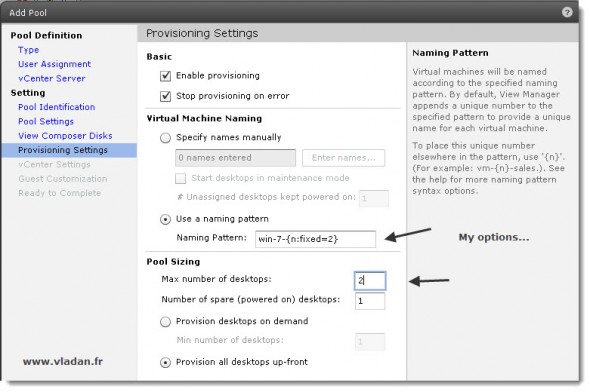
And we are approaching to the pool naming with it's naming conventions. As you can see the n:fixed=2 syntax will create desktops like win-7-01, win-7-02, win-7-03…….. nicely ordered….
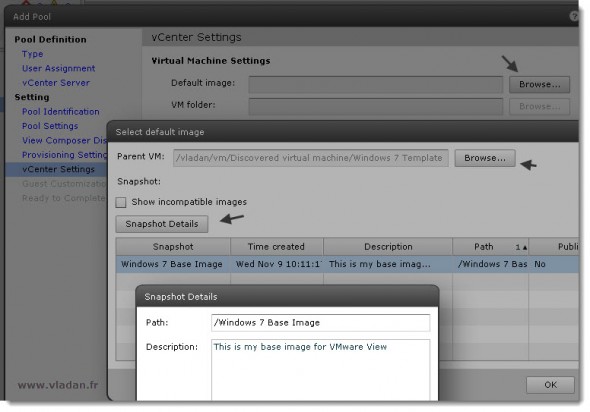
The next screen is here, where we will choose the base image which we have created in my lesson here, where we installed the VMware view Agent in the virtual desktop and created the base snapshot – How to install VMware View Agent in the Virtual Desktop plus more .
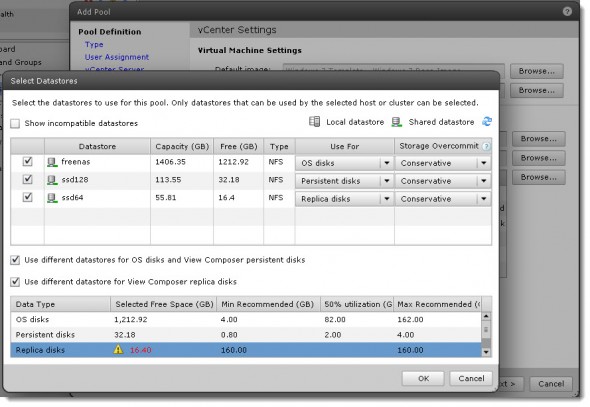
After validating the base snapshot image, you'll have to validate the Ressource Pool, AD container to store the desktops (make sure you create a new container in your Active Directory Users And computer MMC on your Domain controller) and also the storage. As you can see the storage can take advantage of SSD or High speed storage array here on placing the Replica Disks on that datastore.
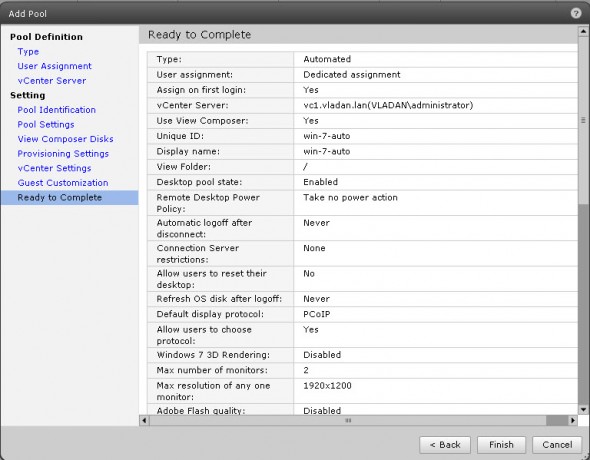
And after you'll see the final screen which validates the creation of our first Desktop pool.
And this is it. Our pool starts to populated, and if you switch now to the vSphere Client, you should see the clonning in action !
Feel free to follow via RSS or subscribe to our e-mail list.
The full serie – VMware View 5 Install, configure – How-to in my lab :
- VMware View 5 Install, configure – How to do a simple lab setup
- How to install Database and ODBC for VMware View
- How-to install VMware View Connection Server
- How-to install VMware View Composer
- How to install VMware View Agent in the Virtual Desktop plus more
- How to create desktop pool in VMware View – this post
- The first connection to a desktop pool
- VMware View – Virtual machine with Input Specification already exists error
- How to Optmize the Master Desktop Image for VMware View
- VMware View Video for SMB
- How-to configure VMware View Persona Management
- How-to remove linked clones reference from composer database video
- VMware Horizon View Connection Server SSL Certificate How-to

