In this post we'll have a look How to Backup to Azure. We'll test how the Azure backup agent installed on Windows system gets configured and what's the backup options. In fact the Azure Backup agent is very similar to Windows built-in backup utility, and allows to backup not only Windows server systems, but also client systems like Windows 7, or Windows 8.x. To setup a backup to Azure you'll need few things.
In this sample setup we'll be using a Windows 7 client, but the Azure agent which needs to be installed onto the system, supports W7, W8.x and Windows Server 2008R2 and higher. You'll need an Azure subscription as well in order to log in to the Azure portal.
System Requirement:
- .NET 4.5
Step By Step How to Backup a System to Microsoft Azure
The Azure portal has now new look and you can start the assistant from the new portal, which is has nicer colored icons etc, however then you'll get redirected to the old portal.
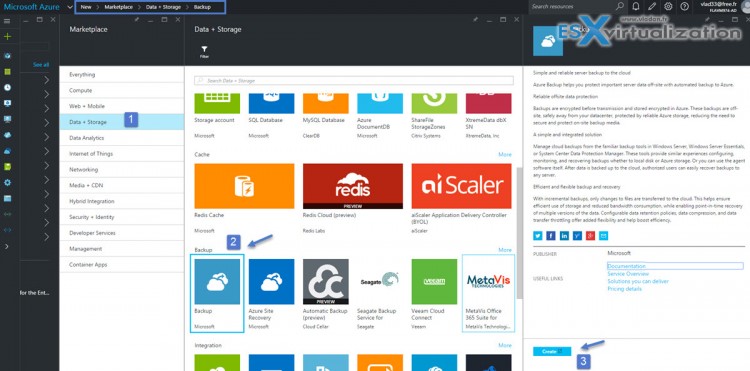
So Go to the Azure Portal page at https://portal.azure.com and then Click New > MarketPlace > Data + Storage > Backup and choose Quick Create
So as I said this will redirects you to the old portal where you'll need to create new vault. Choose some meaningful name and select location for your backups.
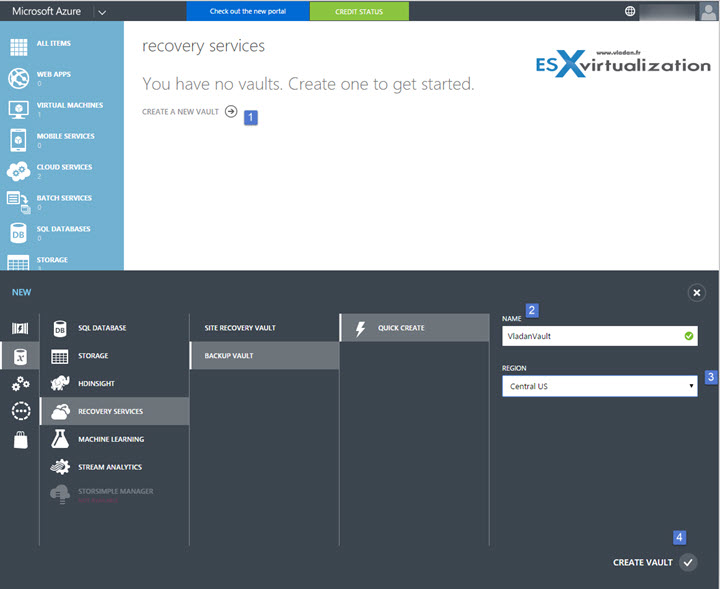
Once done you should see the progress bar and then the status shall show as Active.

So far so good… Now you'll need to click the name you gave to your vault to go to the next step… (in my case the VladanVault)
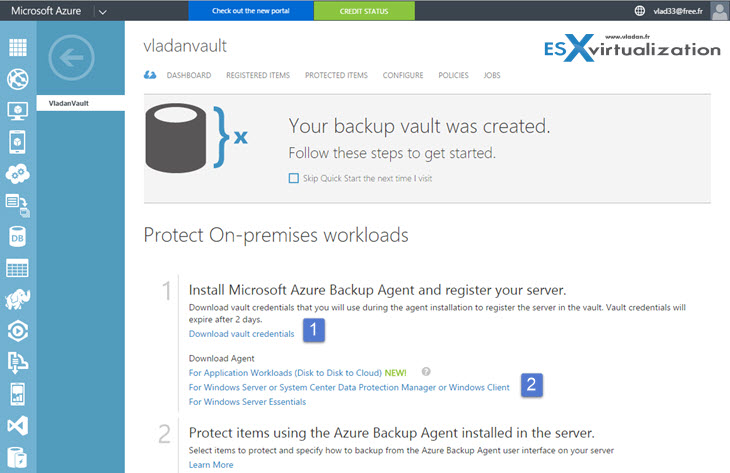
From this page you'll need to:
- Download vault credentials — From the Dashboard page in the Azure Backup vault, download the vault credentials that will be used to register the Windows machine to the backup vault.
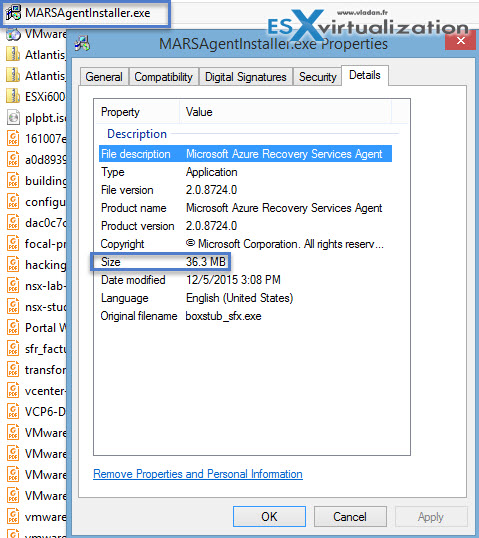
- Install the Azure Backup Agent and register the server — From the Dashboard page, click the link to download the Azure Backup agent. Install the agent, and register the server to the backup vault using the vault credentials. The name of the agent is MARSAgentinstaller.exe and it's about 36Mb in size. This is the client which will be installed in the system you want to protect.
What's the Vault credentials for?
The vault credentials file is a certificate generated by the portal for each backup vault. The portal then uploads the public key to the Access Control Service (ACS). The private key of the certificate is made available to the user as part of the workflow which is given as an input in the machine registration workflow. This authenticates the machine to send backup data to an identified vault in the Azure Backup service.
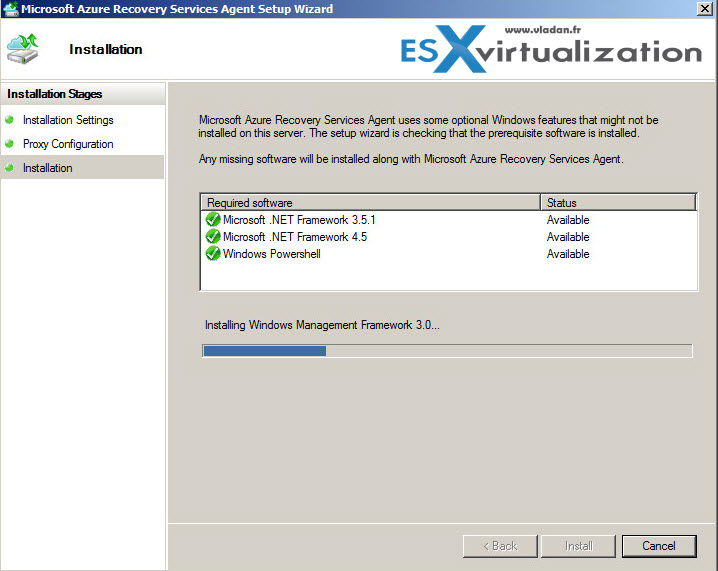
The Installation of the Azure Recovery Services Agent is next. There is nothing fancy here. Just make sure that your system has .NET 4.5 installed….
Then just click the new icon on the desktop. This will open an MMC where you'll need to click the Register Server in the Actions side bar on the right.

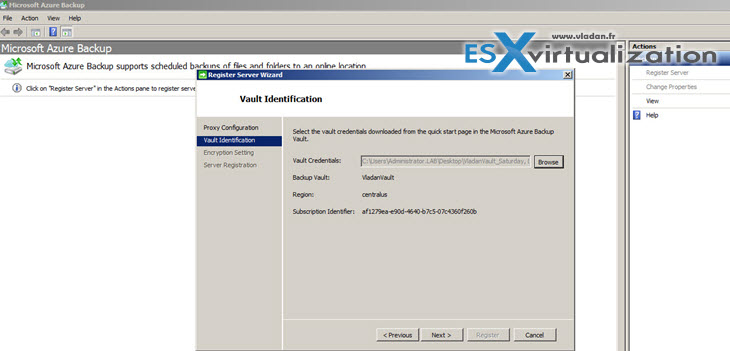
This will start an assistant where the first thing to do is to provide the credentials file. Note that in my case the credentials file was stored on network share and when I pointed to the file the first time, the system has thrown an error. This made me thinking, that perhaps I shall copy the file locally into the system. That's what I done. I placed the credentials file to the desktop and the assistant could continue.
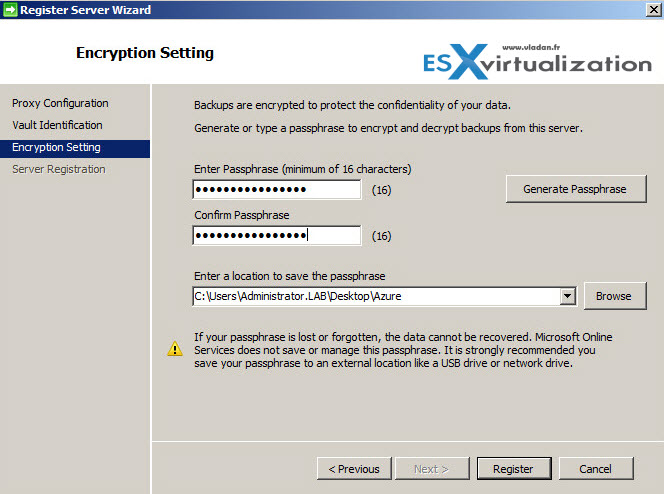
Clicking next you'll get to a page where you'll need to specify a password for protecting the backup file. It has to have at least 16 characters…
Then hitting next, the registration process starts registering the server (or client) to Azure. My system is a simple Widows 7 system joined to my local domain that I created for the occasion.

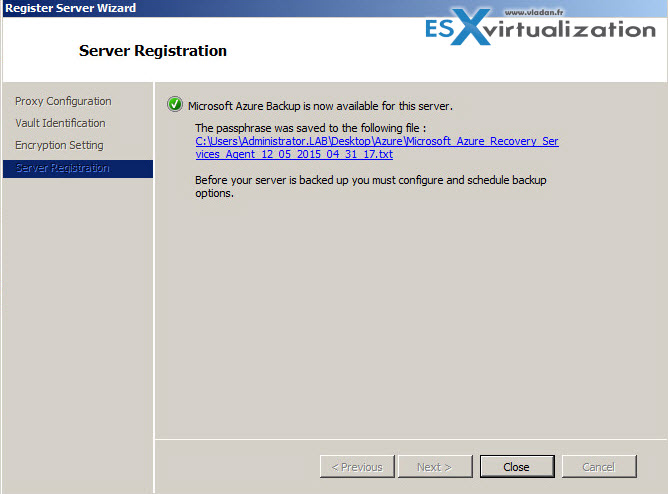
In my case everything went OK and I had this confirmation screen with the green check mark…
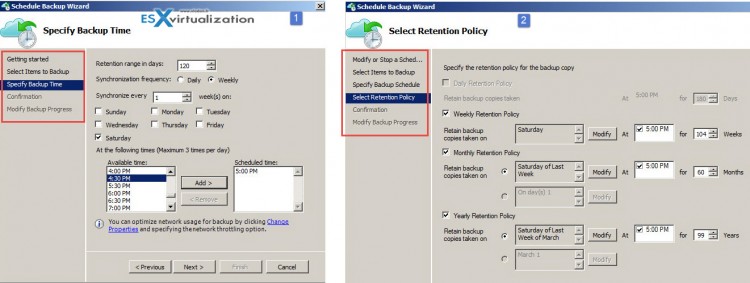
Then you need to setup a backup schedule and choose what do you want to backup…
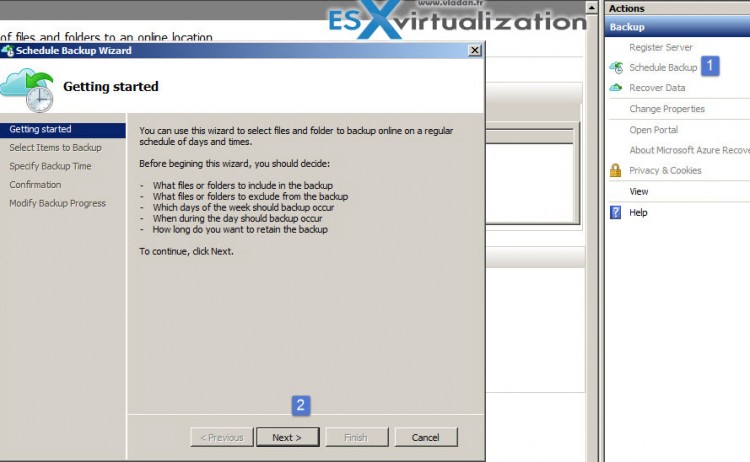
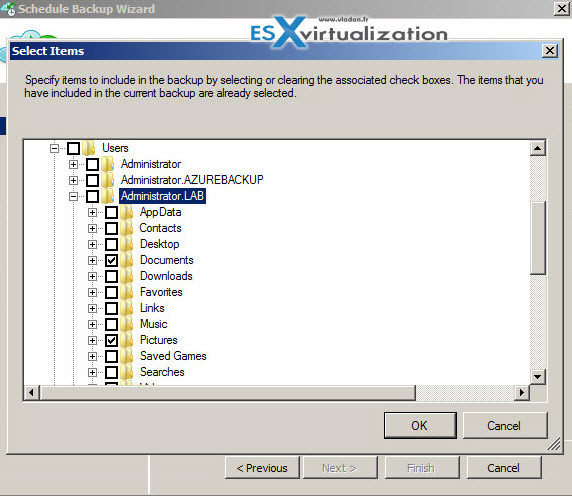
The assistant asks about folders/files you want to include in the backup… Note that there is no possibility to include things like system state or register.
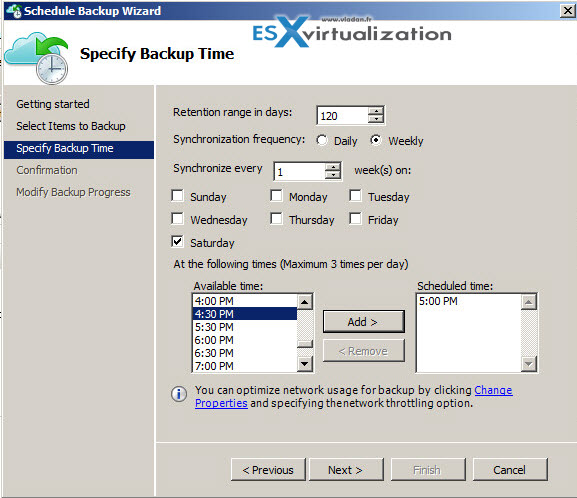
Backup to Azure scheduling options…
And the confirmation page. Neat.
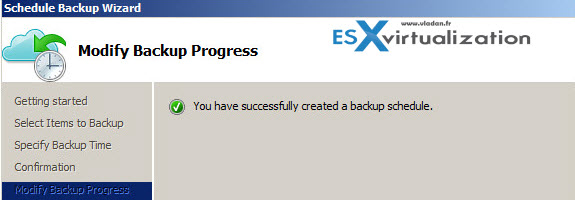
I then placed some sample data in the folders I wanted to test the backup for and hit the Backup Now button.
As you can imagine, my internet connection is public ADSL and it's not very performant. As a result, it took some time to launch the backup and to finish the backup.

Even though I downloaded the agent from the recommended Microsoft page, during the backup I had the message in the backup Agent is out of date. There is a link to the Microsoft KB page https://support.microsoft.com/en-us/kb/3080243 where you can download a fix.
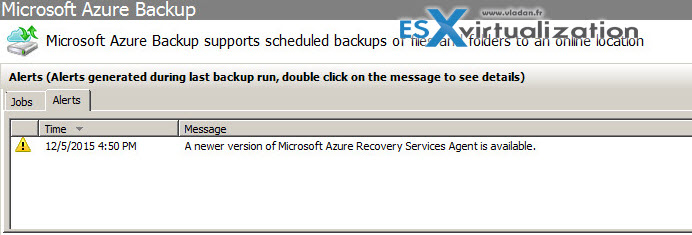
This Azure Backup agent update replaces the following updates:
- KB 3058057: Mandatory update: Backups or replications that use Microsoft Azure Recovery Services Agent fail after December 9, 2015
- Azure Backup enables backup of large volumes, VMs, databases and more
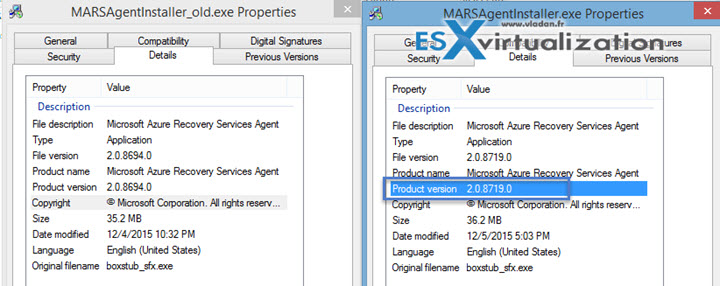
After checking the versions, true, the new version is available…. and the upgrade went fine.
How about Retention Policy?
Yes, this would be possibly a first question… -:). During the initial wizard setup there is not the Select retention policy part. Check the image on the right which is the one when you modify existing job. As you can see you have not only the Retention policy, but also the specify backup schedule ( not specify backup time).
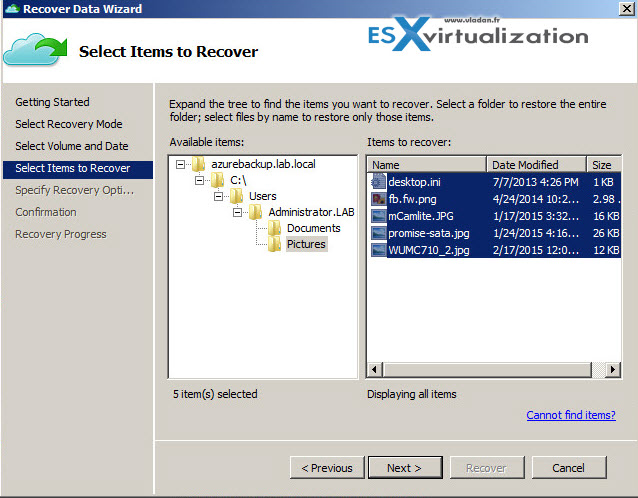
The recovery process is simple. You first specify the volume and date…
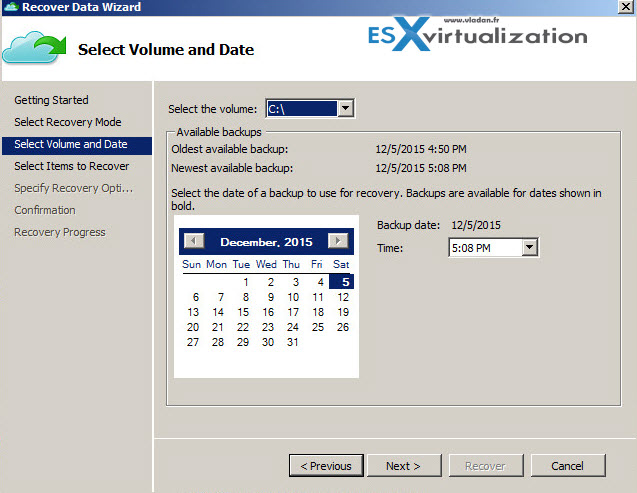
and then the files you want to recover
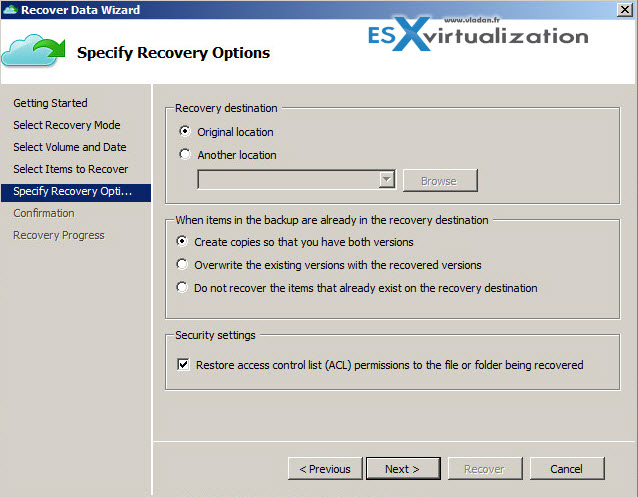
You have a choice there for:
- The location
- Create copies, overwrite or do not recover – you can keep the originals and create copies so you keep both versions of files
- Keep original ACLs – You can also keep the original ACL of those folders/files.
Wrap UP
Everything works. File level backup is the only option. You have a choice to backup any files/folders you want within your disk(s). But perhaps system state or register backup options would be interesting as well. The backup agent has to be installed in every system you want to protect and as it's an executable, you you might have a difficulty to script the installation/configuration process at scale.

