If you care about your privacy and security, you know how important it is to clean your Windows PC from traces of your past activities. These traces can reveal your personal information, your browsing habits, your software usage, and more. They can also slow down your PC performance and compromise your security.
That’s why you need PrivaZer FREE Edition, a free and powerful tool that scans and cleans your PC from unwanted traces of your past activities, and protects your privacy and security. PrivaZer FREE Edition is more than just a cleaner. It is also a privacy protector that prevents recovery of your activities, and a security enhancer that overwrites your traces with irreversible methods.
Table of contents
In this blog post, I will show you how PrivaZer FREE Edition protects your privacy and security on your Windows PC in a few simple steps.
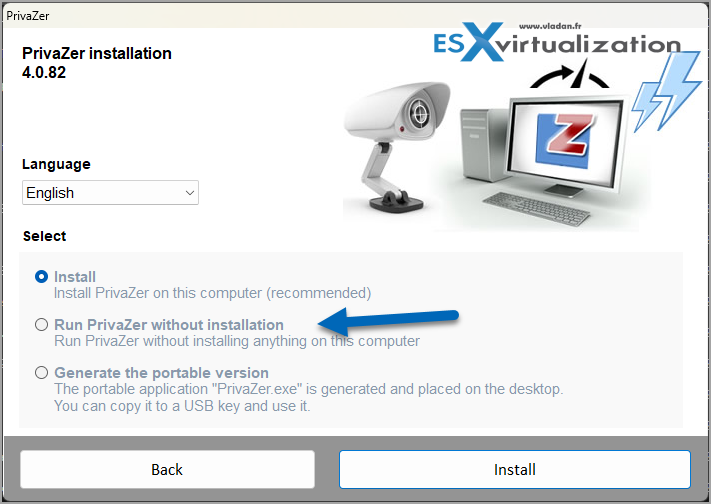
But first, I want to tell you why I like PrivaZer? In fact, I've been always using CCleaner for Windows, but hey, why not try something else after all those years, right? And I stumbled into PrivaZer. The app gives you choice to be installed or not. I chosed not to install, so the executable will generate an ini file that will be used the next time you'll run the product again. You can also setup the ini file and copy it to multiple computers within your home network. The other two options are to install and (or) generate portable version.
Features of PrivaZer FREE Edition
- Cleaning: Removes junk, cleans history and traces of your activities.
- Customization: Customize what to scan and clean.
- Data recovery: Undelete lost data.
- Disk space analysis: Analyze disk usage and view disk space.
- Evidence removal: Wipes traces of deleted data.
- Logging: Keep track of all activities.
- Network scan: Identifies devices and applications on your network.
- Privacy protection: Securely erase files and data.
- Reports: Generate detailed reports for analysis.
- Scheduling: Automate cleaning and optimization tasks.
- Security: Identifies weak points and vulnerabilities.
- System analysis: Analyze and report on your system and disk space.
- System optimization: Defragment disk and registry.
- User interface: Intuitive, easy-to-use interface.
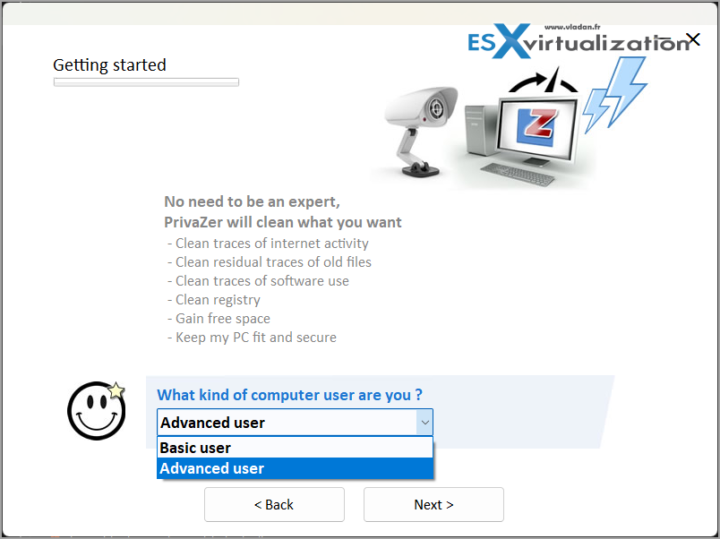
The software babysits you.
PrivaZer is destined to all kind of people. Experienced admins as well as basic (non IT personnel). That's why the program after launched has a long series of questions where it gathers the settings it will use for the cleanups!
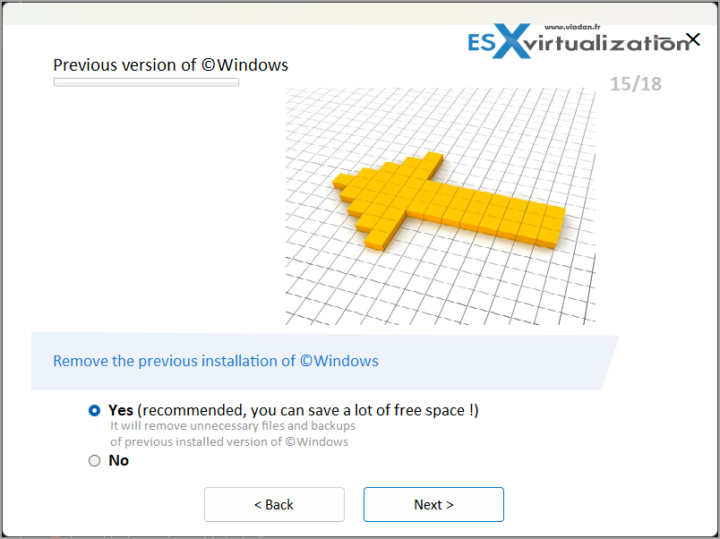
Some useful options we can show up. Previous version of Windows. Of course, especially if you have upgraded from Windows 10 few months back…. Then also you might have some Windows installers which might be left unnecessary. Also old versions of installers might be taking place on your hard drive for nothing.
At first I thought that it might be just another stupid software for newbies, but no. It gives you carefully to pick the options you want within your cleanup going smart with cookies which you certainly want to keep (those ones that allows you to your social media sites, etc) but you also have options to Clean Them All or Selected clean up!
Traces in Free space and USN journal!
PrivaZer checks also free space. As you know, files that has resided in the free space on your hard drive (or SSD) are still there, even if deleted. Just not visible, right? Privazer check that out and cleans everything.
The USN Journal (Update Sequence Number Journal) is the journaling functionality of NTFS. USN Journal maintains change logs made to the files on the NTFS and ReFS volumes. USN journal contains file or folder creation, deletion, and modification details. NTFS appends new records to the end of the USN Journal stream and it can be retrieved in the event of system crash or restore.
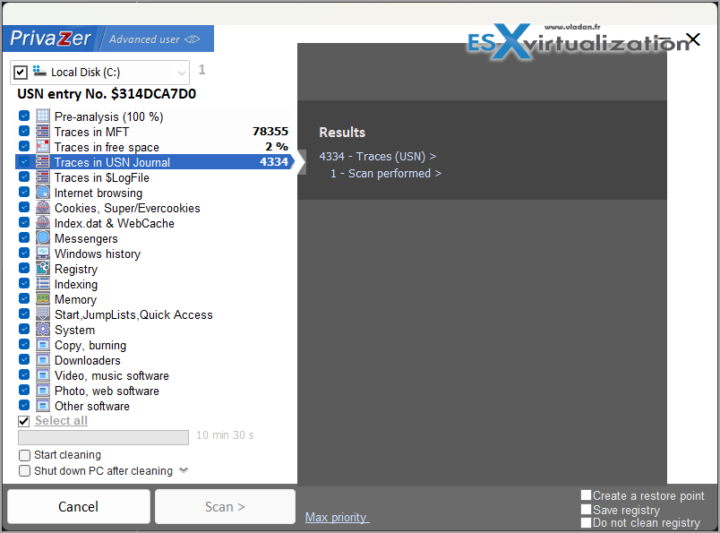
Step 1: Download PrivaZer FREE Edition
To download PrivaZer FREE Edition, you can visit the official website and click on the “Download” button. Alternatively, you can use this direct link to download the installer file. The file size is about 28 MB and it is compatible with Windows XP, Vista, 7, 8, 10, and 11, both 32-bit and 64-bit versions.
Step 2: Install PrivaZer FREE Edition
Once you have downloaded the installer file, you can run it to start the installation process. You will see a welcome screen where you can choose the language and accept the license agreement. Then, you can choose the installation folder and the start menu shortcuts. You can also choose whether to create a desktop icon and a quick launch icon.
The installation process is very fast and it will take only a few seconds. After the installation is complete, you can launch PrivaZer FREE Edition from the start menu or the desktop icon.
Step 3: Scan and Clean Your PC with PrivaZer FREE Edition
When you launch PrivaZer FREE Edition for the first time, you will see a main window with three options: Scan, Clean, and Settings. You can also access these options from the menu bar at the top.
To start protecting your privacy and security, you need to click on the “Scan” button. PrivaZer will ask you to select the drive or device that you want to scan. You can choose your internal hard drive, an external drive, a USB flash drive, an SD card, or even your smartphone. PrivaZer will automatically detect the type of storage device and adapt its cleaning algorithms accordingly.
Next, PrivaZer will ask you to select the areas that you want to scan and clean. You can choose from a list of categories, such as Internet activities, Windows activities, old files, software activities, and more. You can also customize the scan by clicking on the “Advanced options” button. Here, you can select or deselect specific items, such as cookies, cache, history, passwords, recycle bin, registry, etc.
After you have selected the areas to scan, you can click on the “OK” button to start the scan. PrivaZer will show you a progress bar and a summary of the scan results. You can also view the details of each category by clicking on the “Show details” button. Here, you can see the exact files and traces that PrivaZer has found and how much space they occupy.
To clean your PC, you need to click on the “Clean” button. PrivaZer will ask you to confirm the cleaning and choose the deletion method. You can choose from three options: Basic cleanup, which deletes the files and traces without overwriting them; Secure cleanup, which overwrites the files and traces once with zeros; and Ultimate cleanup, which overwrites the files and traces multiple times with random data. The higher the deletion method, the more secure and irreversible the cleanup, but also the longer it takes.
After you have chosen the deletion method, you can click on the “OK” button to start the cleanup. PrivaZer will show you a progress bar and a summary of the cleanup results. You can also view the details of each category by clicking on the “Show details” button. Here, you can see the exact files and traces that PrivaZer has deleted and how much space they have freed up.
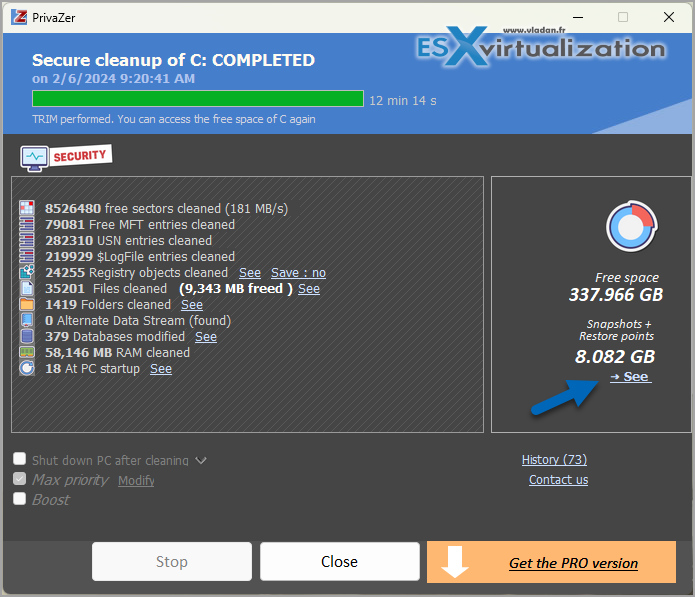
By scanning and cleaning your PC with PrivaZer FREE Edition, you are protecting your privacy and security in several ways:
- You are preventing recovery of your activities by anyone who might access your PC or your storage devices, such as hackers, thieves, or spies.
- You are deleting sensitive information that could be used against you, such as your personal data, your browsing habits, your software usage, and more.
- You are enhancing your security by removing potential vulnerabilities, such as malware, spyware, or viruses, that could exploit your traces.
- You are optimizing your PC performance by freeing up disk space, improving startup speed, and reducing errors.
Step 4: Adjust the Settings of PrivaZer FREE Edition
If you want to customize the settings of PrivaZer FREE Edition, you can click on the “Settings” button. Here, you can access various options, such as:
- General settings: Here, you can choose the language, the theme, the update frequency, and the startup behavior of PrivaZer.
- Scan settings: Here, you can choose the default drive or device to scan, the default areas to scan, and the default scan mode (normal or advanced).
- Clean settings: Here, you can choose the default deletion method, the default cleanup mode (manual or automatic), and the default cleanup frequency (once, daily, weekly, monthly, etc.).
- Exclusions settings: Here, you can add or remove files, folders, or registry keys that you want to exclude from the scan and cleanup.
- Shredder settings: Here, you can access the shredder tool, which allows you to permanently delete any file or folder from your PC by overwriting it multiple times.
You can also restore the default settings of PrivaZer FREE Edition by clicking on the “Restore default settings” button at the bottom.
Pro Version?
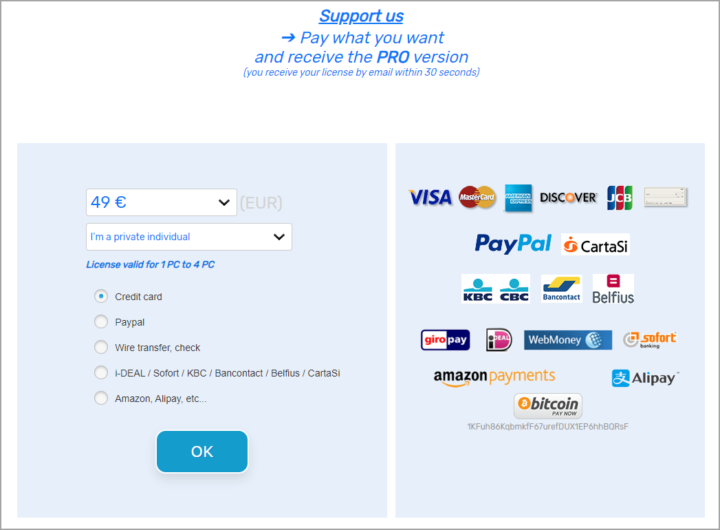
If you like the software and want to buy a copy, you can. In fact, you can pay what you want. Wow, man, that's cool. I'm always trying to use free software as much as I can, but hey, if you can afford it, why not. I really like this product and I hope this small little contribution will help the team to keep up the good work!
Conclusion
PrivaZer FREE Edition is a free and powerful tool that protects your privacy and security on your Windows PC. It can scan and delete unwanted traces of your past activities, prevent recovery of your activities, and overwrite your traces with irreversible methods. PrivaZer FREE Edition is also compatible with various types of storage devices and offers advanced options for customization. You can download PrivaZer FREE Edition from the official website and start protecting your privacy and security on your PC in a few simple steps.
If you like the post, please share through social media. If you know other cool free software I should blog about, just let me know via comments. Stay tuned!
More posts from ESX Virtualization:
- VMware vSphere 8.0 U2 Released – ESXi 8.0 U2 and VCSA 8.0 U2 How to update
- What’s the purpose of those 17 virtual hard disks within VMware vCenter Server Appliance (VCSA) 8.0?
- VMware vSphere 8 Update 2 New Upgrade Process for vCenter Server details
- VMware vSAN 8 Update 2 with many enhancements announced during VMware Explore
- What’s New in VMware Virtual Hardware v21 and vSphere 8 Update 2?
- Homelab v 8.0
- vSphere 8.0 Page
- Veeam Bare Metal Recovery Without using USB Stick (TIP)
- ESXi 7.x to 8.x upgrade scenarios
- A really FREE VPN that doesn’t suck
- Patch your ESXi 7.x again
- VMware vCenter Server 7.03 U3g – Download and patch
- Upgrade VMware ESXi to 7.0 U3 via command line
- VMware vCenter Server 7.0 U3e released – another maintenance release fixing vSphere with Tanzu
- What is The Difference between VMware vSphere, ESXi and vCenter
- How to Configure VMware High Availability (HA) Cluster
Stay tuned through RSS, and social media channels (Twitter, FB, YouTube)
