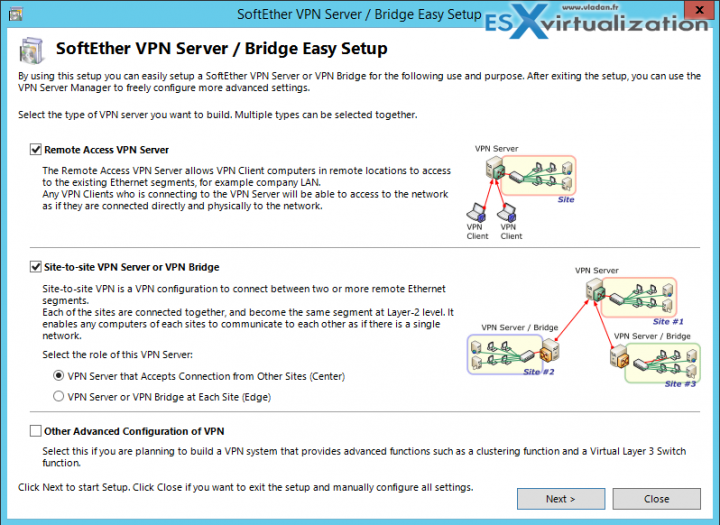
There is a Cool Free VPN Server Software SoftEther VPN. The product consists of several modules (server, client, bridge) and is available for Windows (including ARM machines), Linux and MacOS, or Android/iPAD. Thanks to Joshua Stenhouse who told me that he's using this product it in his lab. I'm usually not a much into a VPN software solutions, but this one seems to be quite different. It's built by Japanese university of Tsukuba and covers multiple use cases and has some built-in utilities for Dynamic DNS (no need for external IP being Fixed IP) and free Microsoft Azure VPN.
Let's get started. In this post, I just quickly present the Windows version, but it is not excluded that in one of my later posts I'll also test the installation on a Linux VM. The product allows to do a remote access to your lab/company/place or do a site-to-site VPN. It uses SSL-VPN tunneling on Https to pass through the NAT and firewall. It has also some cool VPN over ICMP (permit to pass ICMP or DNS packets).
The Architecture is simple. The software can virtualize ethernet devices so it can create a flexible VPN network for remote access VPN or for Site-to-site VPN. SoftEther VPN implements the Virtual Ethernet Switch program (called Virtual Hub) as a software-emulated traditional Ethernet switch. SoftEther VPN implements VPN Session as a software-emulated Ethernet cable between the network adapter and the switch.
The SoftEther VPN Protocol is based on HTTPS so almost all kinds of firewalls permits SoftEther VPN's packets. Similar way as Skype software.
SoftEther VPN Features:
- SSL-VPN Tunneling on HTTPS to pass through NATs and firewalls.
- AES 256-bit and RSA 4096-bit encryptions.
- SSL-VPN Tunneling on HTTPS to pass through NATs and firewalls.
- Free OpenSource Software
- Resistance to highly-restricted firewalls.
- Windows, Linux, Mac, Android, iPhone, iPad and Windows Mobile
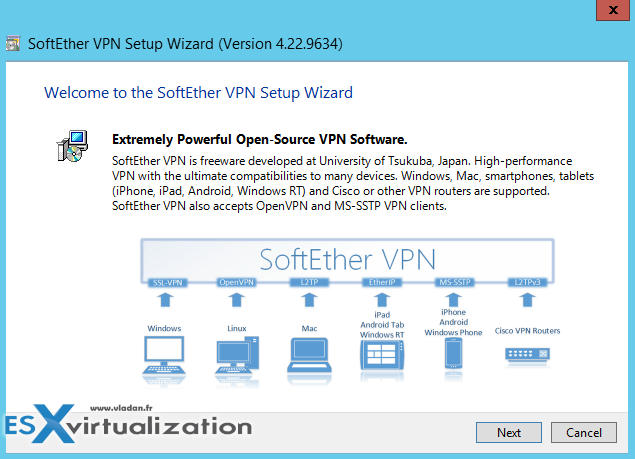
- SSL-VPN (HTTPS) and 6 major VPN protocols (OpenVPN, IPsec, L2TP, MS-SSTP, L2TPv3 and EtherIP) are all supported as VPN tunneling underlay protocols.
- Embedded dynamic-DNS and NAT-traversal so that no static nor fixed IP address is required. All VPN packets are capsuled into ICMP or DNS packets to transmit over the firewall. The receiver-side endpoint extracts the inner packet from the capsuled packet.
- And much more…
The installation has a wizard which walks you through and it depends on which topology you're creating and which underlying OS you're using, the views might be different.
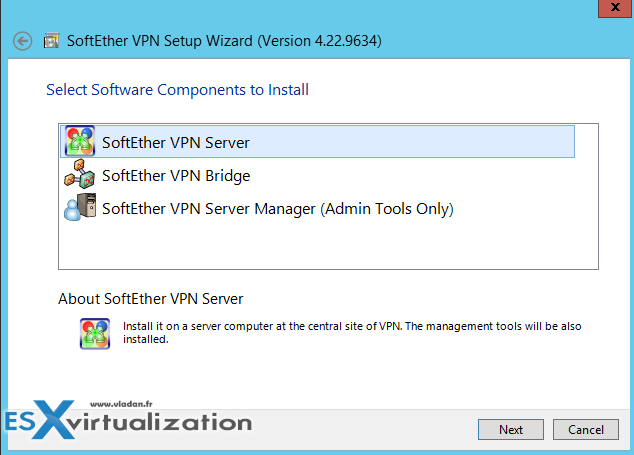
You have a first choice on what you're installing. Check the “console only” option (3rd one) where you're installing only the management console, not the whole server….
I'm skipping some screens like where you want to install this software or accepting the licensing agreement (there are 3 more screens I think), but without much interest. The interesting screenshot below is a screenshot which shows the installation the virtualized NIC within your OS.
SoftEther VPN and Dynamic DNS function
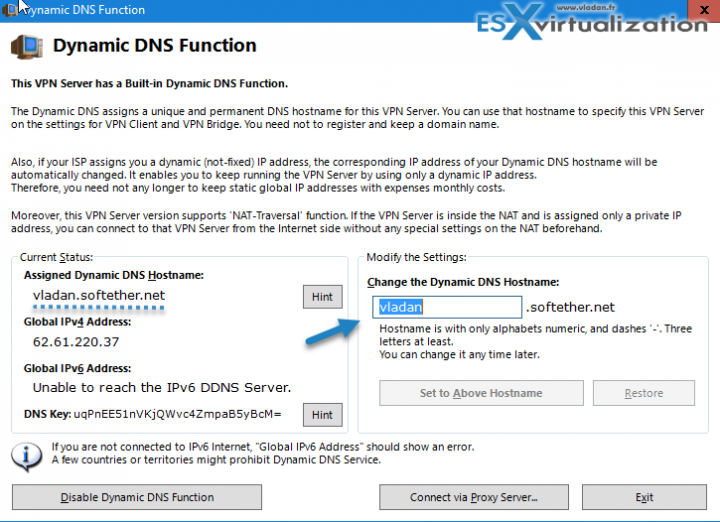
There are more screens. Here is another interesting one, where you basically create a dynamic DNS record which assigns a unique and permanent DNS hostname for your VPN server. You don't need to register your own domain name.
This is particularly useful for most home labs or users which do not have Static IP which is usually a paid option. So in this case where your ISP assign you a dynamic IP, this one expires from time to time and changes. the Dynamik DNS function allows keeping track of those changes and resolves the domain to your new IP every time this one changes.
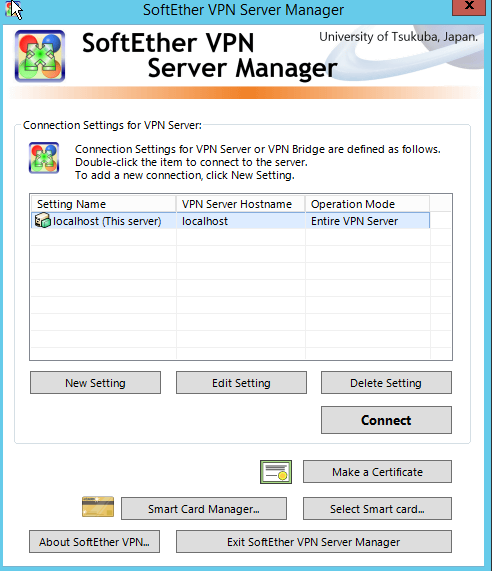
The final screen. Then you can click the Connect button and start configuring.
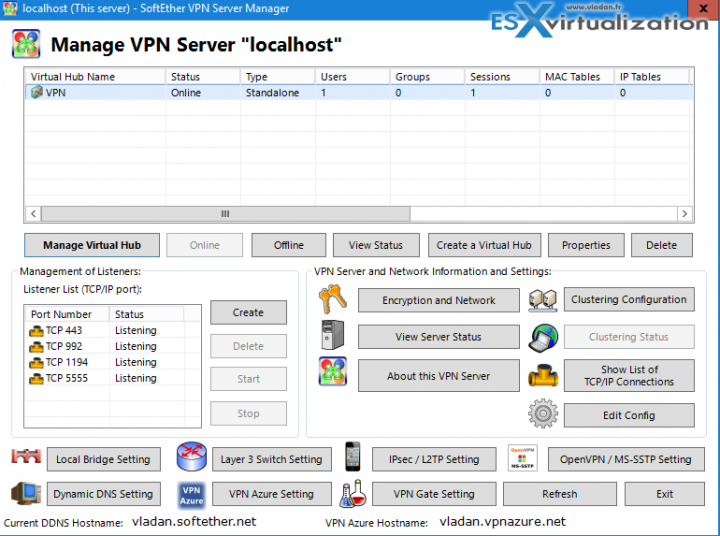
You'll need to configure a new password, new user (which can be mapped to your NT domain) and also you'll need to select the NIC which will be used to the local bridge. All the options can also be reached from the final server manager screen.
So the final screen looks like this.
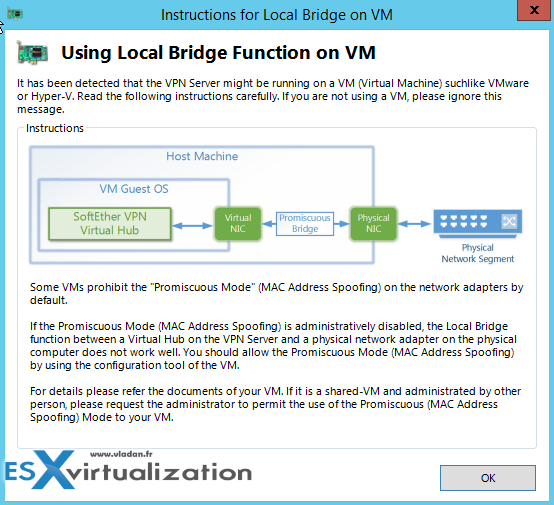
Note that you can also use this VPN server on systems with Single NIC (within a VM). In case, you might need to configure a portgroup or virtual switch to allow promiscuous mode. Here is the message which you'll see:
- Log into the ESXi/ESX host or vCenter Server using the vSphere Client.
- Select the ESXi/ESX host in the inventory.
- Click the Configuration tab.
- In the Hardware section, click Networking.
- Click Properties of the virtual switch for which you want to enable promiscuous mode.
- Select the virtual switch or portgroup you wish to modify and click Edit.
- Click the Security tab.
- From the Promiscuous Mode drop-down menu, click Accept.
What is promiscuous mode?
By default, a guest operating system's virtual network adapter only receives frames that are meant for it. Placing the guest's network adapter in promiscuous mode causes it to receive all frames passed on the virtual switch that is allowed under the VLAN policy for the associated portgroup. This can be useful for intrusion detection monitoring or if a sniffer needs to analyze all traffic on the network segment.
And how about Microsoft Azure?
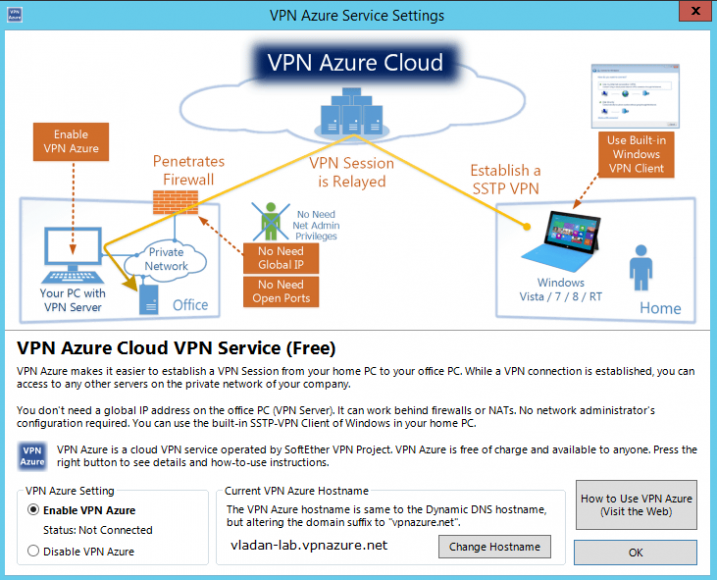
Possibility to connect to Azure as an ultimate option, in case you're working on very protected and firewalled environment. It's a free and accademic service provided by Japanese university in Tsukuba.
Quote from the source:
This service is provided by SoftEther Corporation and University of Tsukuba as an academic experiment. You can connect to your VPN Server behind the firewall from other VPN clients on the remote side, without opening any TCP/UDP ports on the firewall, if you have activated the VPN Azure function on the VPN Server in advance. The VPN Server will connect a TCP connection “from inside to outside over the firewall” . The connection will be kept towards a relaying server on the VPN Azure Cloud Servers. You can connect to a relaying point on a cloud server from a VPN Client. The cloud server will relay your all traffics to the destination VPN Server behind the firewall. Once the connection has been made, you can now access to any computers on your company or home network which are protected by the firewall.
Once a VPN Server connects to the VPN Azure Cloud, the server will have a unique hostname “abc.vpnazure.com” ( “abc” is unique idenfitier). The hostname is assigned on the appropriate VPN relaying server on the VPN Azure Cloud Service. VPN Azure Cloud Service function is disabled by default. You can easily activate it on the manager GUI of VPN Server. For details to use, please refer http://www.vpnazure.net/.
Screenshot from the option.
The creators also mention stability and no memory leaks.
Check the details and download at SoftEther.
Check more articles from ESX Virtualization:
- VMware VCSA 6.5 Backup and Restore How-To
- Free Tools
- Prepare the DHCP Server for vSphere Auto Deploy Provisioning – VMware vSphere 6.5
- Patch VMware vCenter Server Appliance (VCSA) from Offline Depot ZIP file
- Upgrade Windows Server 2012R2 AD to Server 2016
Stay tuned through RSS, and social media channels (Twitter, FB, YouTube)

