I'm sure that everyone know this tool. But still I want to share me recent experience. You know that with the new hosts I got for my lab there is the Supermicro's iPMI remote management, and I found myself too lazy after all. All you need to do to attach a GParted Live ISO, then boot the system on it and then do what you have to do. No need to burn the iso or to create a bootable USB stick. The Gparted Live ISO can directly attach to the system, you boot on it and it can be used to format or create partitions on local disks.
So we'll have a look at the different possibilities today. If you're running some physical system with an OS (not ESXi) you can use the USB version to resize partitions if you need to as well. But in my particular case I was just looking on how to quickly erase my local disks in 3 hosts in my lab cluster in order to prepare them for VMware VSAN 6.0 installation. The usage of this tool is not however limited for lab environments and vSphere 6, but it's possible to use this ISO to manage partitions and copy data between partitions on physical systems too as many different file systems are supported.
If you are technician, IT guy or an architect doing deployments you might be interested on how to “clean” disks before deployment at the client's site. If yes, than you might want to read on…
GParted Live ISO – what's the features?
GParted enables you to easily manage your disk partitions:
- Create partition tables, (e.g., msdos or gpt)
- Create, move, copy, resize, check, label, set new UUID, and delete partitions
- Enable and disable partition flags, (e.g., boot or hidden)
- Align partitions to mebibyte (MiB) or traditional cylinder boundaries
- Attempt data rescue from lost partitions
GParted works with the following storage devices:
- Hard disk drives (e.g., SATA, IDE, and SCSI)
- Flash memory devices, such as USB memory sticks and Solid State Drives (SSD's)
- RAID Devices (hardware RAID, motherboard BIOS RAID, and Linux software RAID)
- All sector sizes (e.g., devices with 512, 1024, 2048, 4096 byte sectors and more)
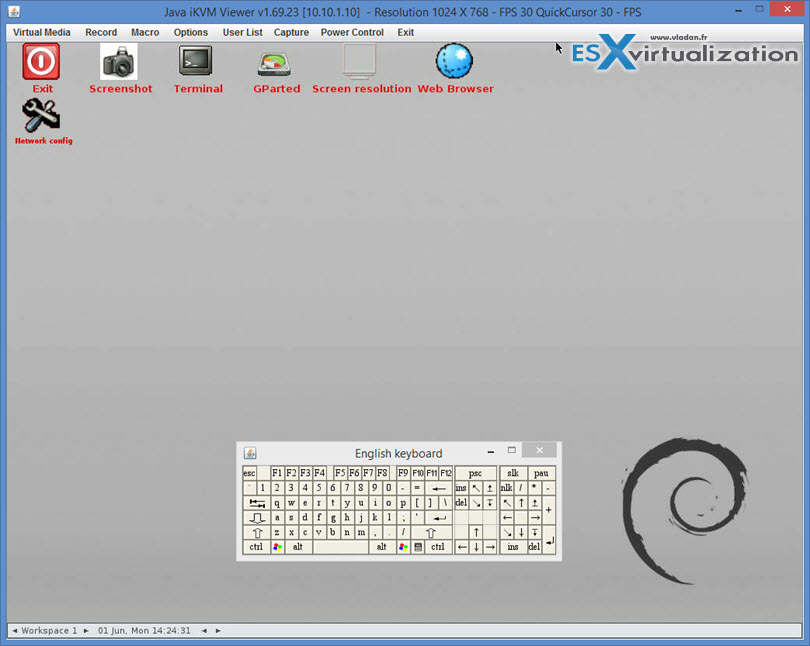
After you first boot on the Gparted live ISO (note that I used the gparted-live-0.21.0-1-i586.iso version as the latest one has not been showing the icons and the desktop actually), you'll get to this desktop, and the Gparted tool executes automatically…
If not you have other possibilities like take screenshot, open a terminal window, launch web browser or change screen resolution…. In my case everything was executing in a Java window from the Supermicro's iPMI console.
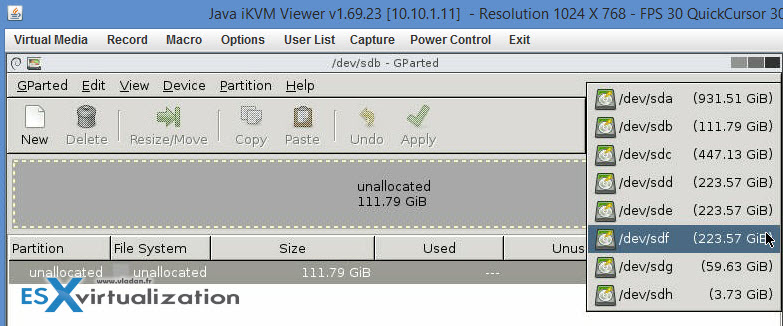
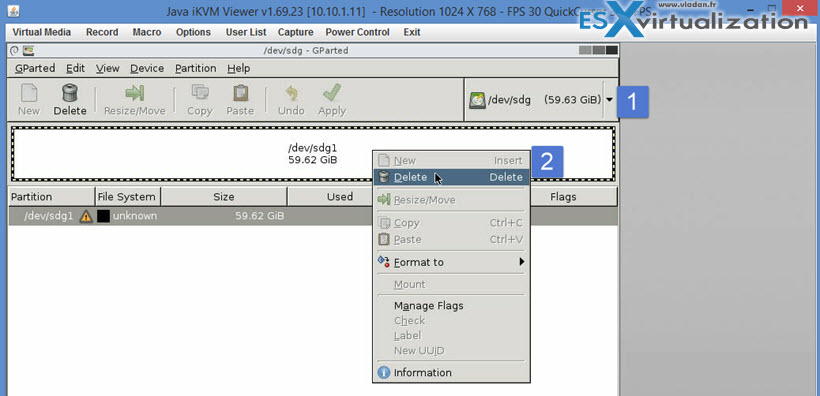
Then when you select your drive you are able to:
- Use the mouse and do a right click to execute actions.
- Use the menu where you choose the available actions.
In my case I wanted to delete the existent partitions from all local drives to prepare for VSAN installation…
Note that I had to not only delete partition each time from each drive, but also create a partition table (through the menu). The DOS partition table which is selected by default, is just fine. So to recap and to prepare disks for VSAN:
- Delete partition
- create partition table (DOS default is ok)
Apply to execute the actions.
If you want to prepare VMware vSphere Host running ESXi, please note that you can also use CLI via SSH to prepare disks for VSAN (the hard way).
Gparted supports not only partition operations, but also copy operations. There is many file systems supported, but not all operations are supported on all file systems. Some of the file system support:
- btrfs
- ext2 / ext3 / ext4
- fat16 / fat32
- hfs / hfs+
- linux-swap
- lvm2 pv
- nilfs2
- ntfs
- reiserfs / reiser4
- ufs
- xfs
Gparted project's website can be found here – gparted.org. You'll find also a guide on how to create a bootable USB if you need to, or setup a PXE boot via network.
Download site at Sourceforge: https://downloads.sourceforge.net/project/gparted/


Another great article!
FYI, noticed some minor issues with 2 URLs in these 2 sentences:
“Gparted project’s website can be found here – http://www.gparted.org. You’ll find also a guide on how to create a bootable USB if you need to, or setup a PXE boot via network.”
Turns out the www won’t work, but http://gpart.org works great. Also, the “PXE boot” link needs fixing.
Thanks again for the extremely helpful article, sure beats the old days of burning physical CD/DVD media!
OM. Thanks for the heads up! I corrected Both links. Thanks a ton!