Configuring IP pools is easy. IP pools were first introduced with vSphere 4, but they're not necessarily used by everyone. IP pools are necessary if you want to create or deploy a vApp. They provide a network identity to vApps. IP pool gives a network config to VMs that run in the vApp. So you'll also need to have an IP pool configured if you want to test vCloud Automation Center (VCAC) or Horizon Workspace.
When you configure an IP Pool you specify a range of either IPv4 or IPv6 addresses, DNS and proxy settings, and select which vSwitch port groups that the pool will be available too. Usually, you'll want to do a static IP for server VMs, but you might want to have a test VLAN for developments and you need DHCP there.
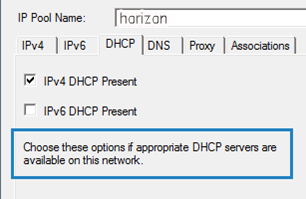
Update/Correction: If you create new VMs and put them on VLAN which is associated with an IP pool, those VMs will automatically get an IP address via your DHCP server. If you want the pool to leverage DHCP, check the box to let it know that a DHCP server exists. IP Pool itself does not act as DHCP server.
However, you can setup a Transient – IP Pool where IP addresses are automatically allocated using IP pools from a specified range when the vApp is powered on. The IP addresses are released when the appliance is powered off.
Definition:
IP pools provide a network identity to vApps. An IP pool is a network configuration that is assigned to a network used by a vApp. The vApp can then leverage vCenter Server to automatically provide an IP configuration to its virtual machines.
Where to find IP pools configuration?
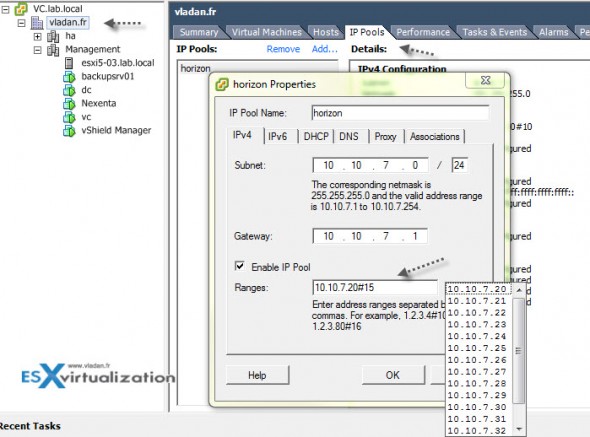
The IP pools are created at the Datacenter level, so after selecting the data center, the tab will appear in your vSphere client (windows).
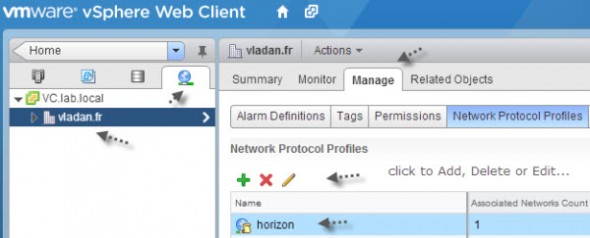
If you're using new vSphere Web client, the approach is quite different, because you must go Home > Networking > Manage > Network Protocol Profiles. The options you get there are the same.
How to setup IP pools and what are the options there?
You can define the IP information on the different tabs there. Like DNS, DHCP or Proxy tabs are present. It's an easy process if you know basic DHCP administration. In my example an IP pool used for Horizon Workspace vApp. Next to the checkbox to enable the IP pool, there is a link which brings up a small window showing how many IP address will be used by that pool.
1. Add new IP pool
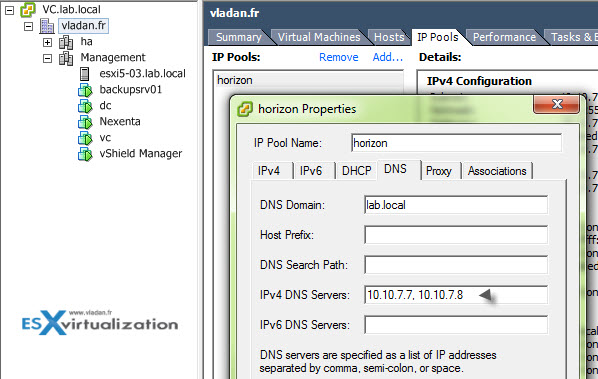
2.The DNS Tab.
The DNS tab allows you to specify a DNS domain name information and also DNS servers IP address. Watch out when you want to enter several DNS servers, to make sure that you separate your DNS servers with a comma, a semicolon, or space. Otherwise, it's nothing new here.
3. The DHCP TAB
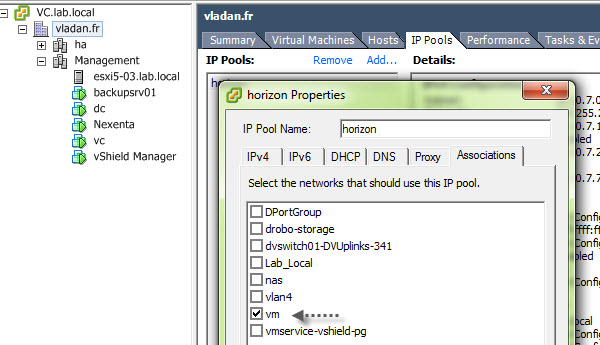
4. Port groups association
Last, you'll need to associate the IP pool to one of your port groups.
Wrap Up
IP pools provide easy to use network configuration built-in vCenter server. This function is not necessary if you don't run any vApps, but it's a very convenient and necessary way for your vApps to get a correct static address or an IP address via your DHCP server.
Some vApps will be fine with static IP addresses while others you might want to rely on your DHCP server.
Update:
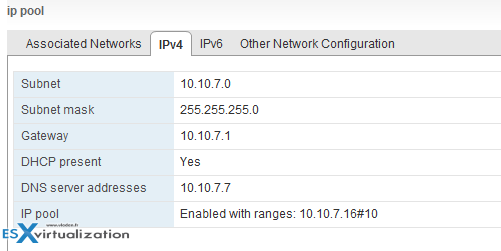
VMware vSphere 6.5 uses Network protocol profile instead, leaving IP pools behind. The Option is configurable at the Datacenter level configure > Network Protocol Profiles > Add > Select your network > Configure IPv4 > Next etc….
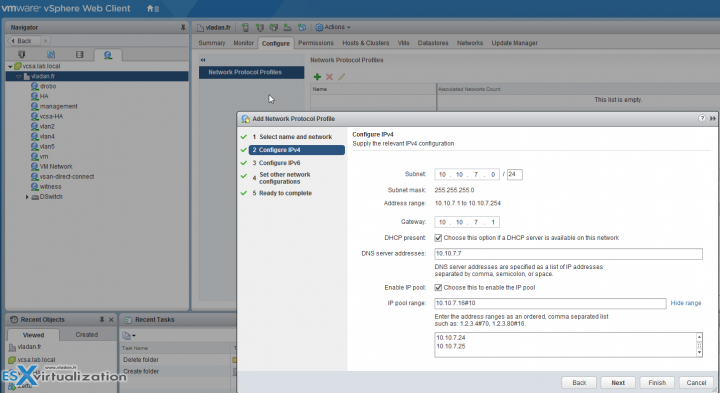
Note there is a checkbox close to the DHCP present. It says “Chose this option if a DHCP server is available on this network”.
Check more articles from ESX Virtualization:
- vSphere 6.5
- How to Configure VMware High Availability (HA) Cluster
- Free Tools
- How to Migrate Windows Based vCenter to VCSA 6.5 [Lab] – Windows to Linux
- VMware VCSA 6.5 Active-Passive Setup with Simple Configuration – [LAB]
- VMware vCSA 6.5 HA Failover Test – Video
Stay tuned through RSS, and social media channels (Twitter, FB, YouTube)


Hi,
Do you have an idea why after following your guide OS X VMs still can’t recognise the IP Pool as a DHCP server? Manually assigning one of the IPs which is part of the Pool works, but after setting Network Preferences back to DHCP the VM gets a “self assigned” IP, which is not part of the Pool.
Did you see anything like this?
I am curious if you ever found an answer for this. I have the same issue with Windows 7.
Same here
In Vcenter (vcloud indeed) I see the VM has an IP assigned, but the VM is displaying an auto-assigned (169.254..) one
I made according Your tip but my VMS have still APIPA IP 🙁
There has to be a DHCP server on the network. Then only you can check the box next to DHCP. It does not replace your DHCP server. Sorry for the inconvenience.
The post has been modified and updated to reflect the latest vSphere 6.5 version which leaves IP pools and uses Network Protocol Profiles instead.
The funny thing is that it never worked (tested with vSphere 6.5 and 6.7 beta)! Yes It really can allocate IP addr from network protocol profile’s IP pool! But It’ll allocate the same IP addr to multiple VMs if you’re using vApps! This is another tech joke from VMware. The product is never fully tested and fortunately most customers will not use these broken features.
(Note that the IP addr is allocated to VMs via ovfenv rather than DHCP protocol. So configuring your VMs to use DHCP just would not work.)
Hi, it’s an old post (vSphere 5). Newer releases of vSphere left IP pools behind…
Based on my observation, quite a lot of blog writters just copy-n-paste from VMware’s official documentation. They just don’t know some features never worked!
“There has to be a DHCP server on the network.” — This is wrong! Why bother using IP pools if there’s a DHCP server?
If you want the pool to leverage DHCP, check the box to let it know that a DHCP server exists. The Pool will not act as a DHCP server.
Man had to read comments to find out this is a useless non-working feature. Please state that at the end of your tutorial. At least these instructions are useful if they ever fix it.