Most of you usually know how to install VMware ESXi interactively via ISO or via Autodeploy. In this post, we'll check out another possibility where we'll learn How to Create Autodeploy ISO for unattended ESXi Installations. You'll need some tools which can edit ISO images. One of them is Winiso, but there are plenty of others.
The configuration file is very flexible, and in our example we'll have the option for installing to the first available disk and formatting without prompt. You may want to change this to fit your needs. Note also that in our post we simply place the KS.CFG file to the root of the ISO file from we'll be booting the installer, but it's just for learning purposes. , but there are in total 3 different places where you can put the file:
In total, 3 VMware supports different types of installations with places where you can put the file:
- Root of the ESXi ISO file
- USB stick – During boot do a Shift + o: runweasel ks=usb:/ks.cfg
- Network – the file has to be accessible through https/https, NFS or FTP.
The USB is the simplest one, but we might come back to this to explore the two other options in one of our future posts.
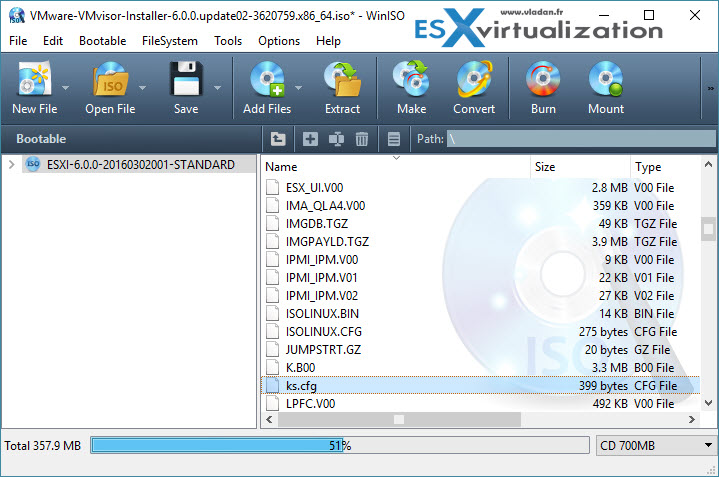
Step1 – Download WinISO, (6 Megs) > do an installation on your management workstation > Open the latest ESXi ISO file.
Step 2 – create ks.cfg file with this example content in it (partly from VMware documentation) and place the file to the root of the directory

# Sample scripted installation file
# Accept the VMware End User License Agreement
vmaccepteula
# Set the root password for the DCUI and Tech Support Mode
rootpw Superpassword123
# The install media is in the CD-ROM drive
install –firstdisk –overwritevmfs
# Set the network to DHCP on the first network adapater
network –bootproto=dhcp –device=vmnic0rootpw Superpassword123
reboot
If you check the documentation, there are other options as well, for example, the selection of international keyboard (optional) or specify serial number. If not, the hypervisor just installs as 60 days trial. The KSCFG is supported for installation or for upgrades.
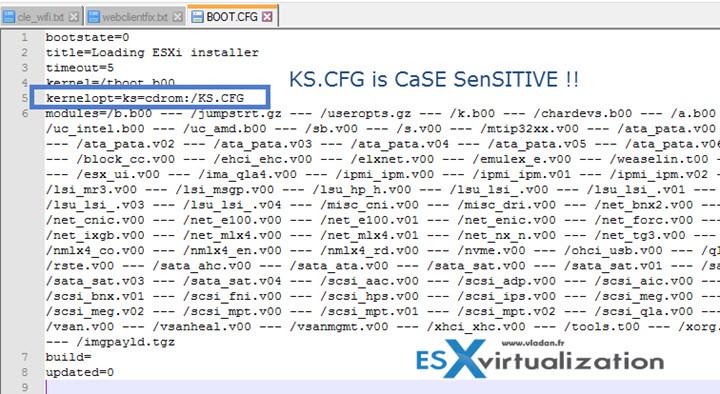
Step 3 – Modify existing file called BOOT.CFG which is on the ISO (replace the original one with the new one) > then do a Save As to save the ISO with a new name… Like this you keep the original ISO untouched. Or, you can do a copy of the original ISO by hand before starting doing any changes if you like….
The original value to replace is:
kernelopt=runweasel
with this… (note the CASE. If you don't put the case ON, the script isn't found)

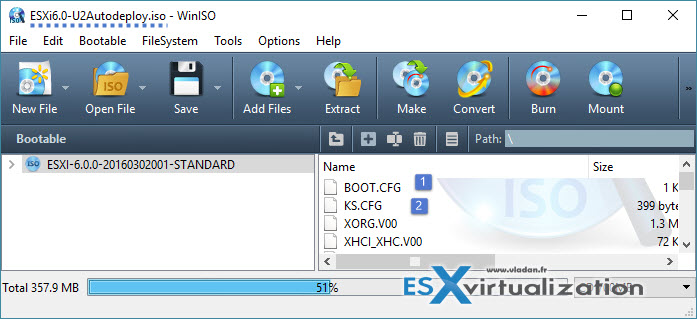
So at final, you should end up with an ISO file with: 1 new file (ks.cfg) and one modified file (boot.cfg)
- One new file (KS.CFG)
- One modified file (BOOT.CFG)

Don't forget to save your work….
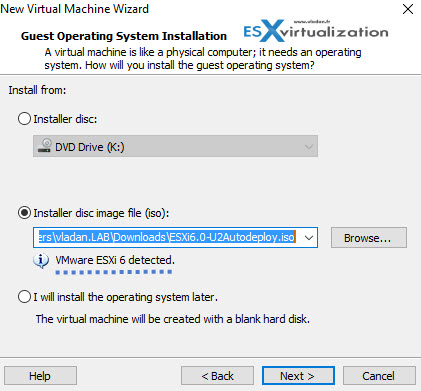
Best way then to test is through VMware Workstation, Fusion or Player. Once you attach the ISO to the newly created VM, automatically the new VM is recognized as ESXi hypervisor (unsupported)… But for testing different values this is probably the most flexible option.
The DHCP option for example works only if you have a DHCP server available on your network. When testing in VMware workstation make sure that you set correct networks settings for this newly created VM otherwise if VM is isolated the installer will complain that no DHCP servers were found on the network…

Source: VMware vSphere 6.0 Documentation

This was the exact tutorial I was looking for. Tried to remaster the installation ISO on linux, but for some reason, KS.CFG wasn’t working right for me.
Only thing I would like to know now is if you can add vmdks to the ISO and then copy them over during installation so you can have a VM up and running by the time installation has finished? VMDK is only 50 meg so don’t think the ISO would get very big.
Firstly, the script has linting issues, double dash (–firstdisk) before options has been converted to “–firstdisk”
Secondly, it has extra password declaration “rootpw Superpassword123” before reboot.