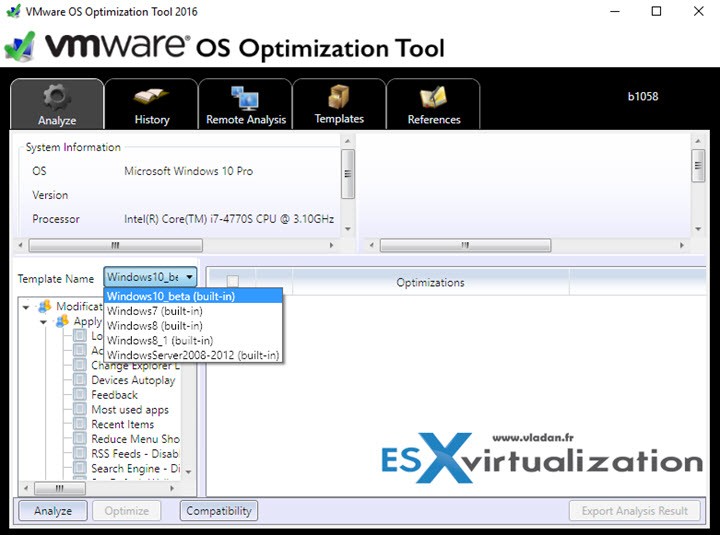
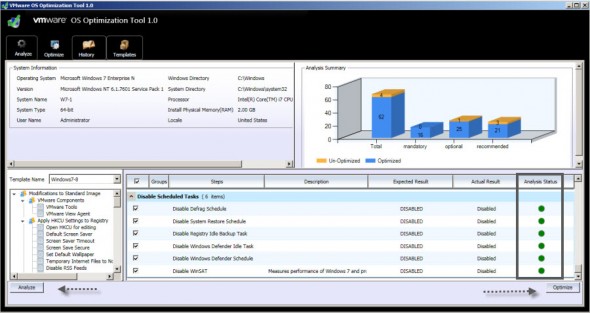
This lesson will teach us some tweaks on optimization of desktop images. VCP6-DTM Objective 3.4 – Build and Customize Desktop Images. VMware has an excellent utility (recently updated to support Windows 10) called VMware OS Optimization Utility. The tool can Analyze/Optimize locally, remote Analyze (not optimize). Has optimization history and rollback. It also can manage templates for different OS (Windows 7, W8.x, Windows Server 2008-2012).
More importantly there is also optimization history and rollback. It also can manage templates for different OS (Windows 7, W8.x, Windows Server 2008-2012).
The exam's documentation (right now) has also the Windows XP deployment guide. I suspect this to be removed in future updates of the exam as Windows XP is no longer supported system by Microsoft. The latest version of Horizon View already supports Windows 10 desktops. We'll be updating the post when an available documentation from VMware shows up.
VMware Knowledge
- Perform OS optimizations
- Perform installation of View Agent and VMware Tools
- Configure virtual machine hardware
- Create and manage snapshots
- Create customization specifications
Tools
- Horizon View Administration Guide
- Horizon View Installation Guide
- Windows XP Deployment Guide
- VMware Horizon with View Optimization Guide for Windows 7 and Windows 8
- Horizon View Administrator
Perform OS optimizations
The first question you'll ask – Why optimize? Less services are active per VM = Better performance !! Additionally, a lot of tweaks can be done through the VMware OS
- Optimizing virtual desktops
- Increases virtual desktop performance
- Increases virtual desktop density, boosting the number of virtual desktops that can be hosted per vSphere server, thereby reducing infrastructure costs
- Improves the desktop experience for end users
- Reduces desktop support because of fewer end-user calls to address Optimizing RDSH servers
- Increases hosted desktop and application performance
- Reduces the amount of system resources that each RDSH server requires
- Increases the number of RDSH servers that can be hosted virtually on Windows Server 2008 R2 or Windows Server 2012 (RDSH server density)
- Increases the number of users that can be supported per RDSH server
- Improves the hosted desktop and application experience for end users
- Reduces system support
For All options, how-to, check out the Windows Optimization Guide (PDF). THIS is a very good PDF with a lot of details. I'd say it's a MUST-HAVE….
Perform installation of View Agent and VMware Tools
The order of installation of those two components is essential. They have to be done in the correct order:
Step1: Install VMware Tools and then install View agent.
Additionally, A VMware KB has more details concerning an issue with resizing – if not there is a problem and cannot resize the screen:
-
Install Horizon View in a supported virtual infrastructure.
-
Create a Windows XP, Windows Vista, or Windows 7 virtual machine.
-
Ensure that VMware Tools is installed, then install the View Agent.
Note: The order is important. If you install any of these applications in the incorrect order, or if you do not know the order in which they were installed, uninstall both and reinstall in the correct order.

-
In View Manager, set up this desktop as an individual desktop and entitle it.
-
Ensure that you have the PCoIP desired settings for monitor and max resolution in the pool.
-
Log in and ensure that there is basic functionality.
-
If PCoIP or screen resizing is not working, log out of the desktop and use the Reset option from View Manager.
Note: Do not reboot by clicking Shutdown > Restart in the virtual machine. PCoIP is dependent upon the appropriate amount of video memory being allocated to the virtual machine. Because this is a virtual hardware setting (that must be in place before the virtual machine starts up), it is applied as a change in the .vmx file.
If the virtual machine has already been started, it is essential that this virtual machine be restarted so that the .vmx file is re-read and the changes are used. Using the Shutdown > Restart option inside the virtual machine does not force the .vmx to be re-read, as this does not cold boot the machine (from the VirtualCenter perspective) to refresh the virtual hardware. Using the Shutdown > Restart option from either VirtualCenter or View Manager (which issues the command via VirtualCenter) is the best way to make sure this file gets read properly.
-
Log in and ensure that screen resizing works.
-
Release the IP lease.
-
Shut down the virtual machine.
-
Take a snapshot.
-
Remove the individual virtual machine assignment from View Manager.
Note: If you do not perform this step, the virtual machine does not appear as an available parent in the pool creation process.
-
Create your pool.
Configure virtual machine hardware
Follow the VMware recommendation concerning the OS type, the amount of memory, disk size and type. Remember to configure only what will be used. For example If your company policy does not allow USB thumbs here is the perfect example not to include the USB devices in the template already.
Create and manage snapshots
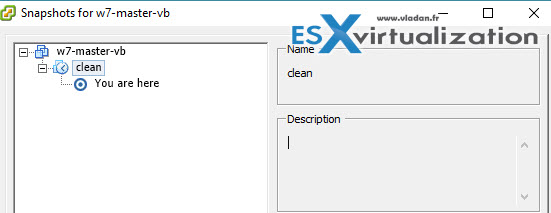
Once you created a master image you have to go to and create snapshot. This will save the point-in-time which will have a specific VMware tools and View Agent version as well as all configurations and modifications you have done. Make sure to name this snapshot and use the description field to note the optimization done to this VM image!
This is a bad example… -:)
Create customization specifications
This is pretty straightforward. Follow the assistant…
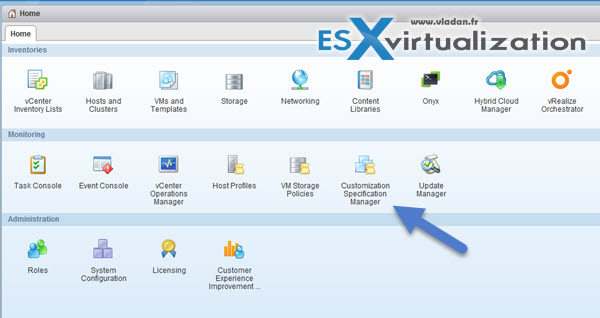
Then the assistant starts and you have the different options which allows to configure all the different things, so at the end the machine is for example domain joined with DHCP enabled…. Simple and effective.
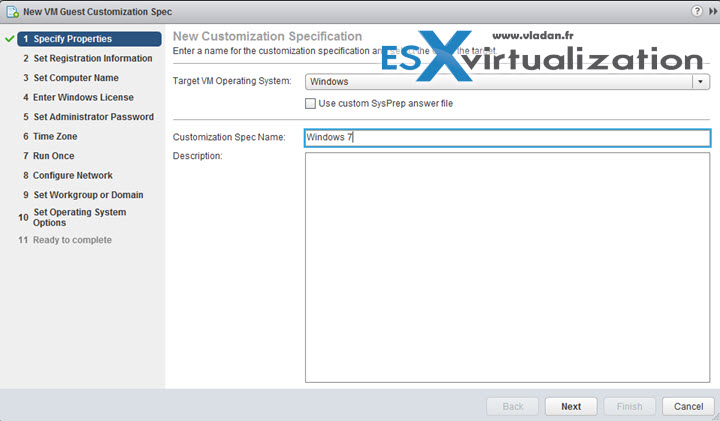
Customization specification check out this post – Quickprep or Sysprep What's the difference?
The whole VCP6-DTM Study page is here. Don't hesitate to ask question or to contribute with an addition! We're hoping this guide will help for studying, and especially passing the exam !!!

