Ravello Systems allows many different use cases. Training labs, simulations of production environment or just creating and spinning a couple of VMs from scratch. You can not only use those cloud services through Ravello at a very very reasonable cost but also learn, test or execute different configurations and setups if you don't have enough resources on your production system. Today we will Get Started with Ravello Systems and we will have a closer look at their VM Import Tool as it's an essential utility to import existing VMs to the Ravello cloud.
If you're new to Ravello, or don't know exactly about their technology here is the essentials. Their virtualization technology (HVX) works this way: Hight performance virtualization engine with overlay storage and overlay networking. Once you actually ask to run the VMs at Google or AWS, Ravello creates and spins up nested ESXi hosts. It does binary translations with a lot of optimization. Then they expose the VMware or KVM virtual devices which allows your VMs to run on the top. You can access those VMs remotely different maners, RDP, console, SSH, temp urls….
From the cost perspective their offer is very straightforward too. In fact, there are no upfront costs. You only pay on what you use and when you use. The costs covers the running instances in Google or AWS cloud and the Ravello technology. The cost is very low comparing the money you need to invest to a real hardware. When you don't use the VMs you shut them down and you just don't pay anything…. They have an online cost simulator too. After creating an account (they offer 14 days free trial – no credit card required) there is one of the first tools that you will certainly use is the VM import tool. What is it?
Get Started with Ravello Systems – VM Import Tool
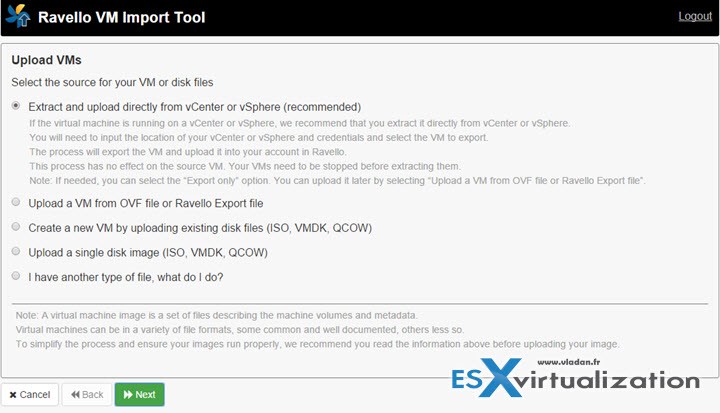
It's basically an importing utility allowing to:
- Upload a VM from your vSphere or ESXi host – You can select ESXi or vCenter. In this case you will import this VM directly to Ravello and the VM (with all the System, Data, Installed applications, network configurations will be kept, will be duplicated to Ravello.
- Upload a VM from OVF file or Ravello export file – OVF is standard VMware packaging file. Many VMs and appliances are distributed in this format as within this file all the config of the VM is also stored. (OVA isn't supported but you can simply untar the OVA). You can also export a VM from your existing infrastructure via vSphere Client. Just select a VM you want to export from the inventory, and then select File > Export > Export OVF Template. Note that the VM has to be Powered Off first.
- Create a New VM by uploading existing disk files – you can pick up ISO file and have it in your repository to install Servers while working remotely at Ravello or you can also upload VMDK file or QCOW format (it's QEMU Copy-On-Write file format).
- Another type of file – If you're running different Virtualization product or even if you have physical host you want to convert, I'd like you point you to one or two tools you'll find on my free tools page. It's VMware Converter and Starwind V2V Converter. Those two are complementary and do a good job of converting VM disks into VMDK files, which can then be uploaded via “single disk upload” option into Ravello.
I assume that you have already open a Ravello account and you are familiar with their offerings and pricing. It's fairly simple as you pay only when you run live some VMs. By default you create and start a VM, the VM is set to run for 2 hours. Then it stops and you're not charged until you power on that VM again…
But let's get back to the VM import tool and the details. First thing you need to do is to install the VM Import tool on your management workstation. I assume that you're using Windows system, but know that the VM import tool is also available for Mac and Linux. It can be your work laptop or desktop which has a connection to your vSphere infrastructure (or an ESXi host). Yes, you don't have to have vCenter running in order to upload a VM into Ravello.
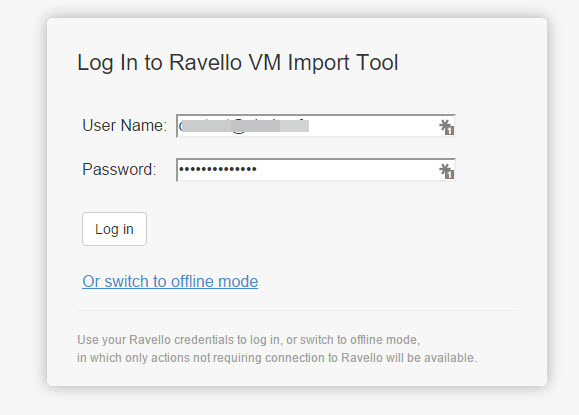
The offline mode allows (what I think) to prepare the VMs (or VMDKs or ISOs) locally when you don't have an internet connection…..
Below you can find links to GUI and CLI versions of the VM import tool:
Windows:
- Download GUI VM Import Tool for Windows – Enables you to import VMs through the product GUI
- Download CLI VM Import Tool for Windows – Enables you to import VMs using a command line interface, so the process can be performed offline and be automated
- Download GUI VM Import Tool for Mac
- Download CLI VM Import Tool for Mac
- Download GUI VM Import Tool for Linux
- Download CLI VM Import Tool for Linux
Then when you select the first option, you'll get to a screen, which has a summary of what's being currently uploaded. The uploads can be restarted in case there is a connection interruption. You can see that as an example I'm uploading a 2003 server VM from an ESXi host (not vCenter in this case).
Before starting importing some VMs you have to stop them so perhaps you want to do that outside of business hours.
The same way as you upload a whole VM (with all the different disks – if the VM has more than one disk) you can upload individual VMDK or ISO files. For this you'll use the third option – Upload single disk image (ISO, VMDK or QCOW format)
The CLI utility
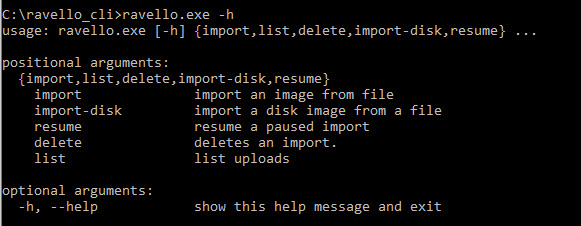
The CLI utility is interesting in case you want to script. After downloading, just unzip and place yourself in the sub folder called ravello_cli where you'll find an executable called ravello.exe which is the main CLI file you need to work with.
Here is the app….
And here is some view from the actions…
To go further, the best is to get the Ravello User Guide. They also have tons of resources and videos available from the help center.
Warning: Your internet connection has to have some good upload speed when using the Ravello VM Import tool. In my case especially during afternoons, that was clearly not the case, so I had a difficult times to get some bits up to Ravello -:)….
Imported VMs are automatically added to the Ravello VM Library.
Once you have those images in Ravello you can start constructing your online application, VM or multi-VM environment which you can then register as a blueprint. Blueprint is a kind of a snapshot of your current design. The advantage of creating a blueprint out of your application design is that you can deploy multiple copies from that blueprint, for example if you have several developpers who needs to work on the same version of an application etc…
We'll take a look at some of the “online” tasks as well as we will familiarize with the user interface when working in the Ravello cloud in our next post.
Ravello Serie:
- How to create a simple VM in Ravello?
- How to Get Started with Ravello Systems – VM Import Tool – (This post)
- Run Nested ESXi in AWS or Google with RavelloSystems
- How-to Install VMware Tools on VM which runs in Ravello Cloud?
- How-to Assign a Public IP Which Persist Across Reboots for Ravello VMs
- How to configure RDP for your VM in Ravello Cloud
- How to create a multi VM application In Ravello
- How to Hot-Clone a VM and upload to Ravello Cloud
Enjoy.. -:) Stay tuned through RSS, and social media channels (Twitter, FB, YouTube)


Do you know of a way to reverse the process and download a Ravello VM to a local machine to use when working offline?
That’s a good question. I’ll try to get someone to reply on this. Thanks.
Vladan, you sound like you know what you are doing. I have a small project and am looking for help. I need to transfer thousands of files daily
FROM: a Windows XP running on VMware Fusion 6.0.6 on my Mac
TO: My website hosted through Kinsta on Google Cloud.
I would like to move my Fusion VM to Google Cloud. I am located in Malta, but my website is in the US. Is this something you could do for me? What Ravello be the best avenue?