vCenter server installation got really simple in vSphere 6, but the config isn't that evident if you're new to virtualization and VMware. In this post I'll do a walk-through on the configuration steps of vCenter. It does not matter if you have deployed vCenter server on Windows or if you have deployed vCenter server appliance (VCSA). To Configure vCenter server after install, to be able to “hook” your Microsoft AD to the virtual infrastructure, there are some steps to do, like configuring the vCenter Single Sign-On. New users might want to follow…
If you have followed the install of vCenter server post, you might just want to watch the video where I'm detailing the steps. But for users with bad bandwidth I still prefer to do a step by step post with screenshots as I know that good bandwidth is a pain!
Configure vCenter Server After Install – The steps:
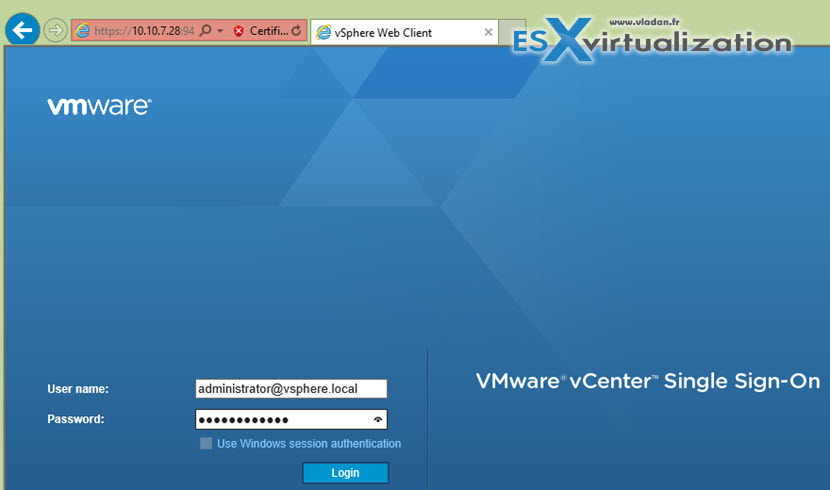
Step 1: Connect to your vCenter server by entering the ip address you have entered during the deployment process:
https://vCenter Server IP/vsphere-client
and by using the [email protected] as a user name and your password you have used during the deployment.
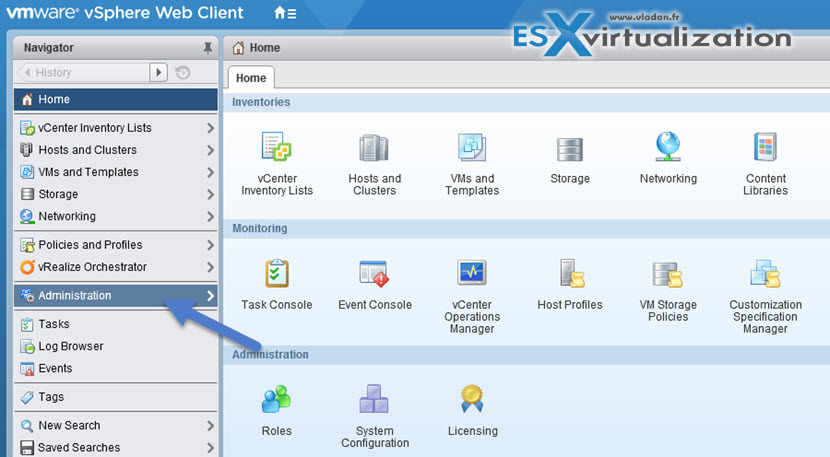
Step 2: Click the Administration button on the left and
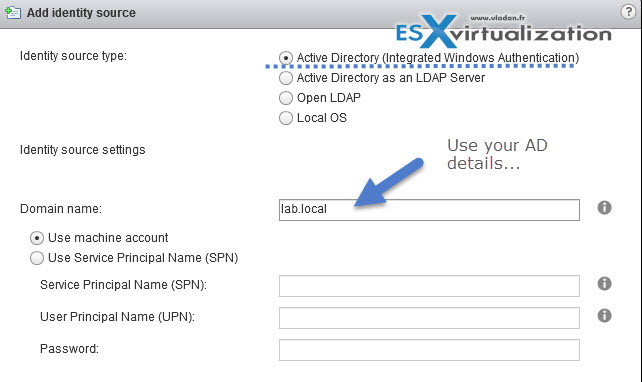
And then go to Single Sign-On > Configuration > Identity Sources > Click the “+” sign to add your AD as an identity source. Normally it will populate your local AD automatically, so you just have to click the OK button…
You can also click the globe icon to make the AD as the default while you're there…
Next Step: Permissions
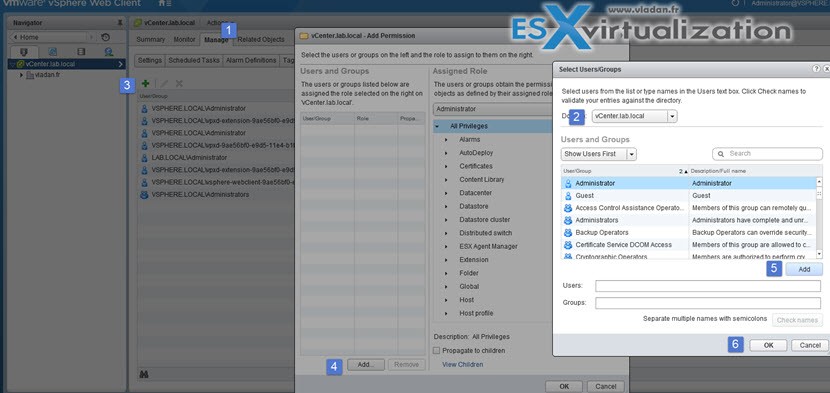
You'll need to assign permissions to users which will administer the vSphere infrastructure. Usually it's domain admin, but not always….. Also keep in mind where you assign those permissions. If it's at the Datacenter level, vCenter level or at the cluster level… Usually you'll want to do it at the vCenter Level.
Go to Home > vCenter Inventory Lists > vCenter Servers > vCenter.lab.local (in my case) > Click the Manage Tab > Permissions
There you click the “+” sign > Add button > make sure that you select the drop-down for your Microsoft Ad to make appear the Domain admin user…
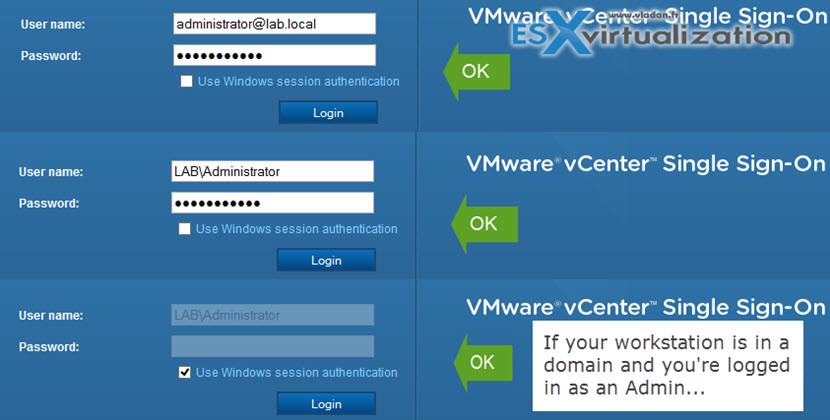
Click OK to validate. You can disconnect and connect as domain admin now… Note that in case your workstation is part of Microsoft AD, you just have to check the box and no need to enter your domain user password… -:)
Some of you might wonder why there is this Single Sign-On. The vCenter Single Sign On is an authentication service which allows the different vSphere software components present in the vCloud suite, to communicate between each other via a secure token exchange mechanism. Before SSO they just all had to use local authentication or use AD as shared common authentication service. As there are now many software products within the vCloud suite, they all are able to communicate after you authenticate once.
I hope that this tutorial will help someone who is new into VMware and needs to progress towards virtualization and new technologies. VMware did simplified the process to maximum and the configuration steps are much reduced than in v. 5.x of vSphere. Keep it simple is the way to go… -:) If you liked this post, just share. Don’t forget to subscribe to our RSS feed, FB and Twitter !!


This is not working for ESXI vSphere Hypervisor 6 u1. Perhaps I am missing something, but this is very frustrating.
Perhaps if you would share your details someone can help? This write up is to configure vCenter server with no matter which version of ESXi. But certainly not the free version of VMware hypervisor which cannot be managed by vCenter server… You need at least vSphere Essentials which gives you access to vCenter server and possibility to manage up to 3 ESXi hosts with 2 physical CPU each.
First you have join to AD or you get this message:
The vCenter Single Sign-On server is not currently joined to any domain. You cannot complete the current operation. Go to Administration and select System Configuration, then navigate to the infrastructure node associated with vCenter Single Sign-On and join the node to an Active Directory domain.