Nice title he? But before you want to call yourself a Boss, you need to (still) learn the ins and outs of Autodeploy. Motivated? GO! In previous post we have already done the first part – the Autodeploy configuration.
Autodeploy uses rules. Those rules does the configuration when the ESXi image boots up. Those rules apply only at the first boot and if you change them, you must use Test and Repair operation within the PowerCLI.
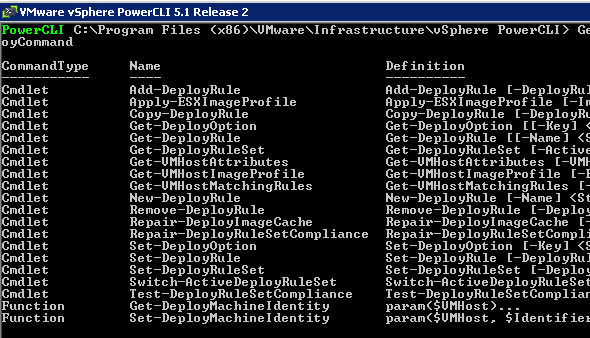
To get started, just fire up a PowerCLI and connect to your vCenter > use this command to get all deploy commands:
Get-Deploycommand

You can set rules that will match patterns based on elements like model, MAC address etc…
During today's lesson we will principally use those two cmdlets:
New-DeployRule
Add-DeployRule
Let's create an Image Profile rule.
You must first quickly create an Image Profile rule, the one we've done in our first post where we were using Image Builder. We ended up with profile that we exported to ISO and to bundle. The bundle profile has a zip extension.
Quick recap of those steps:
Add-ESXSoftwareDepot
New-ESXImageProfile -CloneProfile ESXi-5.0.0-469512-standard -Name vcaptest
Export-EsxImageProfile -ImageProfile vcaptest -ExportToBundle c:vcaptest.zip
To quickly check the images that we currently have when we run this PowerCLI session (Note: when you exit the powerCLI session, the profile does not show, so you can't use it to create rules!!!)

The rule we are going to create will use the cmdlet New-DeployRule for hosts that will boot at our lab's 10.10.3.x subnet.
New-DeployRule -Name "firstboot" -Item "vcaptest" -Pattern "ipv4=10.10.3.50-10.10.3.100"
Then we need to use command Add-DeployRule
Add-Deployrule firstboot

Great! We just created our first rule….-:)
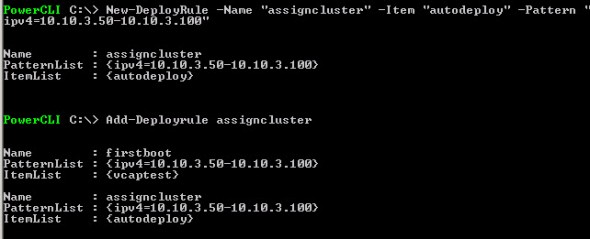
What's next? Now this is optional, but cool. We can create a cluster rule, which will put the host into our lab cluster! We will use command Get-Cluster

New-DeployRule -Name "assigncluster" -Item "autodeploy" -Pattern "ipv4=10.10.3.50-10.10.3.100"
Excellent. Now, let's talk about host profiles. Host profiles are used to to have the exact same configuration on our hosts across cluster, which usually have same or similar hardware.
Host which boots with Autodeploy will by default puts itself into maintenance mode. This is to allow the administrator to finish the configuration – to place the host into cluster he wants and exit the maintenance mode. But we can (optionally) use Autodeploy to automate that. We can use Autodeploy to configure our host with predefined profile.
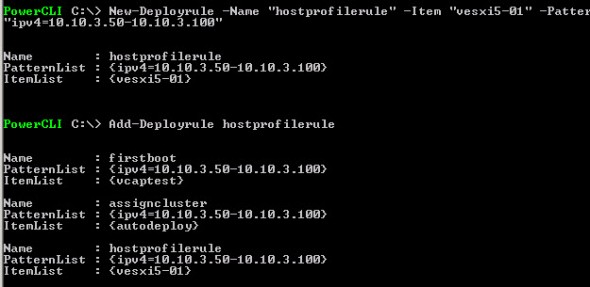
If we have already created a host profile which will be used once our host boots up, we need this profile to be assigned to a host. We will be again using the same two commands as above!
New-Deployrule -Name "hostprofilerule" -Item "vesxi5-01" -Pattern "ipv4=10.10.3.50-10.10.3.100"
Well done! We can see the 3 rules in our Active rule set…
So now when we have those 3 rules in place, we can possibly boot a host which will be assigned an IP address from our DHCP server (we will use reservation to assign an IP address to our ESXi host). We will also need to create DNS records for forward and reverse.

So as you can see, the host booted up and joined my “autodeploy” cluster… Nice.
But as my host came up in maintenance mode, I had to update my answer file, because the profile I created from my reference host did not match exactly the new host.
Another thing I had to deal with was a DNS. When I created my DHCP reservation and configured static DNS forward and reverse records, I didn't empty the DNS cache so when the host booted up it showed up with the IP address instead of FQDN. So I then emptied the DNS cache on the DNS server and restarted the DNS service for the modifications to take effect…. and the result, after a reboot of the host, you can see the image below on the right…

At final I had a host in my cluster with a nice DNS name ready… Quick check at the host profile to verify if our host was compliant…

Host profiles, Autodeploy and Image builder are very powerful. Those features will certainly be maintained in future releases because they allows automating many things from within the infrastructure. Hopefully we might see a GUI which is probably more convenient than remembering PowerCLI commands, but there aren't so much that you need to remember, and you can always ask via get-help ….
The whole serie so far:
- VCAP Diary – VMware vSphere ESXi Image Builder
- VMware vSphere AutoDeploy – Run some PowerCLI and you’re the Boss (this post)
- VMware vSphere AutoDeploy – Install and configure
- VCAP Diary – VMware vSphere Host Profiles
- VMware vSphere Host Profiles – options and troubleshooting
The article was published first at ESX Virtualization website. Feel free to subscribe via RSS or by e-mail to get the latest news to be delivered via weekly newsletter. The latest 200 articles of daily updates can be found on our daily archives page.


Thanks Vladan for this post explaining incredibly easy how Autodeploy works.
This was way better than the description in the Optimize & Scale course!
Now I think I’m ready for my VCAP 😉
Excellent article! This will be very useful to me. One question tho, how do you tell AutoDeploy to install the OS permanently on a specific drive? For some reasons ESXi is running from memory instead of running from disk…
Thanks!