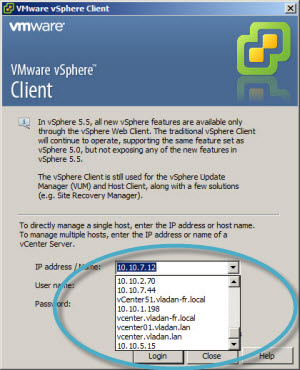
If you're IT consultant, IT guy working with VMware vSphere or just testing ESXi in your lab, after a certain time you'll find that in your management workstation or laptop when launching the vSphere client (the Windows based) you start to accumulate the old connection settings.
All those IPs and host/DNS names starts to make this list quite long. You'll start losing time searching the correct connection. You wonder how to remove cached IP addresses and hostnames in vSphere client.
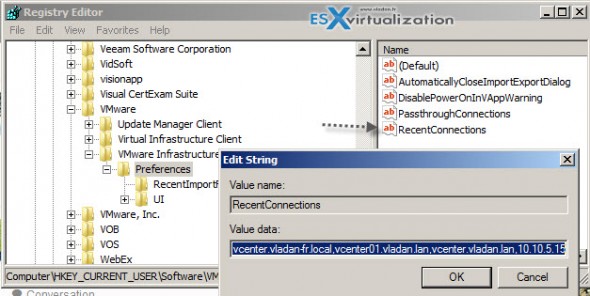
Those cached IP addresses and hostnames can be removed from Windows registry by using regedit. There is a single registry key which needs to be edited and where you can either remove all the entries or just remove those you don't want to keep.
The process is simple and without risk, it'll take you just a few seconds. To clear the VI client connect box server I'm bookmarking this mostly for my own purposes as you could already probably read about it through other articles and blog posts.
How to Remove Cached IP addresses and hostnames in vSphere client?

01. Start regedit and navigate to the following registry key.
HKEY_CURRENT_USER\Software\VMware\VMware Infrastructure Client\Preferences
02. Right click the RecentConnections and click Modify.
03. Edit the entries (or delete them all) in the window which pops up. You can also reorder those entries there ….
Validate by clicking the OK button and close the Regedit window. That's it.
Next time you start the vSphere client, the entry contains only those entries that has been left there. If you have deleted all, then obviously the connection window will be blank.
This tip is only concerning the vSphere client, the vSphere Web client is not concerned as the login credentials are not cached there.
Source: VMware KB 1013644

