This post is a quick recap of different ways to change a hostname of an ESXi host. There are different ways we work and different tools we use. Not every time we have the chance to use the tools we want, or we have an access directly to the server room or to the console. This post will teach you 5 Ways to Change Hostname of your ESXi host.
Why would you want to modify a hostname first? Perhaps, after decommissioning some old hosts you want to re-use the old DNS records for your newer hosts which you have already deployed with some temp DNS settings.
Or you may be changing hostnames of a temporary or test environment, who knows. The examples might be numerous. Make sure to correlate the IP address and DNS entries on your DNS server first.
I'm sure that I won't show much new for “old” VMware admins, but new people which just starting to learn, they might find this usefull. Let's get started.
5 Ways to Change Hostname of your ESXi host
01 – Host Client
ESXi host client is now bundled with each ESXi installation. Previously you had to install an additional vib which assured this functionality. You can access the host client via a web browser, you don't need an additional software. vSphere Windows Client is dead. No connection possible.
connect to the host via host client with:
https://IP_or_FQDN/ui
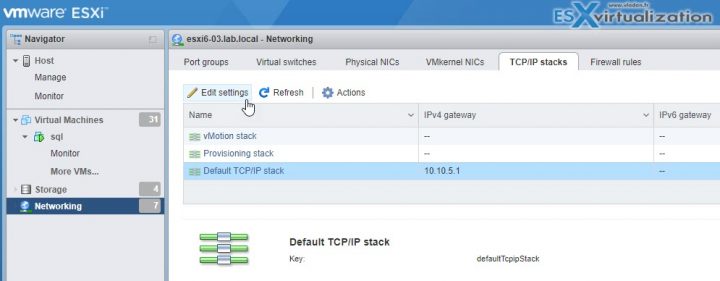
and go to Networking > TCP/IP stacks > Edit Settings
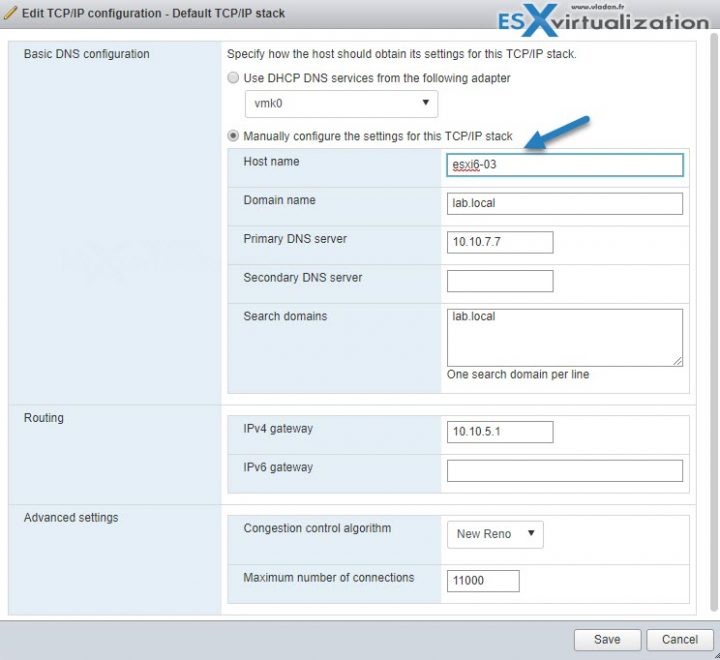
You'll get a new pop-up window in an overlay. It comes up with preselected radio button and all you have to do is to change the hostname there… As simple as that.
02 – vSphere Web Client
Use vSphere Web client (Flash). This is the only client which can right now manage all configurations for vSphere infrastructure. The HTML5 client isn't fully finished yet. The Flash based client is slow, sometimes buggy, but we have to deal with it.
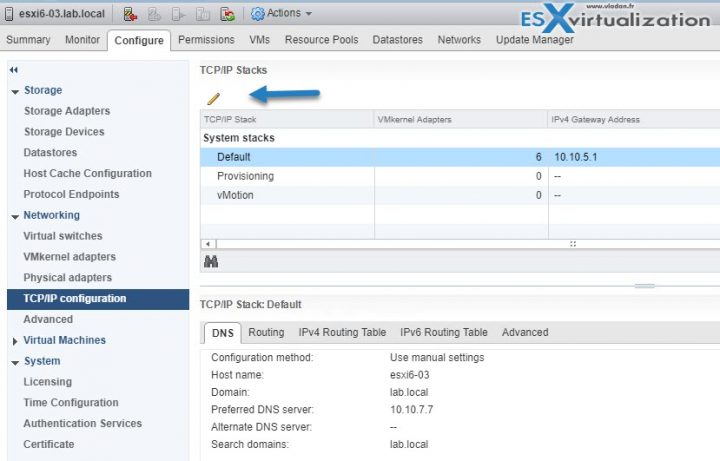
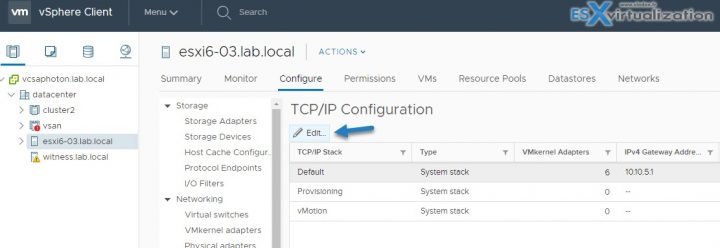
Connect via vSphere web client > Select Host > Configure > Networking > TCP/IP configuration > Select Default System Stack > Click the Edit icon.
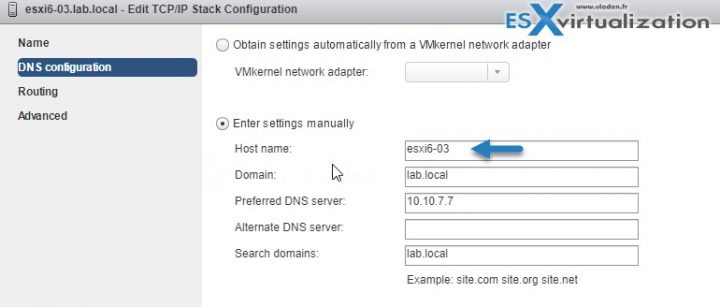
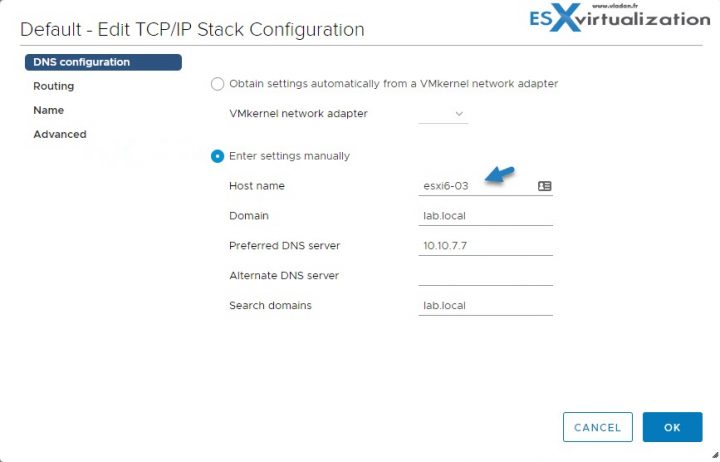
And then you'll get a pop-up window where you can change the hostname. Again, very simple.
03 – vSphere HTML 5 Client
Yes, this is now possible also through vSphere HTML 5 client. Slowly all features are becoming available, but there is not all features parity just yet. For some features, especially vSAN related, you still need the vSphere Flash-based client.
Again, similar aproach as in previous example.
And the overlay window (nice one indeed) looks like this.
04 – SSH or direct console
For this, you'll need either direct access to the server room or SSH being activated.
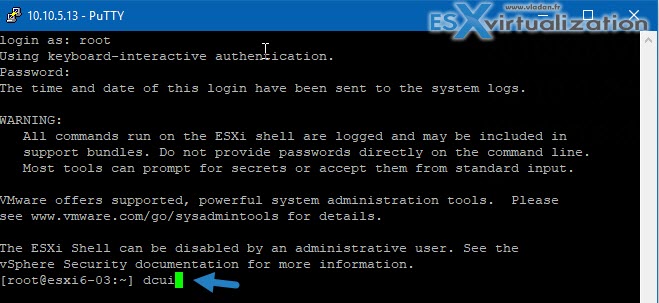
Type
dcui
to enter the console window remotely.
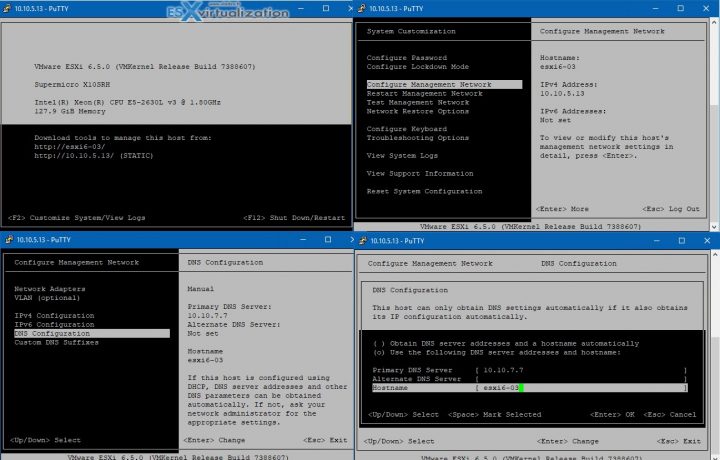
And then go through the other configuration screens which I'm sure you already know… -:)
Hit F2 > Configure Management Network > DNS Configuration > Hostname.
Well this is it.
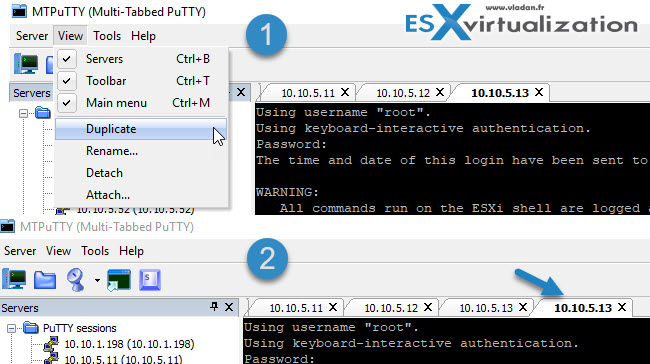
So far we had to do a one-by-one config, but you'll see that it's also possible to do that via other ways where you can use multiple TAB add-ons for Putty and do the config quicker.
Yes, we can duplicate session via File menu. Select View > Duplicate. The session will inherit credentials and script from the source session.
05- PowerCLI to the rescue
if you have many hosts, you might want to use PowerCLI. I'm sure that there are tons of scripts which were written on this so I won't repeat myself. If you have many hosts to re-configure, it is certainly a way to do that via scripting.
I hope that this little article help some people learning VMware technology and that it will be useful for their day-to-day job. Make sure that your DNS server has the good entries before changing any hostnames.
More from ESX Virtualization
- VCP6.5-DCV Objective 1.4 – Secure vSphere Virtual Machines
- Configuration Maximums
- What is VMware vSphere Update Manager?
- VMware Mirage Client Installation and Configuration
- VMware vSphere Standard vs Enterprise Plus
Stay tuned through RSS, and social media channels (Twitter, FB, YouTube)

