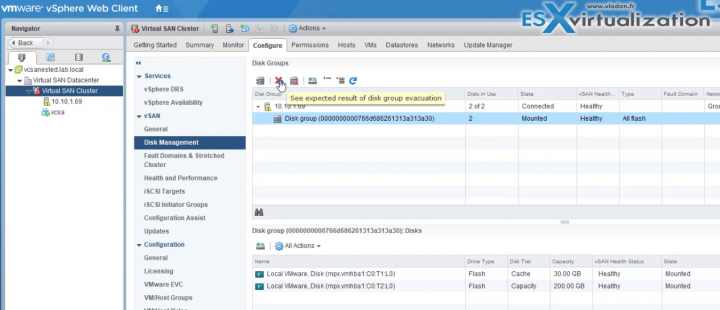
In this post, we'll explore a new vSAN 6.6 feature allowing you to deploy vSAN via VMware vCenter Server Appliance (VCSA) easily to greenfield environments, without the need to allocate a storage space for the VCSA on some temporary local datastore. Note that nested environments are not supported for production environments, but allows a very good learning and homelabbing. So this post will walk you through the VMware vSAN 6.6 Nested Lab Deployment DEMO.
VMware vSAN was released recently and we have done a detailed post about the New VMware vSAN 6.6 here. The release brought over 20 new features and enhancements compared to the previous release which was released just 4 months ago. The vSAN development team is pretty awesome.
Let's get back to our demo. We used our Windows box with 64 Gb of RAM (allocated 32 Gb of RAM to the nested ESXi) and we were surprised the actual speed and fluid navigation through the UI of the VCSA 6.5.0d even if this runs within the second, nested virtualization layer. The first virtualization layer is the nested ESXi and then the ESXi runs also the VCSA….
VMware vSAN 6.6 Nested Lab Deployment DEMO
What You'll need?
There are just a few things, but those are necessary for the lab to work. There can be different cases, but either you have your DNS server somewhere else, or, you want to have your DNS server within your POC environment. Also, we'll talk about the storage requirements.
- 2 More disks – Add 2 more disks (for vSAN storage) to the nested ESXi host (one for caching tier and one for the capacity tier). So basically, you'll install ESXi to the default first disk which is created when you create the VM within the VMware Workstation assistant.
- . – External DNS server to create forward and reverse DNS records for the VCSA appliance. Note that you can also have your DNS server running through VMware Workstation (on the same network) and have it as a part of the proof of concept (POC) environment.
I won't go into many details, the settings are pretty obvious. You'll need to set the VMware workstation (or Player) networking for “bridged” as you'll need (probably) access your DNS server which is outside the nested environment.
The whole installation took almost one hour. I've recorded a quick video which is partly very accelerated so the whole video is only 8:30 min long. (Note that I accelerated the nested ESXi part too as usually everybody knows how to install nested ESXi in VMware Workstation).
The performance is pretty good as the VMs are running from an NVMe Samsung 950 Pro 256Gb drive…
So here is the video.
Watch in HD and full screen and have fun testing…
Few more words about the vSAN 6.6 release, about the new Intelligent Rebuilds Using Enhanced Rebalancing. This is new and allows to break larger components into smaller chunks and proceed with rebalancing.
- Better balance by splitting large components during redistribution
- Smarter decision making on component placement decisions reduces overhead, resulting in faster recovery times
- Improved visibility in rebalancing status in Health Services
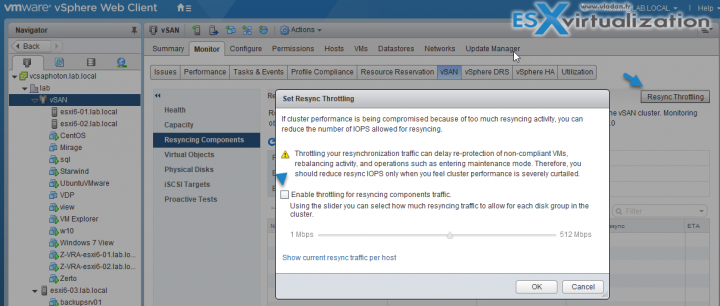
- New customizable “throttling” of resync activity using slider bar.
You may experience some performance issues during rebuilds. You are able to throtle the traffic and limit the rebalancing activity. You'll be able to select how much resyncing traffic to allow for each disk group in the cluster.
Note that VMware recommends keeping the defaults…
You'll find it after logging into a vSphere Web client Select cluster > Monitor > vSAN > Resync Components > Button Resync Throttling.
This is about it for today.
More posts from ESX Virtualization:
- Dedicated vSphere 6.5 Page
- VMware VSAN for ROBO Two Node 10 GbE cross-connect support
- What is VMware vSAN Disk Group?
- What Is Erasure Coding?
- VMware vSphere Essentials Kit Term
- What is The Difference between VMware vSphere, ESXi and vCenter
Stay tuned through RSS, and social media channels (Twitter, FB, YouTube)


