As you know, recently Microsoft has started pushing Windows update also called Windows Anniversary Update. It is the 1703 version. This update has brought many new features which has been announced since long time ago. I particularly liked the security enhancements which came with Windows Defender pushing things further with improvements with an independent testing score (14 out of 20 points) at AV-Test Institute. But that's not the point of this post. We will show you how to save 25Gb of space and How to Clean Previous Windows Installation Files after latest Windows 10 Update.
The process is fairly simple and we don't need any external tools for the job. Just the built-in tool = Clean Manager. While I'm not a fan of cleaning the OS on regular basis, this time I think it is worth it. To save 25Gigs of space when you, for example, have a system with smaller 128Gb SSD drive, this can be a life saver…
I don't even imagine VDI desktops with that much of waste on the system. I know, a complete refresh or rebuild operation would help to get things clean, but if you're VDI admin you have perhaps some dedicated desktops which you can't clean this way.
How to Clean Previous Windows Installation Files after latest Windows 10 Update – The steps
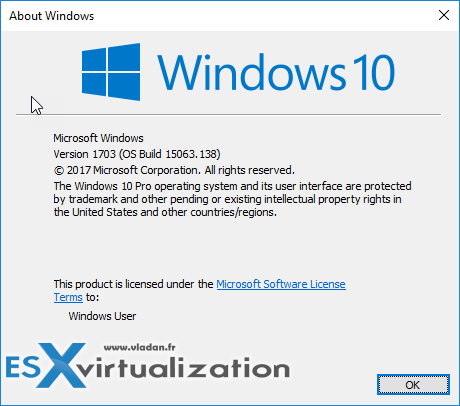
Worth to precise that I'm running the latest Windows 10 Version (you can check the version number by entering “winver” command into the search area….)
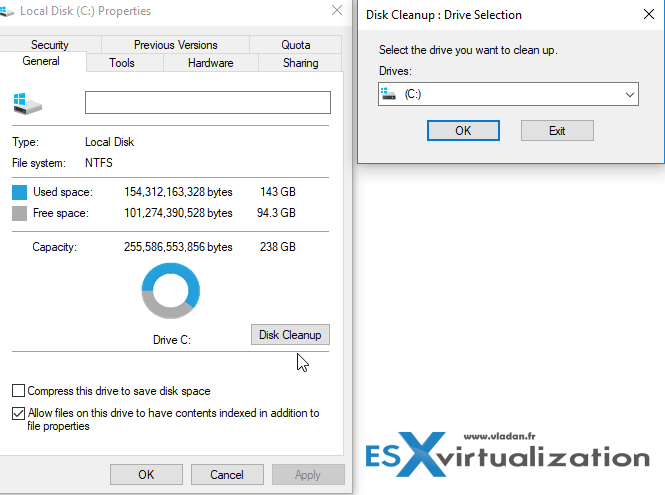
Let's get started. Right Click your C: drive and go to Properties > From the General TAB click the Disk Cleanup button to launch the utility.
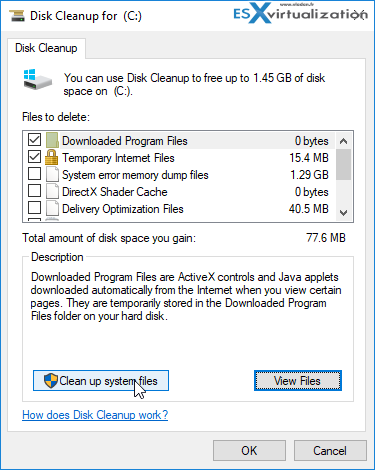
After the first scan, you'll end up on the page where you can select different options. Don't. Just click first the System Files button, to get detailed selection options.
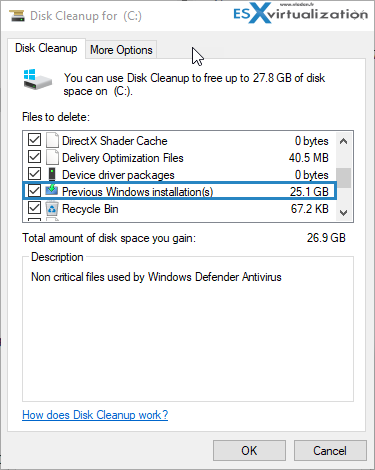
You'll end up on this page where you, as you can see, select the Previous Windows Installation(s). As you can see, in my situation, this takes 25Gb of disk space, which is significant. When you think that, in case you're doing also a volume level backup, you'll also filling your backup repository or your backup disk with this junk…
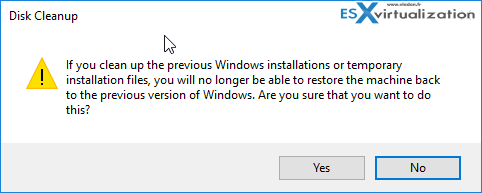
Note that when you clean this, you'll get a prompt asking you if you're sure on what you're doing and that
“If you clean up the previous Windows installations or temporary installation files, you will no longer be able to restore the machine back to the previous version of Windows. Are you sure you want to do this?”
Click yes to proceed…
Done, your C: drive just lost 25 Gigs of files -:).
How cool is that?
Wrap UP:
Windows 10 OS is great in general (if you don't care about what information are going back to Microsoft. I'm on MAC…. No, seriously. The OS got some nice facelift and the big updates, such as the latest anniversary update, makes the things quite easy to deploy/install, and manage.
Perhaps If I was an admin with 200 Windows 10 in my company, I'd certainly look at how to automate the cleaning process. I'd suspect that one would have to look and get the latest ADMX files for Windows 10 Anniversary Update (or rather the ones for Windows Server 2016 if your organization has Microsoft Active directory (AD) for central management.
You can download the Administrative Templates for Windows 10 v1703 here. The complete set of Administrative Templates (.admx) for Windows 10 and Windows Server 2016 is available here.
More posts from ESX Virtualization:
- How to Install Ubuntu Bash Shell on Windows 10
- Upgrade Windows Server 2012R2 AD to Server 2016
- What is Storage Replica? – Windows Server 2016
- Top 12 Most Viewed Posts in 2016
- Free Tools
Stay tuned through RSS, and social media channels (Twitter, FB, YouTube)
