Once we installed and Horizon connection server in the first part, we can prepare a golden image for our lab test. Today we will continue with VMware Horizon 7 Installation and configuration. We will after be able to create a desktop pool based on certain criteria in order to test the latest technology from VMware called Just-in-time desktops, or Instant clones. (aka VM fork).
You can run composer and Just-in-time desktop on the same environment but when installing the agent components in the golden image VM you must make a choice. Basically, you would have to have two “golden images” – one for composer and one for Instant clone.
You can still use composer in your environment, even in Horizon 7, but it's a choice to do. When installing the agent components in the golden image VM you must make a choice. In this post, we'll focus on the Instant clone technology without setting up composer in the environment.
The Golden image will be a simple W7 VM where we'll install two components after installing VMware tools. So let's get started. There is just a few steps to setup:
There are just a few steps to setup:
Step 1: Install Two components of Horizon 7 into the Golden image VM
- VMware-viewagent-x86_64-7.0.1-3989057
- VMware-viewagent-direct-connection-x86_64-7.0.1-3988955
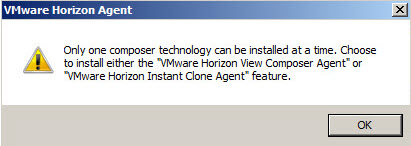
View agent component installation. Make sure to unselect View Composer…
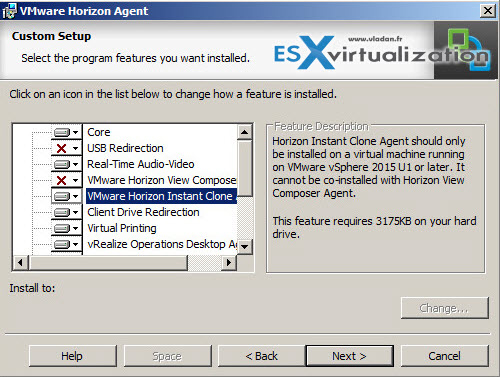
Otherwise, you'll get a nice error message saying that:
Only one composer technology can be installed at a time. Chose to install either the “VMware Hhorizon View Composer Agent” or “VMware Horizon Instant Clone Agent” feature.
So…
Once installed both components (in case you want to use the HTML access you need to install it only)…
You can do other optimizations to the Golden image. You can disable (or put on manual) some services or preinstall apps you need to have as a base. The options here are numerous…
Then you can just shut down the VM and create a snapshot. This is a necessary step as Horizon needs this snapshot to work.
Step 2: Then go to the connection server, log in to the admin UI and:
- Add a License
- Add vCenter Server (you can do with accepting the default untrusted certificate, for lab testing)
Then you can create a desktop pool. In order to test the Instant clone technology, you must use non-persistent desktops. You'll need to create Automated > Floating desktop pool….
Continue with the assistant and Chose Instant clones checkbox…
Then the desktop pool settings, you have a choice (or not) to check the HTML access (VMware blast technology). And as mentioned previously, for this to work, you must install the agent in the Golden image VM:
VMware-viewagent-direct-connection-x86_64-7.0.1-3988955. exe
I did as I wanted to test this as well. While on this screen you can also choose the VMware Blast as a default display protocol if in your environment you'll be mostly using HTML access. The assistant changed on some screens but stays the same as in the v 6.x…. Like for example here, on the naming pattern. Same as in the previous release, but still very effective.

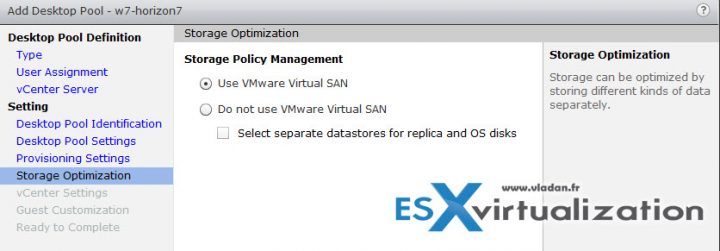
As for storage, there is an option to chose VMware Virtual SAN (I took that option), but it really depends on your environment. VSAN allows having all on the same datastore and its VSAN who does the optimization etc. In case you don't run VSAN in your environment you can choose different datastores and optimize the speed of the desktop pool.
Once the pool created on the before last scree there is a check box which you can check, for entitling users. It's a necessary step to do so, just after the pool creation. If not, even a domain admin will not be able to use the pool (I think)…
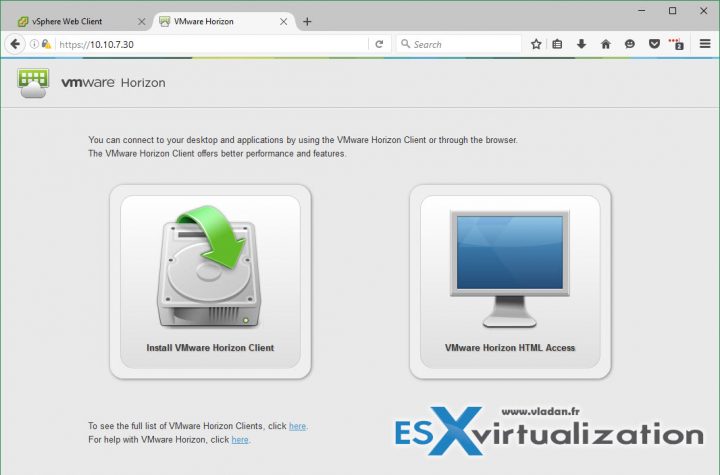
Once done, you can basically just connect via the same url (without the “admin”)
https://ip_of_horizon_7
And then choose the HTML Access option to connect to your connection server and pick a desktop from the pool….
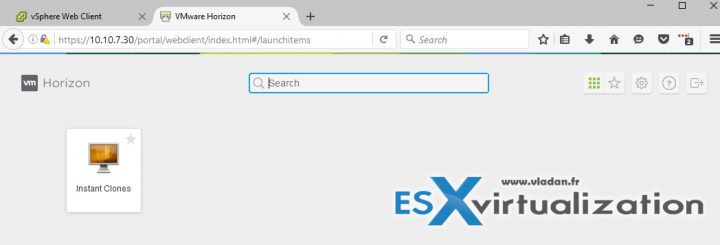
After clicking the VMware Horizon HTML access you'll receive page where you normally find all desktop pools, RDS farms, and other apps … In my case, I just have this single desktop pool which I created.
And then you'll open the W7 desktop. Note that on those two images below I'm demonstrating the little overlay option which allows switching desktop pool. There are other icons at the top left but grayed out. It seems that those are used for a clipboard, keyboard and file transfers…
Done.
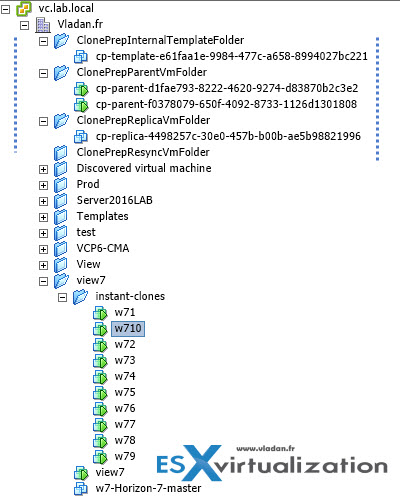
Just a few words when I build the desktop pool. At first, I build a small pool with just 2 desktops. Once done I modified an option and grew the pool from 2 to 10 desktops. Then took a screenshot to see how fast the system was able to clone the 8 desktops…
The cloning operations …
And the results….
So the vSphere environment looks like this….
Wrap-up
This ends up this part of VMware Horizon 7. I was nicely surprised about the technology. Horizon 7 with Instant clone technology rocks. I will explore this environment, and do further posts about other new options and features, with screenshots from the lab. Note that I'm running VSAN 6.2 All flash (AF) in the lab with 2 nodes + Witness, this year. Things are changing every year, the lab evolves. But for now, I'm fine even if I'm starting to get low on memory and VSAN space, despite recent activation of VSAN sparse, and also deduplication and compression. Time to add more RAM -:) and second disk group?
- VMware Horizon 7 Installation and configuration
- VMware Horizon 7 Installation and configuration – Part 2 – [This Post]
- VMware Horizon 7.0.3 Released adding compatibility with vSphere 6.5
Stay tuned for a follow-up post -:). Stay tuned through RSS, and social media channels (Twitter,FB, YouTube)


