Few days back vSphere 6.0 was released. There is many questions on how to do this or that. Today's answer is on a question how to upload a sysprep files into VMware vCenter Server (VCSA 6.0). In the previous release, VCSA 5.5, there was this option through the WAMI interface (through the port 5480). This no longer works this way in VCSA 6.0. In order to be able to upload your sysprep file for older OS which needs it, you must first enable a “pi shell”.
VMware VCSA has new shell, and the access has to be enabled first. Note that this Pi Shell is apparently something temporary and will most likely be locked in future release of VCSA. It seems that VMware is more less does not willing us to “touch” the VCSA and they're locking some features that were previously accessible. Some kind of a black box “do not mess touch”. It's perhaps anoying for some but I understand on why. To prevent damage. We will see however that some documentation exists, for example in this PDF comparing the features in VCSA 5.5 and VCSA 6.0.
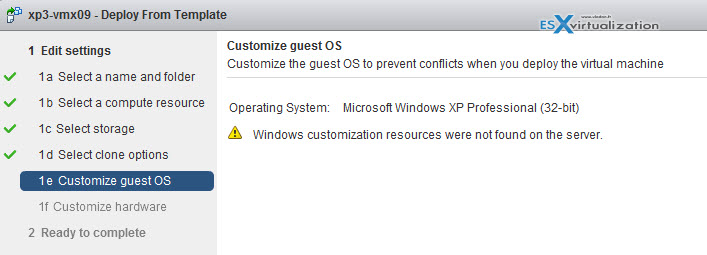
Now why would you want to do that? Experienced VMware admins knows, but new folks perhaps don't. It's because otherwise you'll get a message that “Windows customization resources were not found on the server” when you want to personalize your template. I should say first that this is only necessary for older OS as Microsoft “ships” the sysprep files inside of the new OS since Windows Vista… So it basically apply only for older templates you might have – OS starting with Windows 2000, XP, XPx64, Windows 2003 and 2003×64 … But still it's interesting to know how to enable the shell access.
VMware vCenter Server (VCSA 6.0) Sysprep Files – enable the “Pi Shell” – Here is how it works:
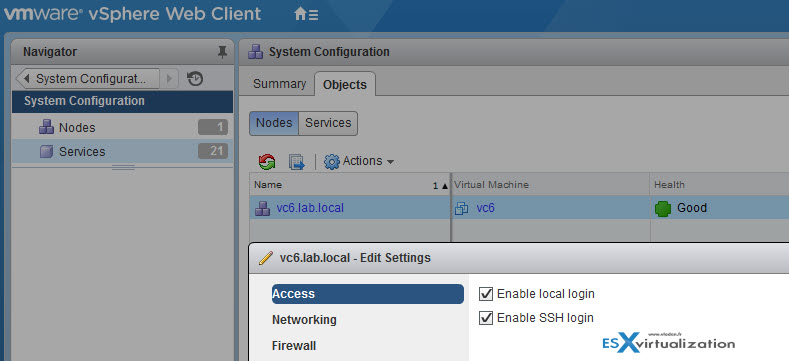
0. Make sure that SSH in enabled on the VCSA. Home > Administration > System configuration (under Deployment) > Select the node > Actions > Edit Settings

1. log in to the VCSA by using for example Putty SSH client and use your root account and password you used during the installation.
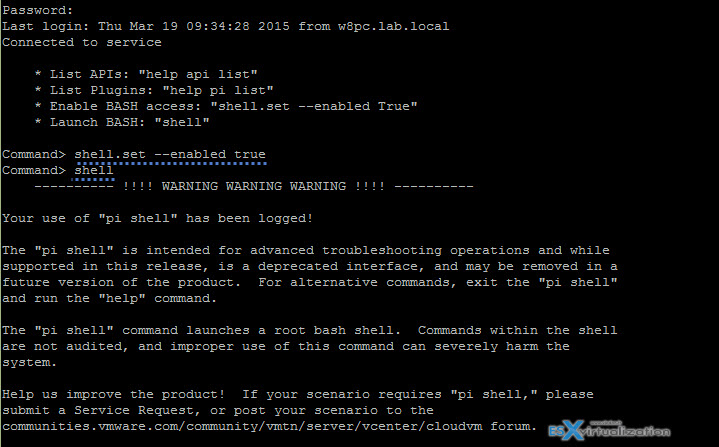
2. Enter this to enable the “pi shell”
shell.set –enabled true
shell
chsh -s “/bin/bash” root
Screenshot …

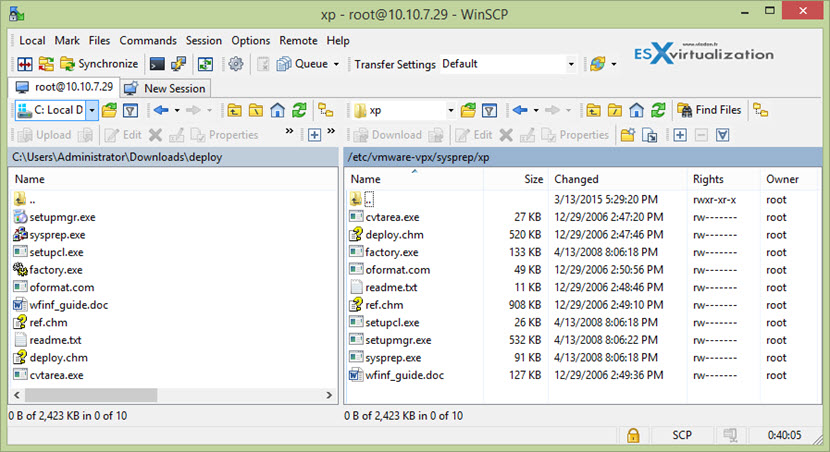
3. Then you can use for example WinSCP and upload the sysprep files to the individual folders which do not needs to be created as they're there.
The filepath is /etc/vmware-vpx/sysprep

If you don't upload those files you'll get an error when wanting to deploy new VM from your template. Here is an example for Windows XP VM…

Update: Make sure that you disable the shell when you finish.
shell.set –enabled false
Note that there is a well known VMware KB which discusses the location of sysprep files:
The contents of the Sysprep deploy.cab file must be extracted to the Sysprep Directory on the vCenter Server host. If the file downloaded from the Microsoft Web Site is a .cab file, the Installing the Microsoft Sysprep Tools in the vSphere Virtual Machine Administration guide details how to install the Sysprep Tools.
If the file downloaded from the Microsoft Web Site is a .exe file, these additional steps must be executed to extract the files from the .exe:
- Open a Windows command prompt. For more information, see Opening a command or shell prompt (1003892).
- Change to the directory where the .exe file is saved.
- Enter the name of the .exe file with the /x switch to extract the files. For example:
WindowsServer2003-KB926028-v2-x86-ENU.exe /x
When prompted, choose a directory for the extracted files. Browse the directory and double-click the deploy.cab file.
Thanks to Jerome to point this out in the comments in my previous post where I was upgrading from VCSA 5.5…
Source: VMware vSphere 6.0 documentation center

Thank you for the article.
What’s up buddy?
Congratulations for the post …. I have a question , I gave everything right in my , but these options ” nodes ” do not seem as soon as I enter this option it already gives me a message that does not have permission, but I have set the permissions as the statement, but it did not work , could you help me? Thank you!
Apologies if I wrote something wrong , I am Brazilian I do not know much English.
Thanks for KB
Just a heads-up. A straight copy of paste of the chsh command into putty may change the formatting of the quotes resulting in the following error: chsh: `“/bin/bash”’ does not exist
As far as I can tell the quotes are not actually required so:
chsh -s /bin/bash root
is probably safer.
The commands as listed completely destroyed my VCenter appliance. Lucky it was Dev… This post needs to updated or removed.
Thanks for letting me know. I wonder if you have tested this with VCSA 6.0 as states the post. It was tested with the 6.0 ONLY. VMware has done a long journey since then…
Great work Vlandan. Thank you for taking the time to blog.Works great…and for the rest always backup before making changes.