VMware Workstation gives you the possibility to test multiple systems without installing a multiboot solution on your physical computer (server) and learn easily without breaking up your underlying system. But you still have the possibility to access to the files located on you physical machine through the VM. In my career I had many questions about VMs and accessing files, and people who are inexperienced with virtualization are often not aware that the running VM behaves like a physical computer on your local network ( LAN). That's why in many occasions I finding myself to repeat often the same thing. I'm not sure that the people which is just starting with virtualization are aware of that.
But this article was not meant to be about VMs and accessing files from those VMs, but about installing an Android OS as a VM to test this lightweight OS.
What do you need to test Android? Not much:
– Latest Android x86 installation ISO (actually I took exactly the android-x86-2.2-eeepc.iso – 2.2 version (direct link) – where you can get network access with one tip…) – https://www.android-x86.org/download
– Latest VMware Workstation 8.0.1 (you can get 60 days trial here – VMware Workstation 60 Days Trial ) or VMware Player
After downloading the iso to your hard drive, you start by creating new virtual machine in VMware Workstation 8. Go and do this:
01. File >New Virtual Machine > On this computer.
I precise on this computer for people who do not have a VMware vSphere Lab, and uses VMware Workstation for running the VMs locally only. Thus you got the possibility there to create the VM directly on your ESXi 5 if you want to. and you can see that option in the menu only if you're connected to an ESXi server (you can be connectet to several ESXi servers at the same time too…).
02. Use the “Typical” option for new VM creation and choose the iso you just downloaded. As you can see, it's detected as FreeBSD. Does not matter if you choose to store the virtual disk as a single file or as a multiple files.
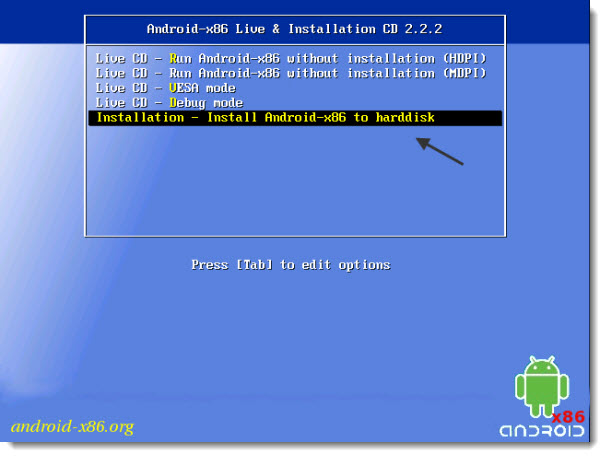
03. Name the VM, choose the location on your hard drive, and start the VM. Immediately after you'll be presented with the menu where you'll be able to choose the Installation (or running as a live CD). You'll take this option. The Installatio process will start and you'll be able to create and format new, bootable partition to host the Android system.
04. First think to do, if you want to do a real Installation, not just play with the live CD, you must create and format a partition for that system. Create a single primary partition in the partition editor. Use all the Free Space available. Once done, you can go to the Exit option and quite the partition editor.
05. You'll be presented with a screen where you'll be able to choose a virtual disk as a destination for the Android system. Since it's a linux system it's recommended to take an EXT3 option for formating the disk. Use Grub as your boot loader.
06. You're almost done. Now when the Android system has booted, you'll need to tweak one configuration file which is located in the folder where you store the Android VM. Depending on how you named your Android VM, but the file should be something like Android.vmx
First Power Down the Android VM. Open the Android.vmx file with Notepad. Right click > Open With > Notepad
Change the line where the default adapter created by VMware Workstation from E1000 to vlance
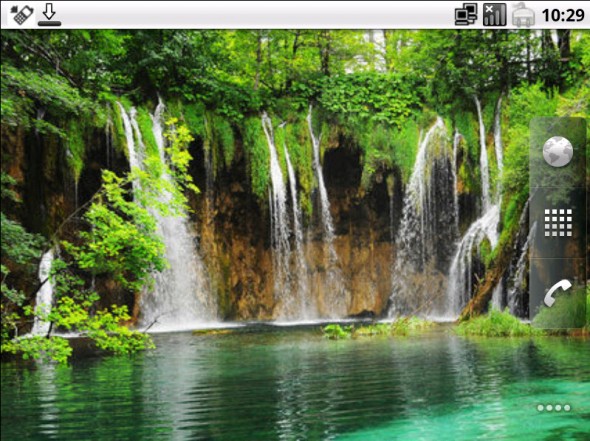
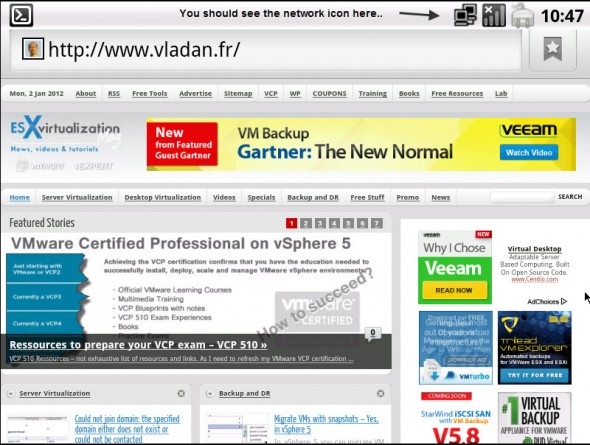
Boot the VM and you should have a network connection now… you can go and download new Android applications, surf the Interenet etc…
You can click on the image to get larger picture, to see the actual size of that screen.
Just one last think. Even if this Android VM works well, not all the functions are working. Like the phone for example… -:).
And you should see the network icon when withing your Android VM. If not, then you took probbably the wrong ISO, as I tried several ISOs from the Android Website, but only one of them – android-x86-2.2-eeepc.iso – 2.2 version (direct link) – has actually worked and had the Internet access.
You might want to see how easy is to install Latest Ubuntu Desktop by using VMware Player? Read this post – How to install the latest Ubuntu Desktop with Free VMware Player. Have fun.


Ooooh nice! Thanks for sharing – I know this is quite handy!
Thanks for the quite good manual. In my case it was needed to manually turn on the Ethernet-Adapter within Android using “Settings” -> “Ethernet configuration” after changing the *.VMX file and rebooting the Android VM.
Thx for sharing your experience… -:)
regards,
Vladan
Thank you very much
What date is this article please? Why do so many article on the net have no date?
Thanks for the excellent explanation and screenshots !!
I tried Android 4.0 RC1 for EEPC (alo the ASUS) with your network tweak, but no joy. Will Try the older version (hence my asking the date on this article)
Jb
There is a date on the right hand side – in the About the Author widget.
And in the article I precise that the latest Android has no network (I haven’t find a way – tried all posible virtual network types… -:(
Best regards
Vladan
pt-br: Meus parabéns pelo tópico, ajudou muito!
Thank you very much for this tutorial.
I tried few before and this one is the first that made the network work.
Could you please show us the easiest way to share files between Android and the host?
Since this came up first on google when i’ve searched “vmware android” i’ll give a little input about networking.
With Android 4.0 RC2 for EEPC i managed to get internet access using bridged mode.
When you boot up the VM press ALT+F1 and try to ping 8.8.8.8 (googles DNS) if its working than type in ‘setprop net.dns1 8.8.8.8’ without quotes. Press ALT+F7 and you should have internet connection now.
this is i looking for….acctually i want use android SDK, but my internet connection so unstable, so i choose install android on vmware, and download such .iso file, thanks dude..
This is very good, I can demonstrate website on it, thank you!
But does vmware has resolution 480×800, 320×480 etc…. anything like that, I set the resolution on vmware but it seems not to work
please I just installed it and it is working but when I tried installing an app like whatsapp, it tells me I need and SD card though I have 9Gig of internal memory allocated. what should I do. please I need help. thank you