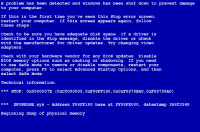
How to avoid BSOD (Blue Screen of Death) when you want to change from LSI Logic parallel into PVSCSI. Before update 1 you could only use the new PVSCSI adapter for your DATA disks in your VMs. The process is kind of a workaround.
Add a second hard disk to your VM with the PVSCSI adapter. Like this the VM will have the PVSCSI driver installed when started.
Gracefully shut down the VM and change the boot disk to use the PVSCSI disk controller.
Boot the VM again. Done.
After your VM fully started, you might get a prompt to restart again, to finish installing your new hardware. While doing this last restart, you can just delete your Second disk you added at step 1. At the end, you should end up with your PVSCSI adapter on your boot disk.
The benefits of using PVSCSI are:
- less CPU usage (about 18% less CPU)
- better Throughput (about 12%)

I tried, believe me. Here is how it can be done and it worked for me on a VM running 2003 R2 server. (I'm sure you can follow those steps for other OS too).
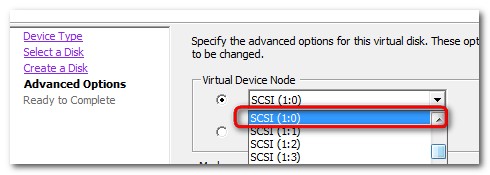
01. Add a second hard disk to your VM (VM is powered OFF) with SCSI ID 1:0 ( no matter how big your disk you add, you will be able to Delete this disk afterwards). Doing this the VM will have the PVSCSI driver installed when started. (I suppose that you have already updated your VMware Tools to the latest version !!!)
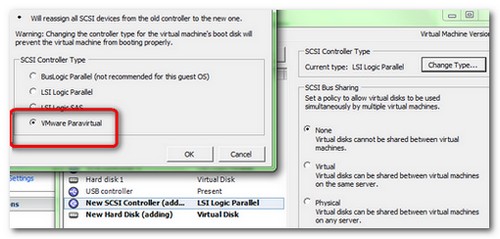
While you there change the SCSI controler from LSI logic Parallel to PVSCSI
02. Boot the VM and let the system to detect and install the new hardware for the second Disk.
03. Power Off your VM and change from the LSI Logic Paralel to PVSCSI on your boot disk. Start your VM.
04. You might get a message to reactivate your Windows, since the hardware has changed.
05. After your VM fully started, you might get a prompt to restart again, to finish installing your new hardware. While doing this las restart, you can just delete your Second disk you added at step 1. At the end you should ended up with your PVSCSI adapater on your boot disk.
UPDATE: OR you might try to do it this more elegant way….
My French colleague Raphael from Hypervisor.fr had done a great job by writing this article.

The good news is that Raphael has done a little bat script which automates the process. The video starts with BSOD (Blue screen of death) to show you that the driver for pvscsi is not present in the VM and that you must inject the driver in the Windows database drivers first.
It's a 2008 server VM, but the same way it's been tested in Windows 2003 server too and it works. I checked. 😎
Source: VMware Communities
Check more articles from ESX Virtualization:
- vSphere 6.5
- How to Configure VMware High Availability (HA) Cluster
- Free Tools
- How to Migrate Windows Based vCenter to VCSA 6.5 [Lab] – Windows to Linux
- VMware VCSA 6.5 Active-Passive Setup with Simple Configuration – [LAB]
- VMware vCSA 6.5 HA Failover Test – Video
Stay tuned through RSS, and social media channels (Twitter, FB, YouTube)


Thanks Vladan 😉